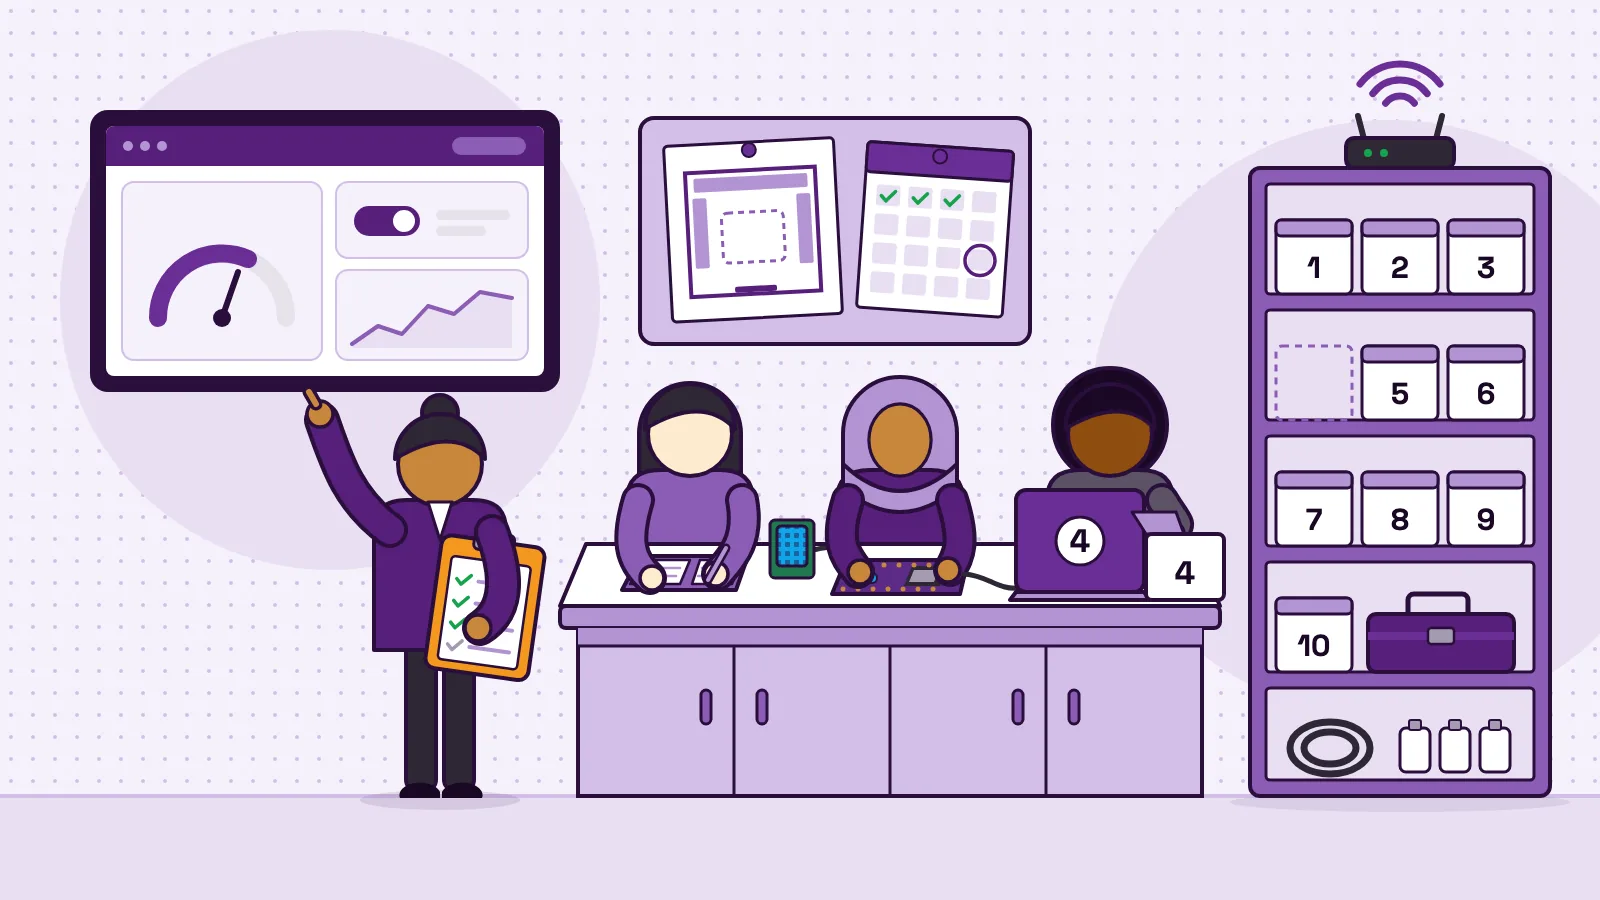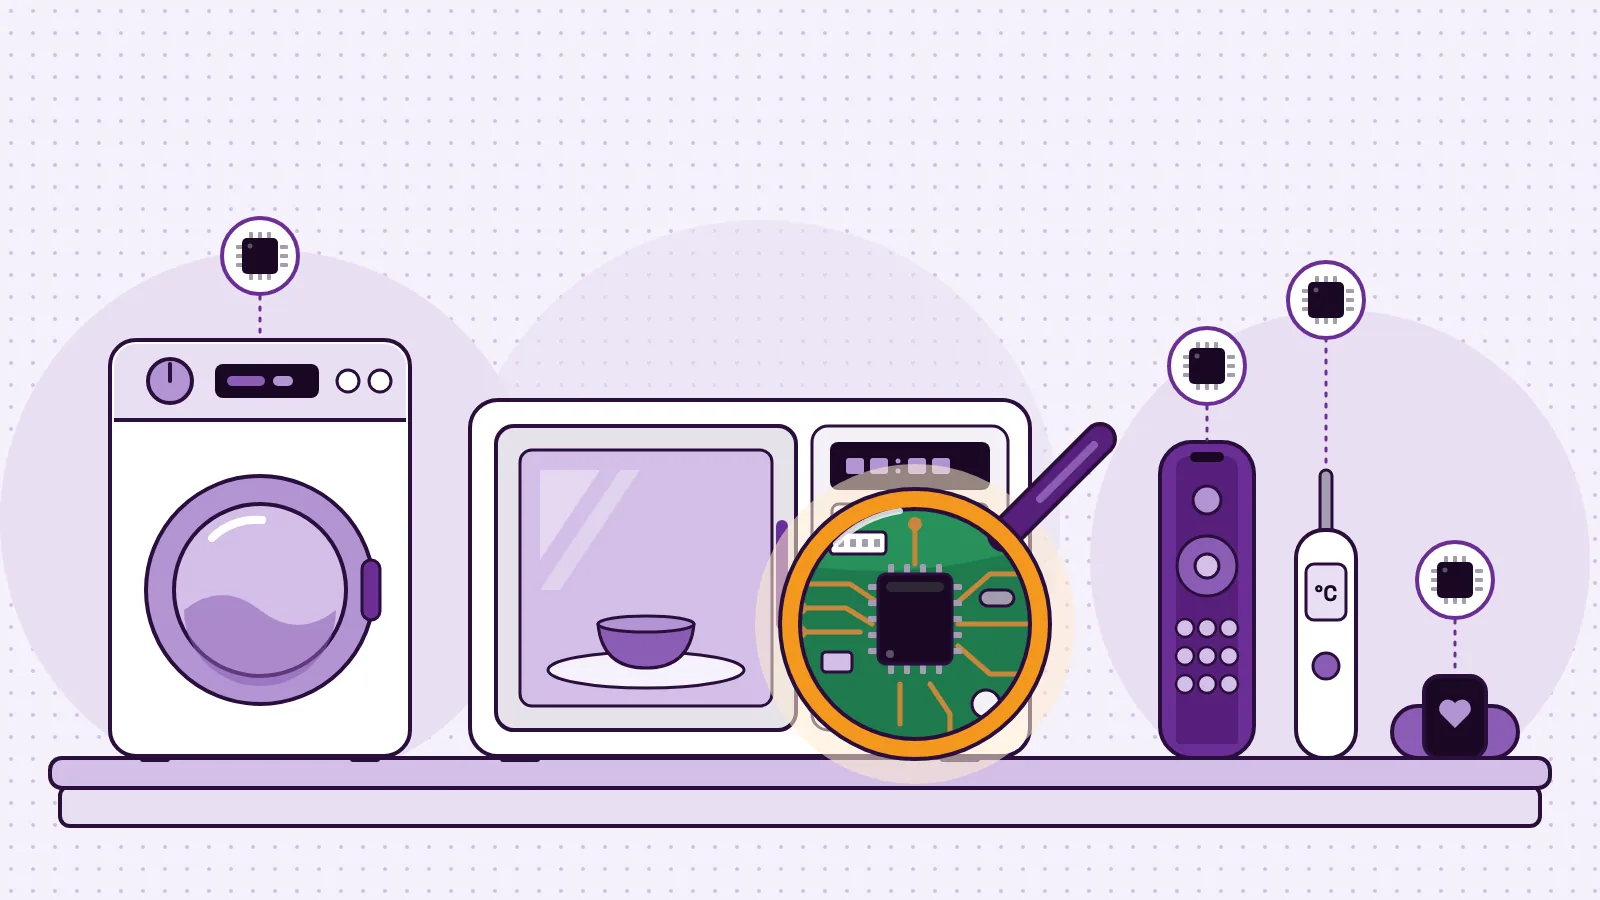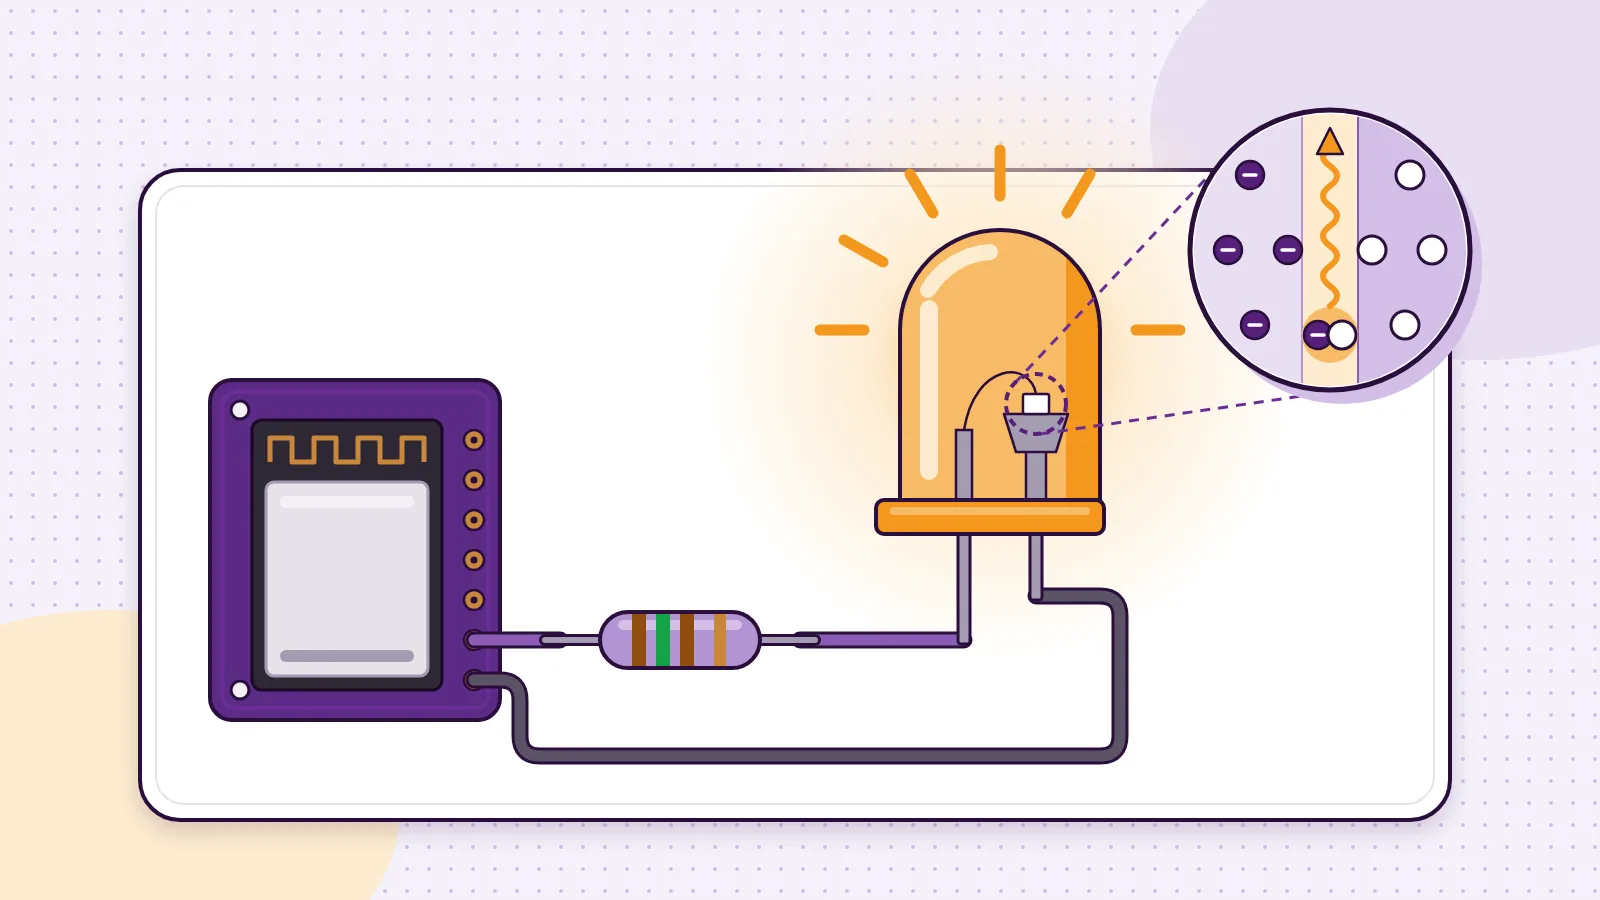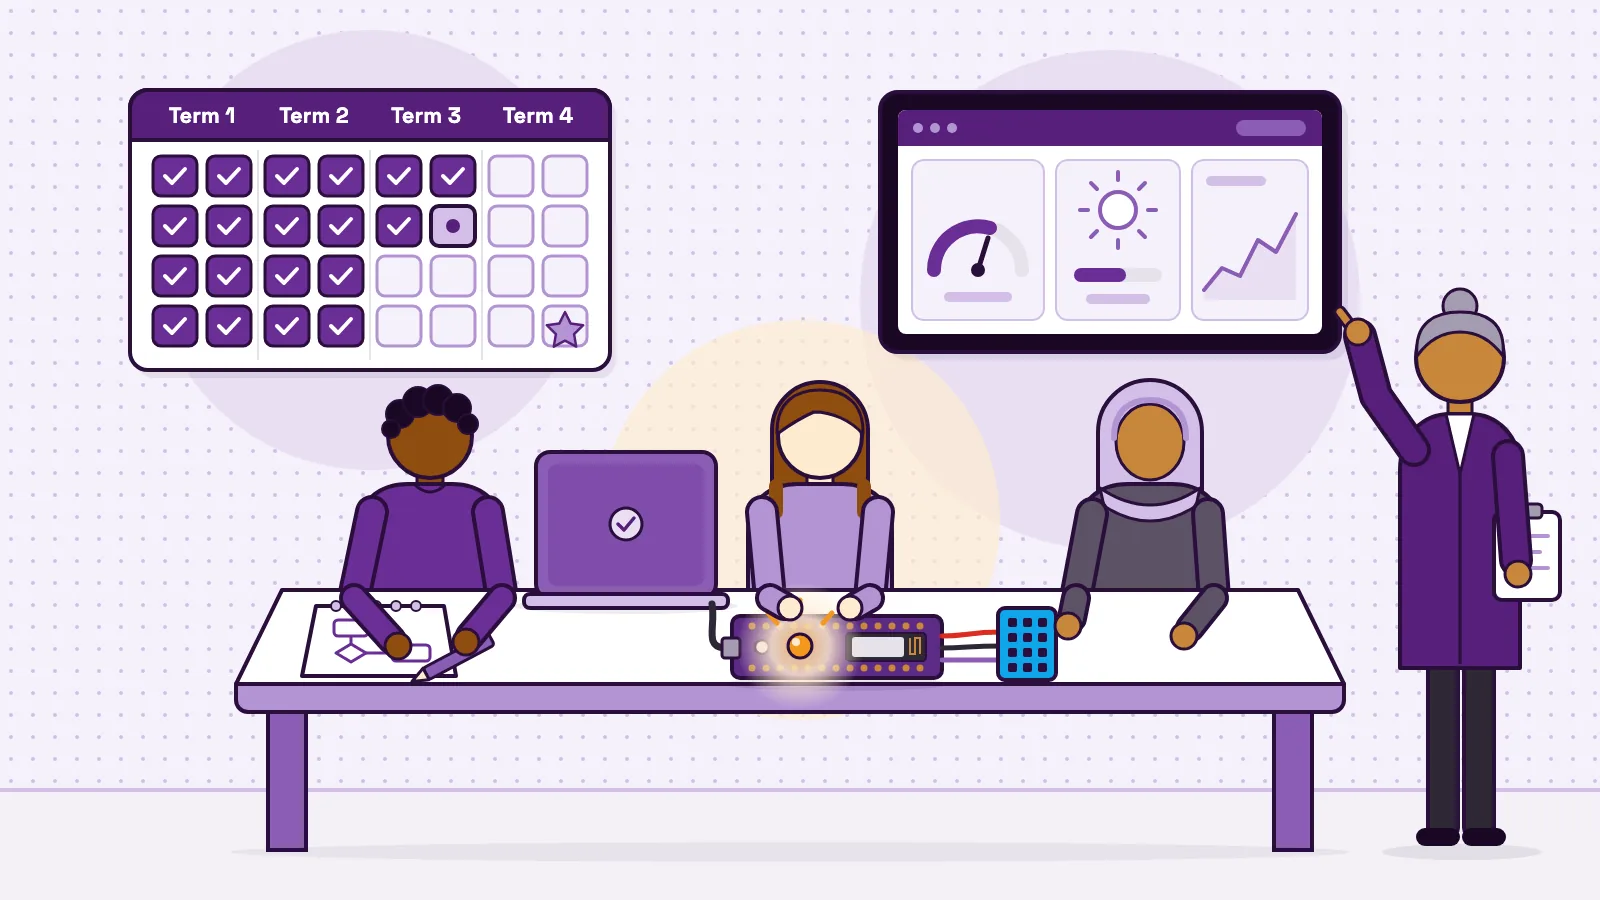
A STEM curriculum is a planned sequence of lessons that teaches science, technology, engineering and mathematics through connected, hands-on work. For IoT and electronics, an order that works across a school year is simple. Start with outputs and inputs. Add sensors and motion. Then teach displays and logic. Finish with full automation and a project students design themselves. Split that into four terms of about eight weeks, end each term with something students build and explain, and the year grows from "turn on a light" to "design a system that runs by itself".
This guide plans that year with the free MakerBuddy curriculum as the worked example: 32 lessons for ages 10 and up, 45 to 60 minutes each, in four terms. You get the term outline, the weekly sequence, standards links, one lesson planned minute by minute, the assessments and the mistakes to avoid.
What a good IoT and electronics curriculum needs
A pile of parts is not a curriculum. Neither is a list of fun projects. A year-long course needs five things.
- 1
An order where each lesson uses the last.
A sensor comes before a rule about it, and a rule before a system of rules.
- 2
Hands-on work every week,
with real hardware or a working model, not just watching.
- 3
Checkpoints you can grade
at the end of each term, long before the final project.
- 4
Links to the standards
your school reports on.
- 5
Logistics that survive a real timetable
shared kits, Wi-Fi the boards can join and a plan for lost weeks.
There is good evidence behind the second point. A 2014 meta-analysis in PNAS by Freeman and colleagues (opens in a new tab) pooled 225 studies of undergraduate STEM courses. Students taught by traditional lecturing were 1.5 times more likely to fail than students in classes with active learning, and average exam scores rose by about 6% with active learning. Those were university courses, but the direction is clear: students learn more when they do the work.
Each MakerBuddy lesson has a Theory part, an Activity and a Challenge. The teacher page lists what each lesson adds: a "Try it" browser demo that works with no kit, a Learning Support box, safety reminders and three "Did you get it?" questions.
The year at a glance: a term-by-term outline
Here is the whole year in one table. Each term is eight lessons, and each ends with a task you can assess.
| Term | Weeks | Big idea | What students use | Ends with |
|---|---|---|---|---|
| 1 | 1–8 | Foundations: IoT, power and outputs | The parts built into the board: blue light, colour light, push button, light sensor and buzzer | Lesson 8: the Traffic Light practical |
| 2 | 9–16 | Sensing the physical world, and motion | The turning knob, temperature and humidity sensor, waterproof probe, distance sensor, motion sensor, servo and relay | Lesson 16: the Data Logger project |
| 3 | 17–24 | Hazard sensing, displays and first rules | Smoke and gas sensor, soil sensor, text screen, flowcharts, No Loop and Forever rules | Lesson 24: the Component Mixer assessment |
| 4 | 25–32 | Automation and the logic engine | Timer and Condition rules, AND/OR logic, every part | Lesson 31 capstone and the Lesson 32 Expo |
- Term
- 1
- Weeks
- 1–8
- Big idea
- Foundations: IoT, power and outputs
- What students use
- The parts built into the board: blue light, colour light, push button, light sensor and buzzer
- Ends with
- Lesson 8: the Traffic Light practical
- Term
- 2
- Weeks
- 9–16
- Big idea
- Sensing the physical world, and motion
- What students use
- The turning knob, temperature and humidity sensor, waterproof probe, distance sensor, motion sensor, servo and relay
- Ends with
- Lesson 16: the Data Logger project
- Term
- 3
- Weeks
- 17–24
- Big idea
- Hazard sensing, displays and first rules
- What students use
- Smoke and gas sensor, soil sensor, text screen, flowcharts, No Loop and Forever rules
- Ends with
- Lesson 24: the Component Mixer assessment
- Term
- 4
- Weeks
- 25–32
- Big idea
- Automation and the logic engine
- What students use
- Timer and Condition rules, AND/OR logic, every part
- Ends with
- Lesson 31 capstone and the Lesson 32 Expo
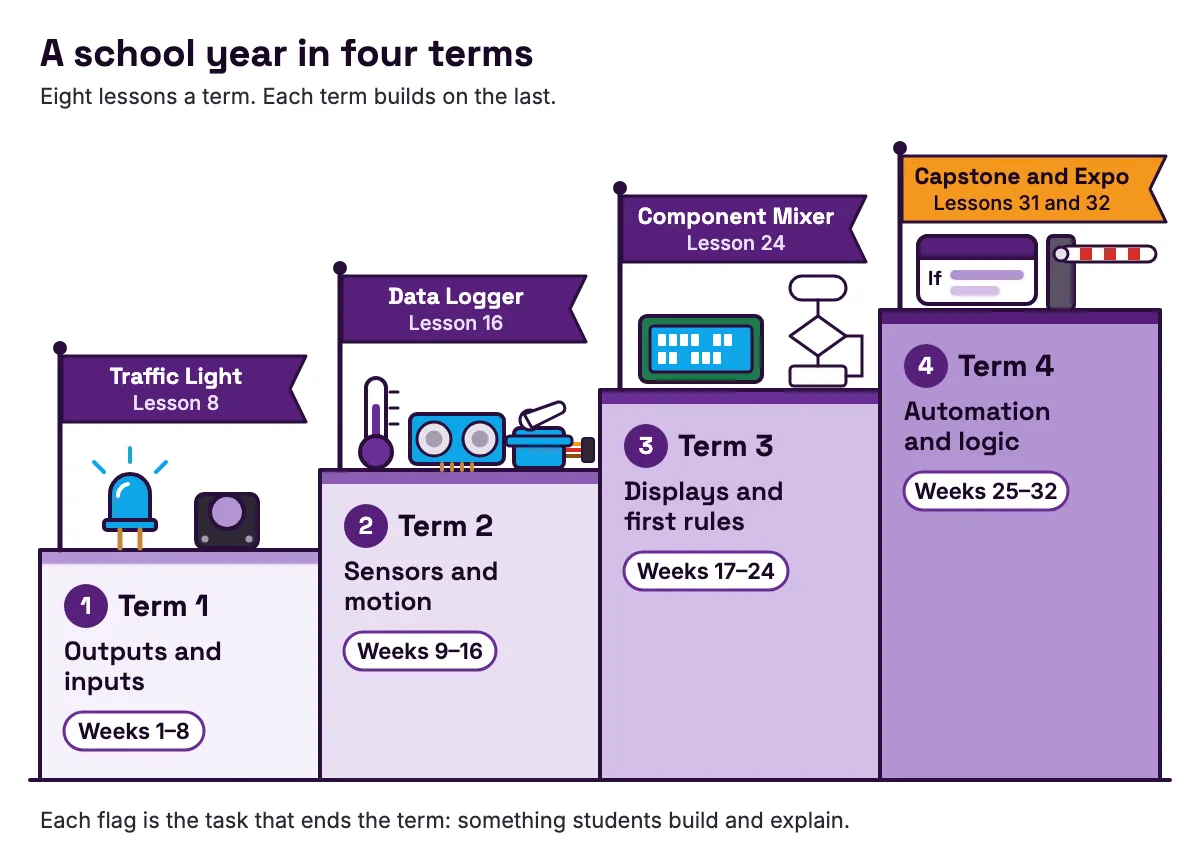
Lesson 1 frames the year as three steps: electronics makes electricity useful, automation adds a rule so the circuit decides by itself, and IoT adds a network so you can watch and control it from elsewhere.
Why the order matters
Four choices make the year work.
- Outputs come before inputs. Lessons 4 to 8 use only the parts built into the board, so students get a result in minutes, with no wiring.
- Logging by hand comes before automation. In Lesson 16, pairs copy readings every 5 minutes. The teacher note says the tedium is on purpose: students feel why devices log data by themselves.
- Flowcharts come before rules. Lesson 20 has students draw a smart fan on paper before Lesson 21 opens the Rule Engine.
- Sensor-triggered rules come last. No Loop and Forever rules arrive in Term 3, Timer and Condition rules in Term 4. So the Term 3 assessment uses No Loop and Forever rules only.
Week-by-week scope and sequence
This is the full sequence. Each lesson title links to the lesson, which is free to read with or without a kit.
| Week | Lesson | What students do |
|---|---|---|
| 1 | Electronics, Automation and IoT | Sort six devices; name each input and output |
| 2 | Board Tour | Find the built-in parts; match plug-ins to sockets |
| 3 | Powering Up and Connectivity | Join Wi-Fi and open the dashboard |
| 4 | Hello World and PWM Dimming | Dim the light to 10%, 50% and 100% |
| 5 | The Physics of Colour | Mix teal and orange from red, green and blue |
| 6 | Digital Inputs | Watch Pressed and Released; plan a reaction game |
| 7 | Light Sensing | Find the number that means "dark" |
| 8 | Term 1 Assessment | Run a traffic light by hand; plan a safe crossing |
| 9 | Analog Inputs and Direct Mapping | Link the knob to light brightness and servo angle |
| 10 | Atmospheric Sensing | Breathe on the sensor and watch both readings jump |
| 11 | Precision Temperature | Compare the probe with the DHT11; map warm and cool spots |
| 12 | Distance and Echolocation | Check readings against a ruler; work out the error |
| 13 | Security Sensing | Try to sneak past the motion sensor |
| 14 | Introduction to Motors | Find the servo's real limits |
| 15 | Relay Control | Switch a small low-voltage load |
| 16 | Term 2 Project: The Data Logger | Log five readings every 5 minutes, then graph them |
| 17 | Gas and Air Quality | Record a clean-air baseline |
| 18 | Smart Agriculture | Calibrate dry and wet; pick a watering number |
| 19 | Visual Output | Show live readings on a two-line screen |
| 20 | Algorithmic Thinking | Flowchart a smart fan and a security light |
| 21 | The Rule Engine and 4 Loop Modes | Pick the right loop mode for five scenarios |
| 22 | No Loop Mode and Sequences | Build a welcome sequence that runs once |
| 23 | Forever Loops | Build a beacon; watch two rules clash |
| 24 | Term 3 Assessment | Build a monitor that runs with the dashboard closed |
| 25 | Time-Based Automation | Build a metronome and a timed waterer model |
| 26 | Sensor-Based Control | Build a nightlight and a smart fan |
| 27 | Range Logic | Join two tests with AND or OR |
| 28 | Smart Safety Systems | Build a three-stage gas warning model |
| 29 | Parking Gate, Part 1 | Draw a state diagram; calibrate the gate arm |
| 30 | Parking Gate, Part 2 | Build the gate rules; stop it flapping |
| 31 | Capstone Design | Write a proposal; hunt a bug in four steps |
| 32 | The MakerBuddy Expo | Pitch the project and demo it live |
- Week
- 1
- What students do
- Sort six devices; name each input and output
- Week
- 2
- Lesson
- Board Tour
- What students do
- Find the built-in parts; match plug-ins to sockets
- Week
- 3
- What students do
- Join Wi-Fi and open the dashboard
- Week
- 4
- What students do
- Dim the light to 10%, 50% and 100%
- Week
- 5
- Lesson
- The Physics of Colour
- What students do
- Mix teal and orange from red, green and blue
- Week
- 6
- Lesson
- Digital Inputs
- What students do
- Watch Pressed and Released; plan a reaction game
- Week
- 7
- Lesson
- Light Sensing
- What students do
- Find the number that means "dark"
- Week
- 8
- Lesson
- Term 1 Assessment
- What students do
- Run a traffic light by hand; plan a safe crossing
- Week
- 9
- What students do
- Link the knob to light brightness and servo angle
- Week
- 10
- Lesson
- Atmospheric Sensing
- What students do
- Breathe on the sensor and watch both readings jump
- Week
- 11
- Lesson
- Precision Temperature
- What students do
- Compare the probe with the DHT11; map warm and cool spots
- Week
- 12
- What students do
- Check readings against a ruler; work out the error
- Week
- 13
- Lesson
- Security Sensing
- What students do
- Try to sneak past the motion sensor
- Week
- 14
- Lesson
- Introduction to Motors
- What students do
- Find the servo's real limits
- Week
- 15
- Lesson
- Relay Control
- What students do
- Switch a small low-voltage load
- Week
- 16
- What students do
- Log five readings every 5 minutes, then graph them
- Week
- 17
- Lesson
- Gas and Air Quality
- What students do
- Record a clean-air baseline
- Week
- 18
- Lesson
- Smart Agriculture
- What students do
- Calibrate dry and wet; pick a watering number
- Week
- 19
- Lesson
- Visual Output
- What students do
- Show live readings on a two-line screen
- Week
- 20
- Lesson
- Algorithmic Thinking
- What students do
- Flowchart a smart fan and a security light
- Week
- 21
- What students do
- Pick the right loop mode for five scenarios
- Week
- 22
- What students do
- Build a welcome sequence that runs once
- Week
- 23
- Lesson
- Forever Loops
- What students do
- Build a beacon; watch two rules clash
- Week
- 24
- Lesson
- Term 3 Assessment
- What students do
- Build a monitor that runs with the dashboard closed
- Week
- 25
- Lesson
- Time-Based Automation
- What students do
- Build a metronome and a timed waterer model
- Week
- 26
- Lesson
- Sensor-Based Control
- What students do
- Build a nightlight and a smart fan
- Week
- 27
- Lesson
- Range Logic
- What students do
- Join two tests with AND or OR
- Week
- 28
- Lesson
- Smart Safety Systems
- What students do
- Build a three-stage gas warning model
- Week
- 29
- Lesson
- Parking Gate, Part 1
- What students do
- Draw a state diagram; calibrate the gate arm
- Week
- 30
- Lesson
- Parking Gate, Part 2
- What students do
- Build the gate rules; stop it flapping
- Week
- 31
- Lesson
- Capstone Design
- What students do
- Write a proposal; hunt a bug in four steps
- Week
- 32
- Lesson
- The MakerBuddy Expo
- What students do
- Pitch the project and demo it live
To brush up on the parts first, read our visual guide to the types of sensors and the guide to actuators, from motors to displays.
How the lessons map to CSTA and NGSS standards
If your school reports on the CSTA computer science or NGSS science standards, this table is our own reading of where the lessons touch them. It is not an official alignment, so check it against your state's version. The CSTA standards progression chart (opens in a new tab) puts Level 2 at ages 11 to 14, by the end of grade 8.
| Lessons | Standard | What the standard asks, in short | Where it shows up |
|---|---|---|---|
| 3, 16 | CSTA 2-CS-02 | Build projects where hardware and software work together to collect and exchange data | The board sends sensor readings to the dashboard over Wi-Fi |
| 31 | CSTA 2-CS-03 | Find and fix problems with devices and their parts, step by step | The four-step bug hunt: power, sensors, outputs, logic |
| 16 | CSTA 2-DA-08 | Collect data with tools and make it more useful | Logging readings, then graphing them |
| 20, 29 | CSTA 2-AP-10 | Plan algorithms with flowcharts or pseudocode | Flowcharts, then a state diagram for the parking gate |
| 21–27 | CSTA 2-AP-12 | Build programs that combine control structures, including compound conditions | Loop modes, multi-step rules and AND/OR tests |
| 32 | CSTA 2-AP-17 | Test with a range of test cases | The Expo rehearsal: each rule checked below, inside and above its thresholds |
| 31 | NGSS MS-ETS1-1 | Define a design problem's criteria and constraints | The capstone problem statement |
| 29–30 | NGSS MS-ETS1-4 | Build a model that gives data for repeated testing | The parking gate, tuned until it stops flapping |
| 11 | NGSS MS-PS3-3 | Design and test a device that keeps heat in or out | An insulation test with the waterproof probe |
- Lessons
- 3, 16
- Standard
- CSTA 2-CS-02
- What the standard asks, in short
- Build projects where hardware and software work together to collect and exchange data
- Where it shows up
- The board sends sensor readings to the dashboard over Wi-Fi
- Lessons
- 31
- Standard
- CSTA 2-CS-03
- What the standard asks, in short
- Find and fix problems with devices and their parts, step by step
- Where it shows up
- The four-step bug hunt: power, sensors, outputs, logic
- Lessons
- 16
- Standard
- CSTA 2-DA-08
- What the standard asks, in short
- Collect data with tools and make it more useful
- Where it shows up
- Logging readings, then graphing them
- Lessons
- 20, 29
- Standard
- CSTA 2-AP-10
- What the standard asks, in short
- Plan algorithms with flowcharts or pseudocode
- Where it shows up
- Flowcharts, then a state diagram for the parking gate
- Lessons
- 21–27
- Standard
- CSTA 2-AP-12
- What the standard asks, in short
- Build programs that combine control structures, including compound conditions
- Where it shows up
- Loop modes, multi-step rules and AND/OR tests
- Lessons
- 32
- Standard
- CSTA 2-AP-17
- What the standard asks, in short
- Test with a range of test cases
- Where it shows up
- The Expo rehearsal: each rule checked below, inside and above its thresholds
- Lessons
- 31
- Standard
- NGSS MS-ETS1-1
- What the standard asks, in short
- Define a design problem's criteria and constraints
- Where it shows up
- The capstone problem statement
- Lessons
- 29–30
- Standard
- NGSS MS-ETS1-4
- What the standard asks, in short
- Build a model that gives data for repeated testing
- Where it shows up
- The parking gate, tuned until it stops flapping
- Lessons
- 11
- Standard
- NGSS MS-PS3-3
- What the standard asks, in short
- Design and test a device that keeps heat in or out
- Where it shows up
- An insulation test with the waterproof probe
Two honest notes. The rules are a visual builder, not text code, so the AP matches are partial; nobody writes nested loops. And the insulation test is an idea from the MakerBuddy project library, not a lesson, so add it to Lesson 11 yourself. NGSS lists the engineering expectations on its MS-ETS1 page (opens in a new tab); MS-PS3-3 (opens in a new tab) names an insulated box as an example device.
In Canada, the provinces and territories run education (opens in a new tab), and their curricula differ. Use the same method: list your outcomes, then find the lesson where students do that thing.
IoT vs robotics vs electronics: which curriculum fits your school
The names overlap, but the student experience is different.
| Curriculum type | What students build | Core ideas | Typical kit | Watch out for |
|---|---|---|---|---|
| Electronics curriculum | Circuits on a breadboard | Voltage, current, resistance, components | Breadboards, resistors, LEDs, a multimeter | Class time lost to loose wires; little about data or decisions |
| Robotics curriculum | Machines that move | Motors, mechanisms, steering with sensors, programming | Wheeled robots or arm kits | Mechanical breakage; motion can crowd out measuring |
| IoT curriculum | Devices that sense, decide and report | Sensors, data, rules, networks | A Wi-Fi microcontroller board with sensors | Needs a Wi-Fi network the boards can join, and network safety |
| Screen-only coding | Programs and games on screen | Algorithms, loops, conditions | Computers or tablets | No physical measuring or engineering |
- Curriculum type
- Electronics curriculum
- What students build
- Circuits on a breadboard
- Core ideas
- Voltage, current, resistance, components
- Typical kit
- Breadboards, resistors, LEDs, a multimeter
- Watch out for
- Class time lost to loose wires; little about data or decisions
- Curriculum type
- Robotics curriculum
- What students build
- Machines that move
- Core ideas
- Motors, mechanisms, steering with sensors, programming
- Typical kit
- Wheeled robots or arm kits
- Watch out for
- Mechanical breakage; motion can crowd out measuring
- Curriculum type
- IoT curriculum
- What students build
- Devices that sense, decide and report
- Core ideas
- Sensors, data, rules, networks
- Typical kit
- A Wi-Fi microcontroller board with sensors
- Watch out for
- Needs a Wi-Fi network the boards can join, and network safety
- Curriculum type
- Screen-only coding
- What students build
- Programs and games on screen
- Core ideas
- Algorithms, loops, conditions
- Typical kit
- Computers or tablets
- Watch out for
- No physical measuring or engineering
An IoT year still borrows from the others. Term 1 of the MakerBuddy course is electronics, with parts already soldered on, and Term 4 ends with a parking gate that senses, decides and moves, like a simple robot. For a robot-first route, see our guide to starting a robotics club at school. Our post on how no-code rules teach real logic explains why a rule builder is a fair first step before text code.
Worked example: one lesson planned minute by minute
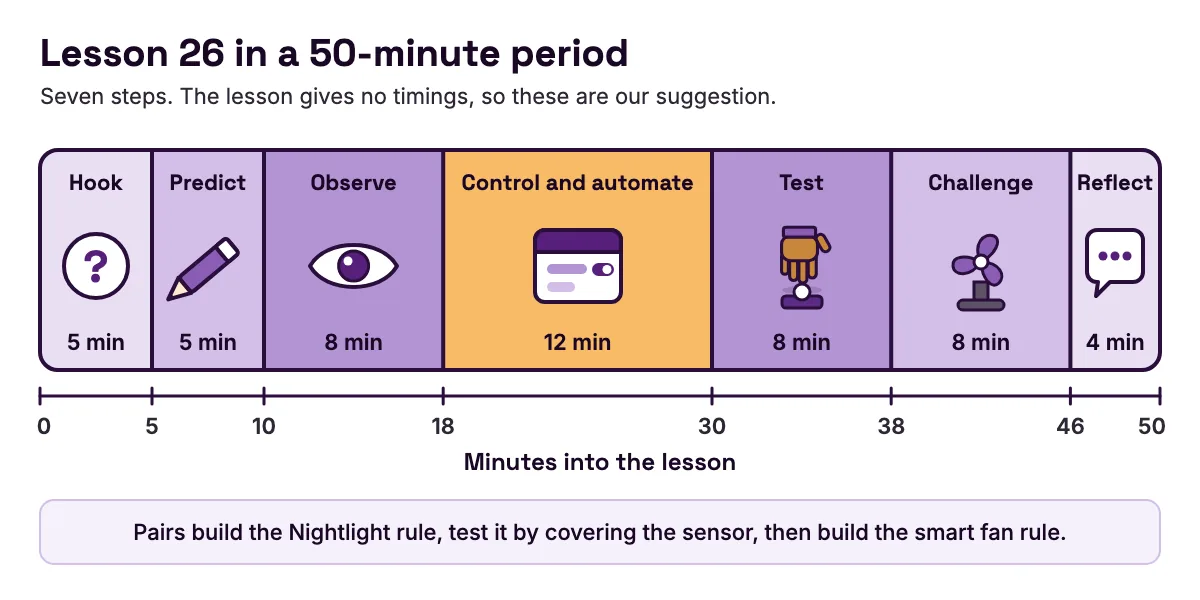
Here is Lesson 26, Sensor-Based Control, planned for a 50-minute period. It uses the seven-step model from the teacher page: hook, predict, observe, control, automate, challenge, reflect. The lesson gives no timings, so these are our suggestion. Students work in pairs, one kit each.
| Minutes | Step | What you do | What students do |
|---|---|---|---|
| 0–5 | Hook | Ask who has fumbled for a switch in a dark hallway | Suggest where a light should switch itself on |
| 5–10 | Predict | Show the Light Level card on the class screen | Write a guess for the bright and dark readings |
| 10–18 | Observe | Check numbers around the room | Record the room value and the covered value; pick a number halfway |
| 18–30 | Control and automate | Demo the Rule Engine tab once | Build the Nightlight rule |
| 30–38 | Test | Ask what happens when the hand moves away | Cover the sensor and explain what they see |
| 38–46 | Challenge | Check USB cables are unplugged before parts go in | Build the smart fan rule |
| 46–50 | Reflect | Use the three "Did you get it?" questions as an exit ticket | Say what their system senses, decides and does |
- Minutes
- 0–5
- Step
- Hook
- What you do
- Ask who has fumbled for a switch in a dark hallway
- What students do
- Suggest where a light should switch itself on
- Minutes
- 5–10
- Step
- Predict
- What you do
- Show the Light Level card on the class screen
- What students do
- Write a guess for the bright and dark readings
- Minutes
- 10–18
- Step
- Observe
- What you do
- Check numbers around the room
- What students do
- Record the room value and the covered value; pick a number halfway
- Minutes
- 18–30
- Step
- Control and automate
- What you do
- Demo the Rule Engine tab once
- What students do
- Build the Nightlight rule
- Minutes
- 30–38
- Step
- Test
- What you do
- Ask what happens when the hand moves away
- What students do
- Cover the sensor and explain what they see
- Minutes
- 38–46
- Step
- Challenge
- What you do
- Check USB cables are unplugged before parts go in
- What students do
- Build the smart fan rule
- Minutes
- 46–50
- Step
- Reflect
- What you do
- Use the three "Did you get it?" questions as an exit ticket
- What students do
- Say what their system senses, decides and does
The rule, written step by step
- 1
Open the Rule Engine tab and type "Nightlight" as the rule name.
- 2
Set Loop Mode to Condition.
- 3
Set Sensor to Light Level (LDR), Operator to Less than (<) and Threshold to 50. Use the halfway number your pair measured if it differs.
- 4
Click Add Step. Set Action to LED On, Value to 255 and Delay to 100 ms.
- 5
Click Save Rule.
- 6
Cover the sensor. The light comes on within about a second.
Why about a second? The board reads its sensors once a second, and the page on how rules run explains that a condition must stay true for 0.3 seconds first. Rules run on the board itself, not in the browser.
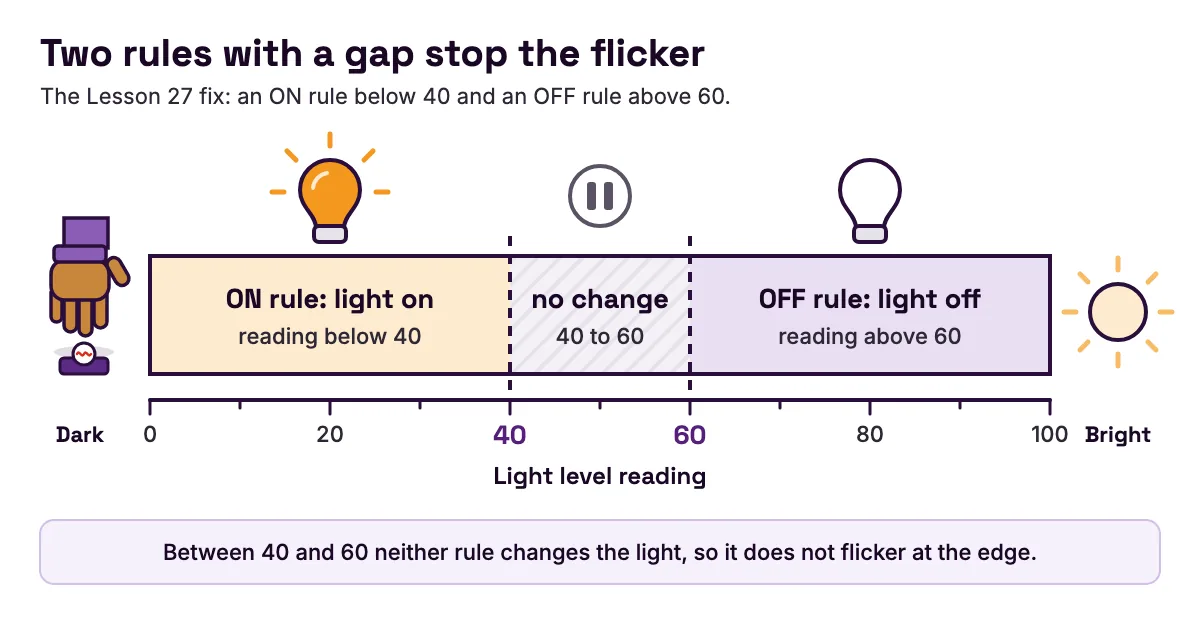
Now the teaching moment. When students move their hand away, the light stays on, because the rule has only an On step. Ask the class why. Lesson 27 fixes it with an ON rule below 40 and an OFF rule above 60; the gap stops the light flickering at the edge.
The challenge works the same way: a Condition rule on Temperature (DHT11), Greater than (>), 30, with one step, Relay On. The bonus rule turns the relay off below 26. The relay switches only a small low-voltage load that the teacher approves. For more lessons planned this way, see our ready-to-teach electronics lesson plans.
Assessment across the year: four checkpoints
The course has one checkpoint per term, then a final project.
Term 1: the Traffic Light practical
In Lesson 8, students run a traffic light by hand on the dashboard: red for three seconds, yellow with one beep, then green. They also dim the blue light to about half and point to a built-in part and a plug-in socket. The challenge is a safe pedestrian crossing planned on paper.
Term 2: the Data Logger project
In Lesson 16, pairs log temperature, humidity, light, distance and motion every 5 minutes for the whole lesson. They graph temperature over time, find the range and look for causes. Grade the graph and the explanations, not the neatness of the table.
Term 3: the Component Mixer
Lesson 24 comes with a full marking scheme in three parts.
| Part | Weight | What students show |
|---|---|---|
| Individual skills | 40% | At least 5 of 7 short tasks, such as a gas baseline, soil readings, a flowchart and a working No Loop rule |
| Integration project | 40% | A Safety and Growth Monitor with two sensors, a startup rule, a warning rule and live readings on the screen |
| Creative challenge | 20% | Their own automation, with a reason for its loop mode |
- Part
- Individual skills
- Weight
- 40%
- What students show
- At least 5 of 7 short tasks, such as a gas baseline, soil readings, a flowchart and a working No Loop rule
- Part
- Integration project
- Weight
- 40%
- What students show
- A Safety and Growth Monitor with two sensors, a startup rule, a warning rule and live readings on the screen
- Part
- Creative challenge
- Weight
- 20%
- What students show
- Their own automation, with a reason for its loop mode
The project includes an independence test worth 5%: students close the dashboard, wait a minute and show the board still running their rule.
Term 4: capstone and Expo
In Lesson 31, each student writes a problem statement, lists every rule and draws a state diagram, then gets your approval. A board holds at most 10 rules of up to 10 steps, so the plan has to fit. The lesson also teaches a four-step bug hunt: power, sensors, outputs, then rule logic.
In Lesson 32, students give a pitch of about 30 seconds and demo the project live. The lesson's "Try it" rehearsal first has them check every rule below, inside and above their thresholds.
Whatever you grade, ask why. The teacher page lists questions that show real understanding, such as "Why did you choose this number?". A copied project cannot answer them. Our guide to rubrics for assessing STEM projects goes further.
Pacing, kits and classroom setup
The course is written as one lesson a week, and the site also suggests teaching only some terms or running a club. The semester and taster formats are our own ideas.
| Format | Pace | Length | How to make it work |
|---|---|---|---|
| Weekly class | 1 lesson a week | 32 weeks | Teach as written; assessment weeks double as catch-up |
| Semester elective | 2 lessons a week | 16 weeks | Same order; give the capstone an extra session |
| One-term unit | 1 lesson a week | 8 weeks | Term 1 alone, as an introduction |
| After-school club | 1 session a week | Flexible | Pick lessons, then let teams invent |
| Taster session | One hour | 1 session | An Hour of Code with hardware |
- Format
- Weekly class
- Pace
- 1 lesson a week
- Length
- 32 weeks
- How to make it work
- Teach as written; assessment weeks double as catch-up
- Format
- Semester elective
- Pace
- 2 lessons a week
- Length
- 16 weeks
- How to make it work
- Same order; give the capstone an extra session
- Format
- One-term unit
- Pace
- 1 lesson a week
- Length
- 8 weeks
- How to make it work
- Term 1 alone, as an introduction
- Format
- After-school club
- Pace
- 1 session a week
- Length
- Flexible
- How to make it work
- Pick lessons, then let teams invent
- Format
- Taster session
- Pace
- One hour
- Length
- 1 session
- How to make it work
- An Hour of Code with hardware
For timetabling: 32 lessons at 50 minutes come to 1,600 minutes, about 26.7 hours a year. The full range is 24 hours at 45 minutes to 32 hours at 60.
How many kits
The teacher page plans one kit per 2 to 3 students. Kits are not used up, so one set serves every class. For a class of 30, with one spare:
| Sharing | Kits needed | With a spare | Price in Pakistan |
|---|---|---|---|
| 3 students per kit | 30 ÷ 3 = 10 | 11 | 11 × PKR 40,000 = PKR 440,000, less 2% = PKR 431,200 |
| 2 students per kit | 30 ÷ 2 = 15 | 16 | 16 × PKR 40,000 = PKR 640,000, less 2% = PKR 627,200 |
- Sharing
- 3 students per kit
- Kits needed
- 30 ÷ 3 = 10
- With a spare
- 11
- Price in Pakistan
- 11 × PKR 40,000 = PKR 440,000, less 2% = PKR 431,200
- Sharing
- 2 students per kit
- Kits needed
- 30 ÷ 2 = 15
- With a spare
- 16
- Price in Pakistan
- 16 × PKR 40,000 = PKR 640,000, less 2% = PKR 627,200
The 2% is the volume discount from 10 kits. Outside Pakistan, schools get a written quote; the kit planner on the MakerBuddy for schools page works out your numbers. Our guide to setting up a STEM lab at school covers storage and layout.
Setup that saves your first lesson
Setup problems can sink a first lesson. Work through the before-class checklist a day or two ahead:
- The boards need 2.4 GHz Wi-Fi that asks only for a name and a password. A phone hotspot set to 2.4 GHz works.
- Each device needs Chrome, Edge or Firefox with the free MakerBuddy extension, or Safari on a Mac, iPhone or iPad. On managed laptops, ask IT to allow the extension. Android phones cannot control the board yet.
- Give each board its own name, such as makerbuddy-01, as Lesson 3 shows.
- Type
demoas the device name to show sample readings with no board. - No student accounts are needed. The board's local connection has no password, so use a trusted network and never make it reachable from the internet.
Ask which extras, such as cables, a small bulb or a small fan, come with your order before you plan lessons around them.
When a year-long IoT course is the wrong fit
A 32-week course is a big commitment. Check it suits your school first.
- You have only a few weeks. Teach Term 1 as a unit, or pick one idea from the project library.
- Your network will not cooperate. If the Wi-Fi uses a sign-in page and IT cannot offer a separate 2.4 GHz network or allow the browser extension, the boards cannot reach the dashboard. Sort this out first.
- You want a text-programming course. The lessons use the dashboard and no-code rules, not Arduino programming. Keen students can go further with the board's web API or open Arduino code, using the documentation, but you plan that yourself.
- Your students mostly have Android devices. Android phones cannot control the board yet, so plan for laptops or iPads.
- You want robots that drive. Motion comes from one small servo and whatever low-voltage load the relay switches.
If none of these apply, a year of IoT gives students a long run of building, measuring and explaining that short units cannot.
Common mistakes when teaching a year of IoT
Boards will not join the school Wi-Fi
Symptom: Lesson 3 stalls. Cause: The network is 5 GHz only or uses a sign-in page. Fix: Use a separate 2.4 GHz network or a phone hotspot, with student devices on it too.
Kits behave strangely in the next class
Symptom: A light turns on by itself. Cause: Rules are saved on the board and start again at power-on, so the last group's rules still run. Fix: Delete them in the dashboard between classes. Holding the button does not clear rules.
Rules fight over the same output
Symptom: A light flickers, or a step never seems to run. Cause: Two rules drive the same part. A higher-priority rule wins, and two rules of the same mode take turns, as Lesson 23 shows on purpose. Fix: Give each part one owning rule, and ask for a short note of which part each rule owns, as Lesson 24 does.
A rule uses the wrong comparison
Symptom: The fan comes on when the room is cool. Cause: The rule says Less than (<) where it needs Greater than (>), which the Lesson 26 teacher note calls the most common mistake. Fix: Teach that the arrow points to the smaller number.
Students expect a rule at a set time of day
Symptom: A student wants the light on "at 8 am". Cause: The board has no clock. Timer rules repeat at an interval, not at a time of day. Fix: Teach Lesson 25 as interval timing, such as "every minute" or "every hour".
A keen student uploads their own Arduino sketch
Symptom: The dashboard and rules stop working on one board. Cause: Uploading your own sketch replaces the MakerBuddy firmware until it is uploaded again. Fix: Put it back with the install by USB steps, and give coders a spare board.
For build ideas when a group finishes early, our ESP32 and Arduino project ideas for students are sorted by sensor and difficulty, and the MakerBuddy blog has guides for every part.
FAQ
What is a STEM curriculum?
A STEM curriculum is a planned set of lessons that teaches science, technology, engineering and mathematics together through hands-on work. A good one has an order, where each lesson uses the last, plus checkpoints you can grade. An IoT curriculum is one kind: students build devices that sense, decide and report. STEAM adds the arts, as our post on STEM vs STEAM explains.
How do you create a STEM curriculum for a whole school year?
Pick the skills students need by the end, then work backwards. Split the year into terms of about eight weeks, each with one big idea and one task you can assess. Teach parts before logic, and logic before projects. The MakerBuddy curriculum is a free 32-week example to use or adapt.
Is there a free STEM curriculum for IoT and electronics?
Yes. The MakerBuddy curriculum is 32 free lessons for ages 10 and up, in four terms of eight, free to read with or without a kit. The hands-on activities need one kit for every 2 or 3 students.
What are the four C's of STEM education?
The four C's are critical thinking, communication, collaboration and creativity. They come from the P21 Framework for 21st Century Learning, now kept by Battelle for Kids (opens in a new tab), which calls them learning and innovation skills. Mapped onto this course, in our view, the bug hunt trains critical thinking, pair work trains collaboration, the capstone trains creativity and the Expo pitch trains communication.
What age should students start learning electronics and IoT?
The MakerBuddy lessons are written for ages 10 and up; younger students can join with an adult nearby. The CSTA standards (opens in a new tab) put the matching hardware and data standards at Level 2, ages 11 to 14.
Do teachers need to know coding to teach an IoT curriculum?
Not for this one. All 32 MakerBuddy lessons use the browser dashboard, and students build if-then rules from menus. Coding is an optional extra for keen students, beyond the lessons.
Can I teach STEM if I am bad at math?
Yes. Most of the maths in this course is reading numbers, picking a number halfway between two readings, percentages and averages. The hardest parts are the distance formula in Lesson 12 (distance = speed × time ÷ 2) and the straight-line mapping in Lesson 9, and both lessons explain them step by step. The dashboard shows every reading as a plain number.
What are the downsides of STEM education?
Hands-on STEM takes more setup than a textbook lesson. You need kits, a network the boards can join and time to test each lesson first. A course also fails when it is a string of fun builds with no order or assessment, so plan the checkpoints before the projects.
Can students follow the lessons without a kit?
Yes, partly. Every lesson is free to read and has a "Try it" demo that runs in the browser. Typing demo as the device name in the dashboard shows sample readings with no board. The hands-on building still needs a kit.
Sources
- Freeman et al. (2014), Active learning increases student performance in science, engineering, and mathematics, PNAS (PubMed Central) (opens in a new tab)
- CSTA: Progression of K-12 Computer Science Standards, Revised 2017 (PDF) (opens in a new tab)
- Next Generation Science Standards: MS-ETS1 Engineering Design (opens in a new tab)
- Next Generation Science Standards: MS-PS3-3 Energy (opens in a new tab)
- Battelle for Kids: Framework for 21st Century Learning, P21 brief (PDF) (opens in a new tab)
- CMEC: Education in Canada, an overview (opens in a new tab)