
Learning Objective
Measure ambient light using a photoresistor.
Light Sensing (LDR)
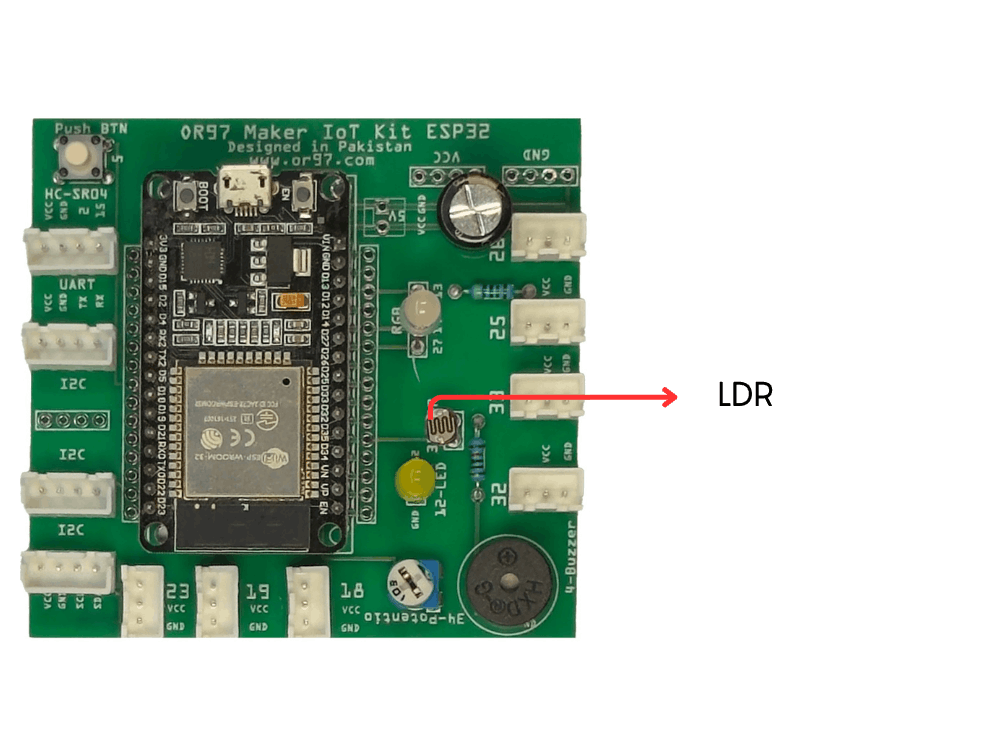
Hardware: MakerBuddy On-board LDR Light Sensor
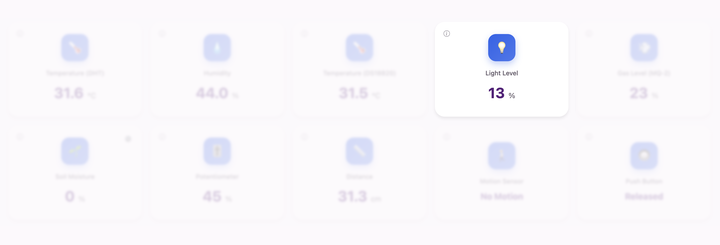
Dashboard: LDR Light Sensor Card
Theory: Photoresistors (LDR)
From Manual to Automatic: Sensing the Environment
Over the past two weeks, we've learned to read both digital inputs (buttons with ON/OFF states) and digital outputs (LED with PWM & RGB Colors). Now we're taking the next step: using sensors that automatically detect changes in the physical world without human interaction! This week's sensor - the Light Dependent Resistor (LDR) or photoresistor - measures ambient light levels automatically, opening the door to smart, responsive systems.
How Photoresistors Work
An LDR is a special type of resistor made from semiconductor materials like cadmium sulfide (CdS). When light photons hit the surface, they excite electrons, making it easier for electricity to flow through the material. This means more light = lower resistance = higher voltage reading. In darkness, the resistance is very high (sometimes over 1 megaohm), blocking current flow. In bright light, the resistance drops dramatically (as low as a few hundred ohms), allowing current to flow freely. The ESP32 reads the resulting voltage change through its ADC, just like with the potentiometer!
Technical Details: Reading Light Levels
The MakerBuddy LDR is configured in a voltage divider circuit with a fixed resistor. As light intensity changes, the voltage at the midpoint changes proportionally. The ESP32's 12-bit ADC reads this voltage and converts it to a value from 0-4095 (mapped to 0-100 for display). Lower values indicate darkness, higher values indicate brightness. The sensor responds to visible light wavelengths and has a response time of about 20-30 milliseconds, making it fast enough for most applications. Understanding threshold values - the point at which we decide "it's dark enough to turn on a light" - is crucial for automation.
Real-World Applications
LDR sensors are everywhere in our daily lives! Automatic street lights use them to turn on at dusk and off at dawn, saving energy and reducing maintenance. Smartphone screens use light sensors to adjust brightness automatically for comfortable viewing. Solar panels use them in tracking systems to follow the sun for maximum energy capture. Camera light meters use similar sensors to adjust exposure settings. Security systems detect when lights are turned on or off. Even your laptop likely uses a light sensor to adjust keyboard backlighting!
For Teachers
This lesson introduces environmental sensing - sensors that automatically respond to physical conditions without human input. This is a critical IoT concept! Have students plot light values throughout the day to understand how ambient conditions change. Discuss threshold selection: "How dark should it be before we turn on lights?" Show that different applications need different thresholds (street lights vs. nightlights vs. security systems). Connect this to the real-world challenge of false triggering - if the threshold is set poorly, lights might flicker on and off unnecessarily. This prepares students for next term's automation rules.
For Parents
This week your child learns about environmental sensing - the technology behind automatic lighting, smart cameras and energy-efficient buildings. The LDR sensor teaches an important principle: devices can monitor their surroundings and make decisions without constant human input. This is the foundation of "smart" technology! Understanding how sensors convert physical phenomena (light) into electrical signals (voltage) into digital data (numbers) is fundamental to modern automation. These skills are directly applicable to careers in robotics, smart home technology, environmental monitoring and sustainable energy systems.
Hands-On Activity: Light Detection
Activity Duration: 20-25 minutes
Students will explore how the LDR sensor responds to different light conditions by creating darkness and bright light scenarios, then determine the threshold value for automatic lighting control.
Step-by-Step Instructions:
- Locate the LDR: Find the LDR sensor already embedded and connected on your MakerBuddy IoT Board. It looks like a small resistor with a light-sensitive surface.
- Open the Dashboard: Navigate to the LDR sensor card on your web interface and observe the current light level reading.
- Baseline Reading: Record the current light level in normal classroom lighting conditions. This is your baseline.
- Create Darkness: Cover the LDR completely with your hand or a piece of paper. Wait 2-3 seconds and record the minimum value you observe.
- Create Brightness: Use a phone flashlight or desk lamp and shine it directly on the LDR from about 2-3 inches away. Record the maximum value.
- Test Shadow Conditions: Create partial shadows by holding your hand at different distances above the sensor. Notice how the value changes gradually.
- Observe Response Time: Quickly cover and uncover the sensor. Notice how fast the reading updates on the dashboard.
- Create a Data Table: Record values for: Complete darkness, dim light (hand shadow), normal classroom light, bright desk lamp and direct flashlight.
What Students Should Observe:
- Lower values in darkness, higher values in bright light (inverse of darkness)
- Smooth, continuous changes as light conditions gradually change
- Fast response time (readings update within a fraction of a second)
- Different light sources (fluorescent vs. LED vs. sunlight) may give different readings
- The value changes predictably and consistently with light level
- A clear difference between "dark enough for automatic lights" and normal lighting
Challenge
Your Mission: Smart Lighting Engineer
You've been hired to design an automatic lighting system for different environments. Your job is to determine the perfect threshold values - too low and lights stay on all day wasting energy, too high and people are left in the dark!
Challenge 1: Threshold Determination
Based on your data table from the hands-on activity, determine the ideal threshold value for automatic lights in these scenarios:
- Classroom lights: Should turn on when it gets dim (cloudy day or late afternoon)
- Security lights: Should turn on only when it's actually dark outside (after sunset)
- Nightlight: Should turn on only in very dark conditions (bedtime)
Write down your recommended threshold value for each scenario and explain your reasoning.
Challenge 2: Environmental Testing
Test your sensor in different locations around the classroom or school. Record the light level at:
- Next to a window (natural light)
- Under a desk or table (shadowed area)
- In a closet or dark room (if available)
- Under direct overhead lighting
Which location has the widest range of light values throughout the day?
Discussion Questions:
- Why do automatic street lights need different threshold values in summer vs. winter?
- What problems could occur if your threshold is set too close to normal ambient light levels?
- How might you prevent lights from rapidly turning on and off if light levels hover near the threshold?
Bonus Challenge: If your classroom light level is 45 during the day and 15 at night and you want lights to turn on at dusk, would you set your threshold to 30? Why or why not? (Hint: Consider adding a buffer zone - turn on at 25, turn off at 35 - to prevent flickering!)
Key Takeaways
✓ Photoresistors
Light Dependent Resistors (LDRs) are semiconductor sensors that change resistance based on light intensity - more light means lower resistance and higher voltage output. These passive sensors require no power to operate and provide analog readings that represent ambient light conditions. They're the foundation of automatic lighting systems worldwide.
✓ Light Measurement
LDR sensors convert light levels into electrical resistance, which is then read as voltage by the ESP32's ADC and converted to digital values (0-100 display scale). This allows us to quantify something invisible - light intensity - and use that data to make automated decisions. Understanding the relationship between physical phenomena and digital data is crucial for IoT development.
✓ Threshold Detection
A threshold is the specific value at which we decide to take action - for example, turning lights on when the reading drops below 30. Choosing the right threshold is critical: too high and the system triggers unnecessarily, too low and it doesn't respond when needed. Buffer zones (hysteresis) prevent rapid on/off flickering when values hover near the threshold.
✓ Automatic Control
Environmental sensors like the LDR enable true automation - systems that monitor conditions and respond without human input. This is the foundation of "smart" technology: devices that sense their environment, make decisions based on threshold values and take appropriate actions. Understanding this concept is essential for building responsive IoT systems.
Coming Up Next Week:
Week 8: Term 1 Assessment — The Traffic Light