A STEM lab at school is a room, or part of one, where students build and test real things: circuits, sensors, models and small machines. To set one up you need five things: enough floor space, reusable kits shared by two or three students each, one laptop or tablet per kit, Wi-Fi and power at every table, and a plan for lessons, storage and safety. The kits are the smallest part of the job. The planning around them decides whether the lab is busy every week or locked in a cupboard by the second term.
This guide covers the STEM lab equipment list, kits per student, budget tiers, layout, a setup timeline and a worked plan for a class of 24. The examples use the MakerBuddy IoT Kit V1.0, an ESP32 electronics kit with 32 free lessons, but the checklist works for any reusable electronics kit.
What a STEM lab is, and which kind your school needs
A STEM lab is a space for hands-on science, technology, engineering and maths. It is not a computer room with a new sign on the door. Students spend most of the lesson predicting, building, measuring and fixing.
There are four common ways to set up a STEM lab for school. Pick the one that fits your space and your timetable.
| Model | What it looks like | Best for | Watch out for |
|---|---|---|---|
| Dedicated STEM room | A room used only for STEM, with kits on shelves | Several year groups every week | Needs space, and a timetable that keeps it busy |
| Shared classroom | A normal classroom with kits in a cupboard | One teacher starting with one class | Packing away eats into every lesson |
| Mobile STEM cart | Kits, chargers and laptops on a lockable trolley | Schools with no spare room | Every room needs the same Wi-Fi and enough sockets |
| Library or makerspace corner | Open shelves and a few tables | Clubs and lunchtime drop-ins | Needs one staff member who owns it, or parts go missing |
- Model
- Dedicated STEM room
- What it looks like
- A room used only for STEM, with kits on shelves
- Best for
- Several year groups every week
- Watch out for
- Needs space, and a timetable that keeps it busy
- Model
- Shared classroom
- What it looks like
- A normal classroom with kits in a cupboard
- Best for
- One teacher starting with one class
- Watch out for
- Packing away eats into every lesson
- Model
- Mobile STEM cart
- What it looks like
- Kits, chargers and laptops on a lockable trolley
- Best for
- Schools with no spare room
- Watch out for
- Every room needs the same Wi-Fi and enough sockets
- Model
- Library or makerspace corner
- What it looks like
- Open shelves and a few tables
- Best for
- Clubs and lunchtime drop-ins
- Watch out for
- Needs one staff member who owns it, or parts go missing
USB-powered kits make the cart realistic, because they pack into numbered boxes and move between rooms.
An electronics lab is not a chemistry lab. NSTA's paper on science and STEM instructional space (opens in a new tab) asks for an eyewash station, a safety shower and a fume hood where hazardous chemicals may be used. A lab that runs only 5 V kits uses no chemicals, so an ordinary classroom is often enough to start. If the room is shared with chemistry or biology, the science rules apply to the whole room.
Here is the case against building a room first. If no teacher has time to learn the kit, the Wi-Fi cannot be fixed, or nobody knows which classes will use the lab, a new room sits empty. Start with one teacher, one class and one lesson the teacher has already tried, as MakerBuddy's guide for schools suggests. Everything below moves into a dedicated room later.
The STEM lab equipment list
This is the STEM lab equipment checklist for an electronics-first lab. "Day one" items are needed before the first lesson. The rest can wait.
| Item | How many | Why you need it | When |
|---|---|---|---|
| Reusable electronics kit | 1 per 2 or 3 students, plus 1 spare | The core of every lesson | Day one |
| Laptop or tablet | 1 per kit in use | Runs the dashboard | Day one (you may own these) |
| 2.4 GHz Wi-Fi network | 1 for the room | Boards and devices share one network | Day one |
| Micro-USB cable and 5 V USB charger | 1 of each per kit | Powers each board | Day one |
| Power sockets | 2 per team table | One for the board, one for the laptop | Day one |
| Class screen or projector | 1 | Demos before teams start | Day one |
| Numbered box per kit, and shelving | 1 box per kit | Parts go back in the same box | Day one |
| Fix-it box: spare kit, spare cables, small screwdriver | 1 | Swap a failed part, keep the team working | Day one |
| Project logbook | 1 per team | Predictions, readings and what changed | Day one |
| First aid kit, fire extinguisher, safety signs | As local rules require | Basic safety equipment | Day one |
| Card, tape, scissors, craft sticks | A class set | Cases, gauges and models | When builds need cases |
| Multimeters, breadboards, soldering with fume extraction | 1 set per team | Students building their own circuits | Year two, after training |
- Item
- Reusable electronics kit
- How many
- 1 per 2 or 3 students, plus 1 spare
- Why you need it
- The core of every lesson
- When
- Day one
- Item
- Laptop or tablet
- How many
- 1 per kit in use
- Why you need it
- Runs the dashboard
- When
- Day one (you may own these)
- Item
- 2.4 GHz Wi-Fi network
- How many
- 1 for the room
- Why you need it
- Boards and devices share one network
- When
- Day one
- Item
- Micro-USB cable and 5 V USB charger
- How many
- 1 of each per kit
- Why you need it
- Powers each board
- When
- Day one
- Item
- Power sockets
- How many
- 2 per team table
- Why you need it
- One for the board, one for the laptop
- When
- Day one
- Item
- Class screen or projector
- How many
- 1
- Why you need it
- Demos before teams start
- When
- Day one
- Item
- Numbered box per kit, and shelving
- How many
- 1 box per kit
- Why you need it
- Parts go back in the same box
- When
- Day one
- Item
- Fix-it box: spare kit, spare cables, small screwdriver
- How many
- 1
- Why you need it
- Swap a failed part, keep the team working
- When
- Day one
- Item
- Project logbook
- How many
- 1 per team
- Why you need it
- Predictions, readings and what changed
- When
- Day one
- Item
- First aid kit, fire extinguisher, safety signs
- How many
- As local rules require
- Why you need it
- Basic safety equipment
- When
- Day one
- Item
- Card, tape, scissors, craft sticks
- How many
- A class set
- Why you need it
- Cases, gauges and models
- When
- When builds need cases
- Item
- Multimeters, breadboards, soldering with fume extraction
- How many
- 1 set per team
- Why you need it
- Students building their own circuits
- When
- Year two, after training
Know what is inside a kit before you compare prices. Each MakerBuddy kit is one board with six parts built in: a blue light, a colour light, a push button, a light sensor, a buzzer and a turning knob. Nine more plug into labelled sockets: temperature and humidity, distance, motion, smoke and gas, and soil moisture sensors, a waterproof temperature probe, a small servo motor, a relay and a text screen. The board comes in purple or green, and both are the same board. The kit photos also show cables, a small bulb, a small motor with a fan blade, craft sticks and a screwdriver, so ask which of these come with your order.
Check your devices before you buy. The dashboard runs in Chrome, Edge or Firefox with a free extension, or in Safari on a Mac, iPhone or iPad. Android phones and tablets cannot control the board yet.
In year one, skip anything only one student can use at a time, such as a 3D printer. It makes a queue, not a lesson. For more on choosing kits, read the honest guide to STEM kits by age.
How many kits per student?
Plan one kit for every two or three students, plus one spare. That keeps everyone hands-on in a 45 to 60 minute lesson. At four or more, one student builds and the others watch.
Rotate jobs every lesson: one student builds, one reads the dashboard aloud and one writes in the logbook. Classroom management for hands-on electronics labs has more routines for a busy room.
This table uses the rule in the class planner on the MakerBuddy order page: students divided by team size, rounded up, plus one spare.
| Students in the class | Teams of 3 | Teams of 2 |
|---|---|---|
| 12 | 4 + 1 spare = 5 kits | 6 + 1 spare = 7 kits |
| 16 | 6 + 1 spare = 7 kits | 8 + 1 spare = 9 kits |
| 20 | 7 + 1 spare = 8 kits | 10 + 1 spare = 11 kits |
| 24 | 8 + 1 spare = 9 kits | 12 + 1 spare = 13 kits |
| 30 | 10 + 1 spare = 11 kits | 15 + 1 spare = 16 kits |
- Students in the class
- 12
- Teams of 3
- 4 + 1 spare = 5 kits
- Teams of 2
- 6 + 1 spare = 7 kits
- Students in the class
- 16
- Teams of 3
- 6 + 1 spare = 7 kits
- Teams of 2
- 8 + 1 spare = 9 kits
- Students in the class
- 20
- Teams of 3
- 7 + 1 spare = 8 kits
- Teams of 2
- 10 + 1 spare = 11 kits
- Students in the class
- 24
- Teams of 3
- 8 + 1 spare = 9 kits
- Teams of 2
- 12 + 1 spare = 13 kits
- Students in the class
- 30
- Teams of 3
- 10 + 1 spare = 11 kits
- Teams of 2
- 15 + 1 spare = 16 kits
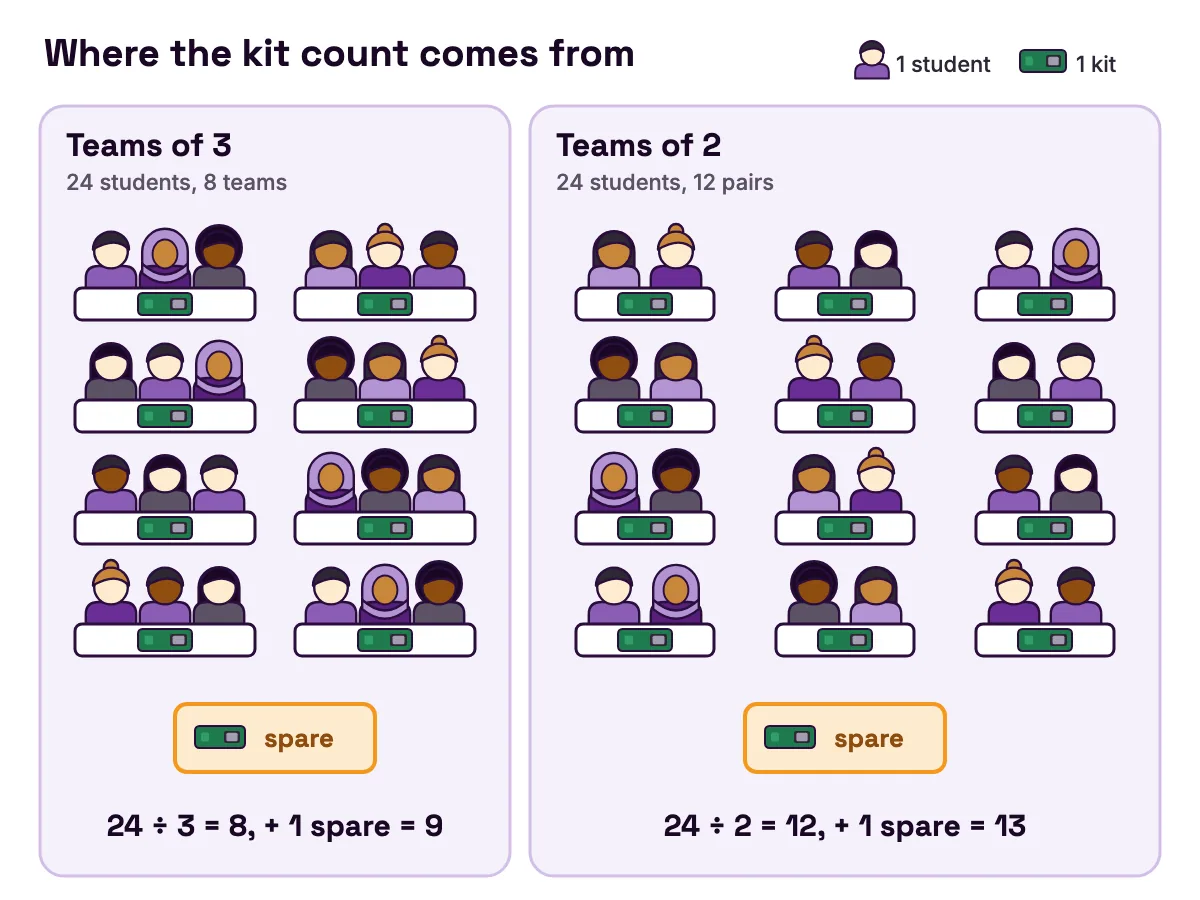
Kits are not used up. Six classes of 24 that come at different times still need only 9 to 13 kits.
The last row needs a warning. NSTA's position statement says that classes of more than 24 students doing science activities cannot safely be supervised by one teacher (opens in a new tab). Its paper on overcrowding (opens in a new tab) adds that most accidents happen in classes of more than 24. It also says a class should be smaller when support staff join it, because the extra adults take workspace too. Split bigger classes for lab lessons.
STEM lab budget: three tiers
A STEM lab budget has five parts: kits, devices, network and power, furniture and storage, and teacher time. You may already own much of it.
One price is fixed. In Pakistan, a MakerBuddy kit costs PKR 40,000, and bigger orders pay less for each kit: PKR 39,200 from 10 kits, PKR 38,000 from 25 and PKR 36,800 from 50. You order online and pay by bank transfer. Schools in the USA, Canada, the UK, Europe, the Middle East and elsewhere get a written quote that includes delivery. Price everything else locally.
| Tier | Who it serves | Kits | Kit cost in Pakistan | Also budget for |
|---|---|---|---|---|
| Starter | One class of up to 24, teams of 3 | 9, or 10 at the lower price | PKR 360,000 for 9, or PKR 392,000 for 10 | Cables and chargers if not included, storage boxes |
| Class in pairs | One class of 24 in pairs | 13 | PKR 509,600 | A device per kit, sockets at every table, shelving |
| Whole school | Two rooms, or several teachers in the same period | 25 | PKR 950,000 | A second room's power and Wi-Fi, teacher training time |
| Several campuses | A group of schools sharing one plan | 50 | PKR 1,840,000 | Spares and a trained lead teacher on each campus |
- Tier
- Starter
- Who it serves
- One class of up to 24, teams of 3
- Kits
- 9, or 10 at the lower price
- Kit cost in Pakistan
- PKR 360,000 for 9, or PKR 392,000 for 10
- Also budget for
- Cables and chargers if not included, storage boxes
- Tier
- Class in pairs
- Who it serves
- One class of 24 in pairs
- Kits
- 13
- Kit cost in Pakistan
- PKR 509,600
- Also budget for
- A device per kit, sockets at every table, shelving
- Tier
- Whole school
- Who it serves
- Two rooms, or several teachers in the same period
- Kits
- 25
- Kit cost in Pakistan
- PKR 950,000
- Also budget for
- A second room's power and Wi-Fi, teacher training time
- Tier
- Several campuses
- Who it serves
- A group of schools sharing one plan
- Kits
- 50
- Kit cost in Pakistan
- PKR 1,840,000
- Also budget for
- Spares and a trained lead teacher on each campus
The totals follow the order form's own sums. For example, 13 kits at PKR 39,200 cost PKR 509,600, which is PKR 10,400 less than at the full price. The online form takes up to 200 kits for Pakistan. For more, or for a quote anywhere else, use the MakerBuddy order page, which has the class planner built in.
Two costs are easy to miss:
- Teacher time. Teachers need time to try each lesson before teaching it. Put it on the timetable.
- Power. Extra outlets are an electrician's job, and an electrician needs notice.
The lessons cost nothing. All 32 MakerBuddy lessons, the teacher notes and the 50 project ideas are free to read, with or without a kit. For funding, see where schools find STEM grants for kits and labs. Schools in Pakistan can also read setting up a STEM lab in a Pakistani school.
STEM lab design: space, layout and zones
Good STEM lab design starts with floor area per student. Then you place the tables, power and storage.
NSTA's safety advisory board gives these figures in its paper on overcrowding (opens in a new tab). They are net figures: the floor left after cupboards, furniture and equipment are taken out.
| Level | Combined classroom and lab | Pure lab room | Class size limit |
|---|---|---|---|
| Middle and high school | 60 sq ft (about 5.6 m²) per student | 50 sq ft (4.6 m²) per student | 24 |
| Elementary | 45 sq ft (about 4.2 m²) per student | 45 sq ft (about 4.2 m²) per student | 24 |
- Level
- Middle and high school
- Combined classroom and lab
- 60 sq ft (about 5.6 m²) per student
- Pure lab room
- 50 sq ft (4.6 m²) per student
- Class size limit
- 24
- Level
- Elementary
- Combined classroom and lab
- 45 sq ft (about 4.2 m²) per student
- Pure lab room
- 45 sq ft (about 4.2 m²) per student
- Class size limit
- 24
These are professional standards written for science labs. The legal limit comes from building and fire codes. NSTA's paper on STEM instructional space (opens in a new tab) notes that the International Building Code uses 20 net square feet per person for general classrooms and 50 for shops and labs. A 5 V electronics room could count as either, and your fire marshal or building authority decides. Even where the classroom figure applies, aim for NSTA's. Teams with laptops, boards and cables need elbow room.
Zones that make a lab run smoothly
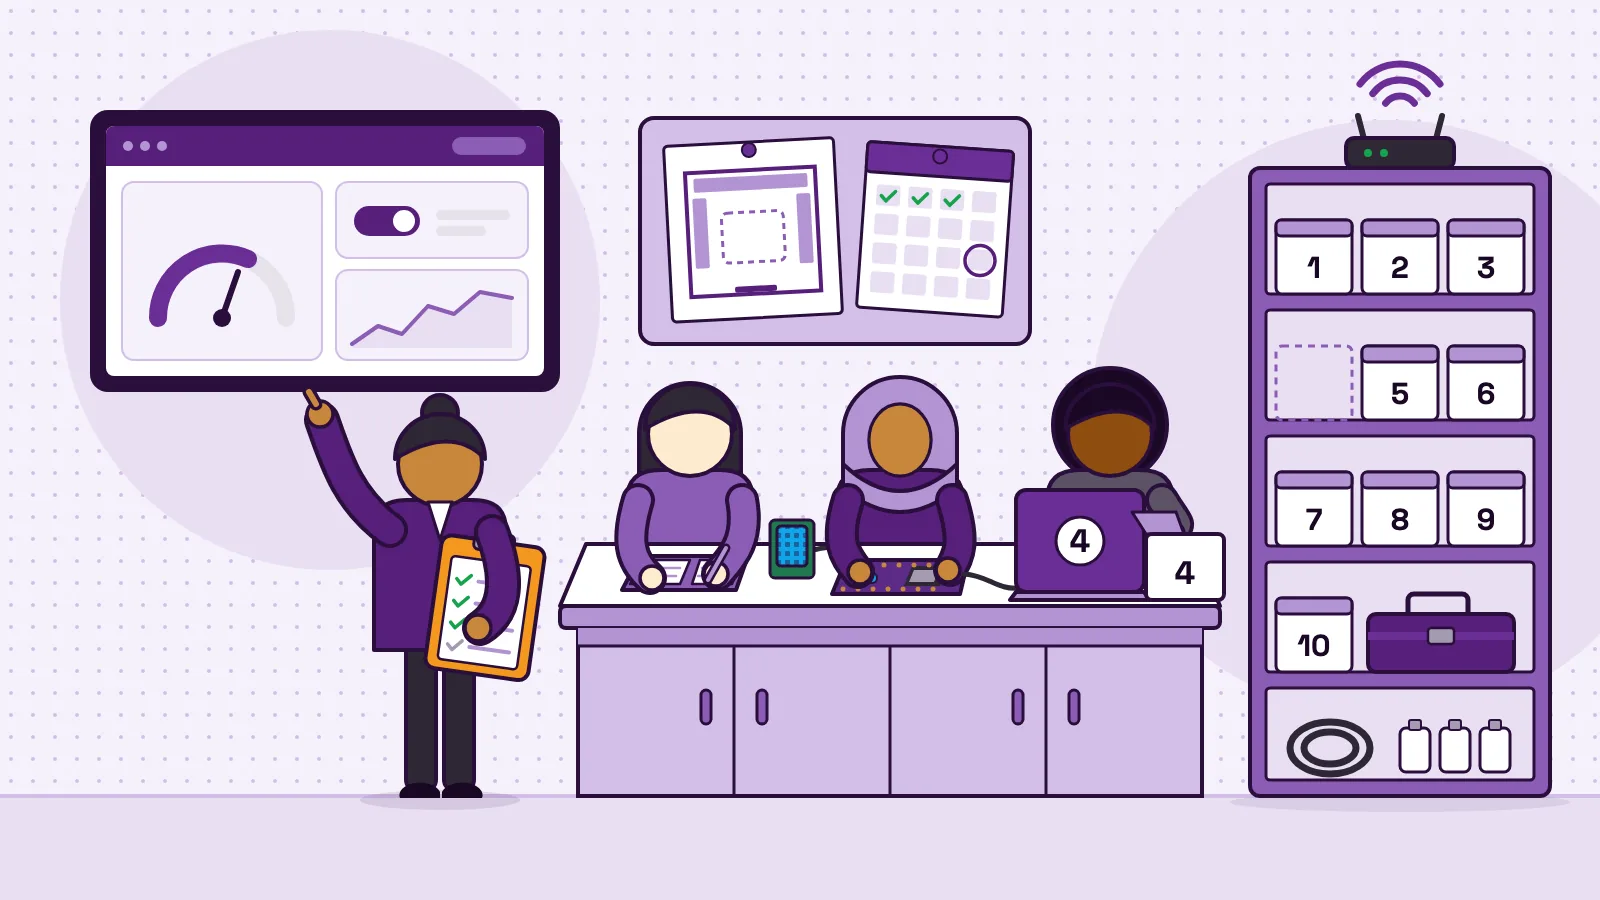
- Demo zone: the class screen, visible from every team station.
- Team stations: one per kit, with two sockets and room for a laptop.
- Storage wall: numbered boxes on open shelves that students can reach.
- Fix-it station: the spare kit, spare cables and a small screwdriver.
- Project shelf: half-finished builds, labelled with the team's name.
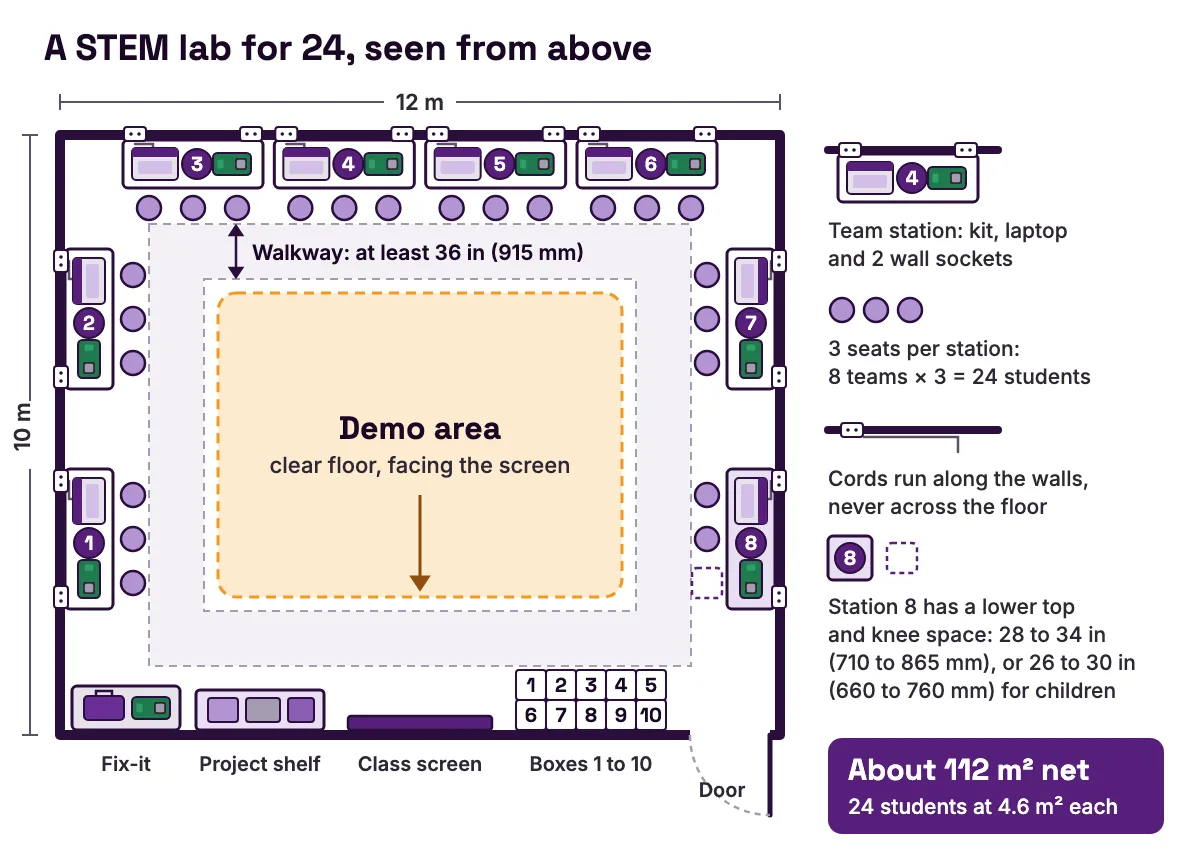
Table layouts compared
| Layout | Good for | Downside |
|---|---|---|
| Team pods (tables in clusters) | Teamwork and talk | Cords cross the floor unless you have floor sockets |
| Benches along the walls | Easy power; from the middle you see every screen | Teams turn round for demos |
| Rows facing the front | Demos and tests | Poor for teamwork and power |
- Layout
- Team pods (tables in clusters)
- Good for
- Teamwork and talk
- Downside
- Cords cross the floor unless you have floor sockets
- Layout
- Benches along the walls
- Good for
- Easy power; from the middle you see every screen
- Downside
- Teams turn round for demos
- Layout
- Rows facing the front
- Good for
- Demos and tests
- Downside
- Poor for teamwork and power
A mix often works best: benches along the walls for the kits, and a clear middle for demos. For craft and cutting zones, see makerspace ideas for schools.
Plan for every student
In the United States, the 2010 ADA Standards list student laboratory stations as work surfaces. Where work surfaces are provided for people other than employees, at least 5 percent must be accessible (opens in a new tab), and fractions round up to the next whole number (opens in a new tab). So even a lab with nine stations needs one. An accessible top is 28 to 34 inches (710 to 865 mm) high, or 26 to 30 inches (660 to 760 mm) for children's use (opens in a new tab), with knee space underneath. Walkways need a clear width of at least 36 inches (915 mm) (opens in a new tab). Schools in Canada and Pakistan should check their own codes.
Worked example: a STEM lab for a class of 24
A middle school in Pakistan wants a STEM lab for two Grade 7 classes of 24. Each class gets one lab lesson a week and follows the lessons in order. Here is the plan, with the sums shown.
- 1
Measure the room.
The spare room is 12 m by 10 m, so 120 m². Cupboards, the teacher's desk and a charging shelf take about 8 m². That leaves 112 m² of net floor space, about 1,200 square feet.
- 2
Check the space.
NSTA's overcrowding paper recommends 50 square feet (4.6 m²) per student (opens in a new tab) in a pure lab room and 60 square feet (about 5.6 m²) in a combined classroom and lab. At 4.6 m², 112 ÷ 4.6 = 24.3, so 24 students fit. At 5.6 m², 112 ÷ 5.6 = 20. So the room works for 24 only as a pure lab, with no separate rows of desks. Students sit at their team stations for demos too.
- 3
Choose the team size.
The students are new to electronics, and the teacher wants fixed jobs. Teams of 3 give 24 ÷ 3 = 8 teams, so 8 kits plus 1 spare = 9.
- 4
Decide on a tenth kit.
Nine kits cost 9 × PKR 40,000 = PKR 360,000. Ten reach the lower price: 10 × PKR 39,200 = PKR 392,000. So the tenth kit adds only PKR 32,000. The school buys 10: one spare for the fix-it box and one for the teacher's demos.
- 5
Count devices.
Eight teams need eight laptops. The school has a laptop trolley, so IT installs the free extension on each. The teacher tests each laptop with the
demodevice name, which shows sample readings without a board. - 6
Plan power.
Eight stations at two sockets each make 16, plus one for the class screen. An electrician adds 17 outlets along two walls.
- 7
Set up the network.
The school creates a 2.4 GHz network for the room that asks only for a name and a password. The boards are named
makerbuddy-01tomakerbuddy-10, and each box carries the same number. - 8
Timetable it.
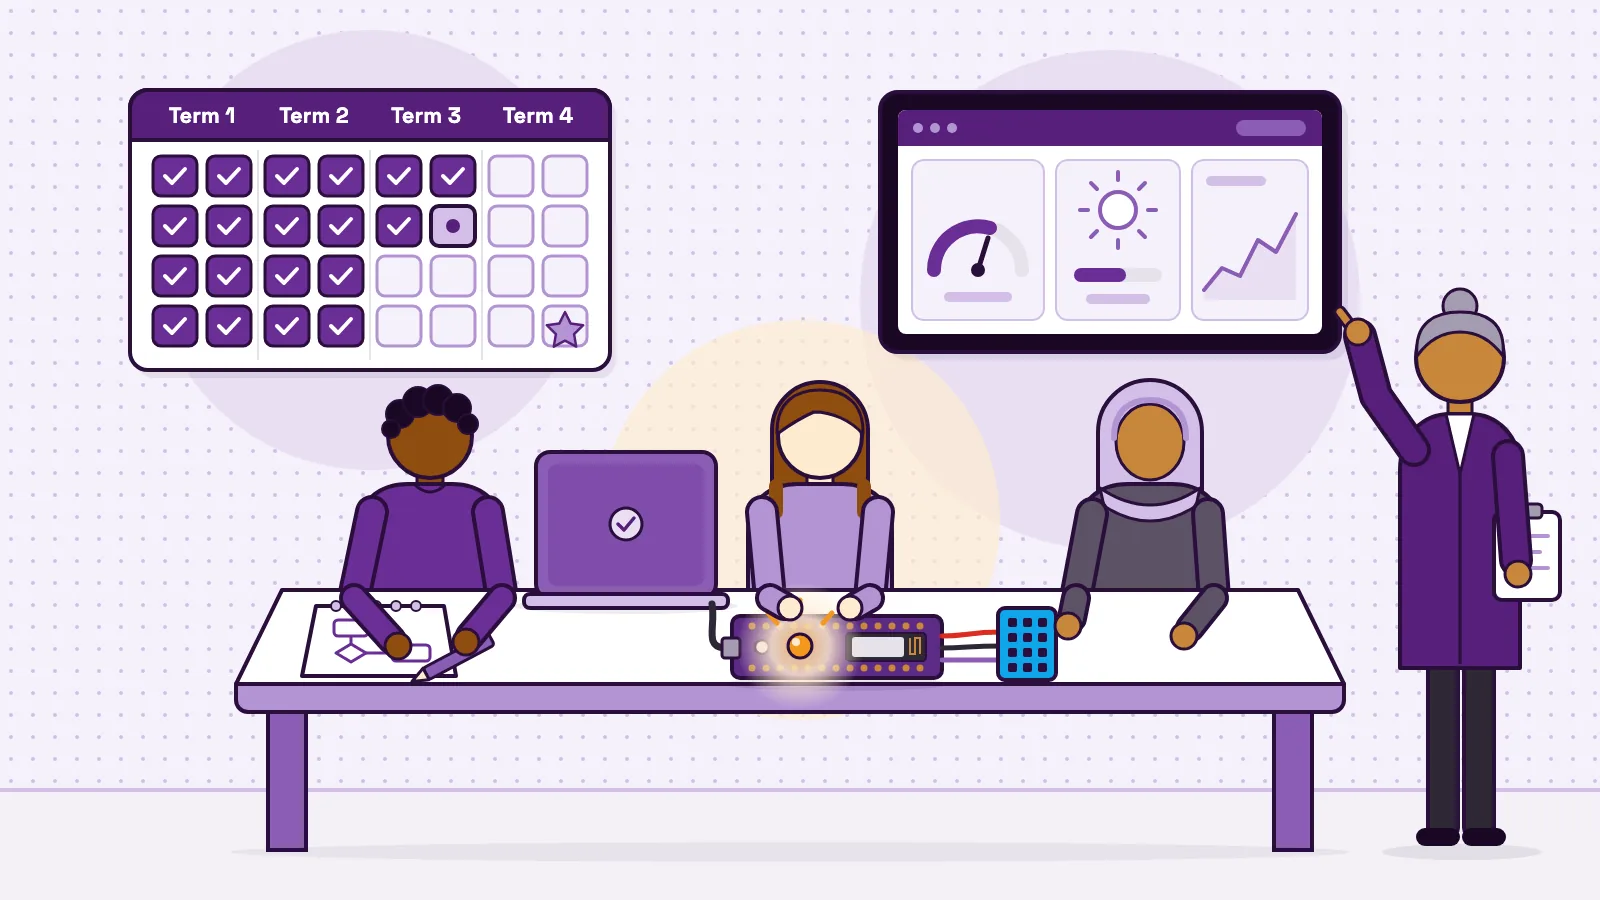
Both classes share the 10 kits on different days. The lessons run one a week across four terms, ending with the capstone project in lesson 31 and the class expo in lesson 32.
| Line | Quantity | Cost |
|---|---|---|
| MakerBuddy kits | 10 | PKR 392,000 |
| Laptops | 8 | Already owned |
| Micro-USB cables and 5 V chargers | 10 sets | Ask whether included; if not, price locally |
| Numbered storage boxes and a shelf | 10 boxes | Price locally |
| Extra sockets | 17 | Electrician's quote |
| Lessons and teacher notes | 32 | Free |
- Line
- MakerBuddy kits
- Quantity
- 10
- Cost
- PKR 392,000
- Line
- Laptops
- Quantity
- 8
- Cost
- Already owned
- Line
- Micro-USB cables and 5 V chargers
- Quantity
- 10 sets
- Cost
- Ask whether included; if not, price locally
- Line
- Numbered storage boxes and a shelf
- Quantity
- 10 boxes
- Cost
- Price locally
- Line
- Extra sockets
- Quantity
- 17
- Cost
- Electrician's quote
- Line
- Lessons and teacher notes
- Quantity
- 32
- Cost
- Free
Step 2 is the one that changes plans. In a 9 m by 10 m room with the same furniture, 82 ÷ 4.6 = 17.8, so about 17 students fit. The answer there is a smaller group per lesson, not more kits.
STEM lab setup timeline, week by week
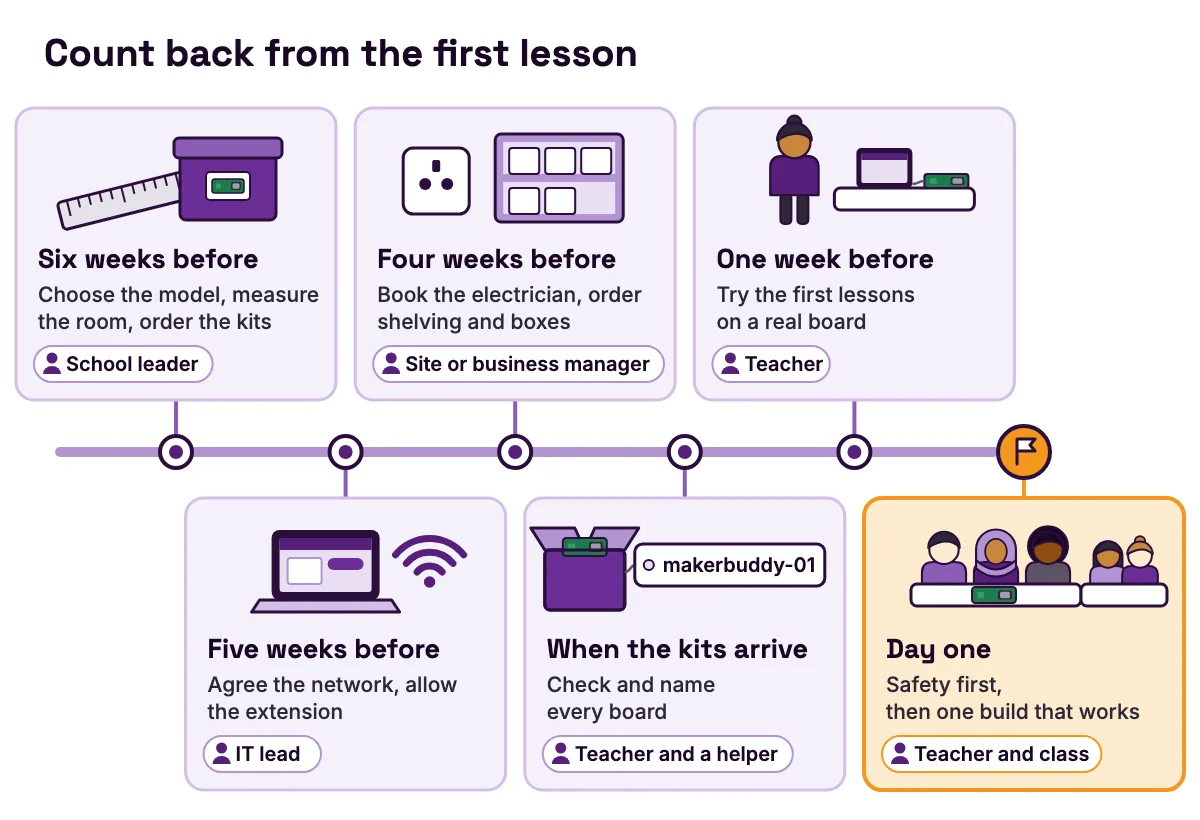
Count back from the first lesson. Order the kits as soon as the budget is approved, and get the delivery date in writing before you fix the start date.
| When | Job | Who |
|---|---|---|
| Six weeks before | Choose the model and the classes, measure the room, ask the fire marshal about its limit, order the kits | School leader |
| Five weeks before | Agree the network; allow the browser extension on school laptops | IT lead |
| Four weeks before | Book the electrician; order shelving and numbered boxes | Site or business manager |
| When the kits arrive | Check every part, set up and name each board, number boxes, stations and laptops to match | Teacher and a helper |
| One week before | Try the first lessons on a real board; run the before-class checklist | Teacher |
| Day one | Safety rules and the plug routine, then one build that works | Teacher and class |
- When
- Six weeks before
- Job
- Choose the model and the classes, measure the room, ask the fire marshal about its limit, order the kits
- Who
- School leader
- When
- Five weeks before
- Job
- Agree the network; allow the browser extension on school laptops
- Who
- IT lead
- When
- Four weeks before
- Job
- Book the electrician; order shelving and numbered boxes
- Who
- Site or business manager
- When
- When the kits arrive
- Job
- Check every part, set up and name each board, number boxes, stations and laptops to match
- Who
- Teacher and a helper
- When
- One week before
- Job
- Try the first lessons on a real board; run the before-class checklist
- Who
- Teacher
- When
- Day one
- Job
- Safety rules and the plug routine, then one build that works
- Who
- Teacher and class
Wi-Fi
The board's ESP32 chip has 802.11 b/g/n Wi-Fi in the 2.4 GHz band (opens in a new tab), according to Espressif's datasheet. So the room needs a 2.4 GHz network that asks only for a network name and a password. A sign-in web page or a username will not work. A phone hotspot set to 2.4 GHz is a good backup.
Set up each board once and give it its own name. Lesson 3 on powering up and connectivity shows each step. A board that cannot find its old network does not go back to setup by itself. Hold its button for 10 seconds to clear the saved Wi-Fi, then set it up again. Saved rules stay.
Devices, privacy and power
On managed laptops, ask IT to allow the free MakerBuddy extension for Chrome, Edge or Firefox. Safari needs nothing. There are no student accounts, and readings stay on your own network. The web app and the Chrome and Edge extensions use Google Analytics; the Firefox extension does not.
The board's local web connection has no password, so keep the kits on a private classroom network, never reachable from the internet. The technical details page on security explains why. IoT security basics for schools covers the wider picture.
To practise without a board, type demo as the device name in the dashboard. It shows sample readings, so you can test laptops and train teachers before the kits arrive.
Each board runs on 5 V through its micro-USB port, from a laptop or a 5 V USB charger. NSTA's paper on STEM instructional space (opens in a new tab) lists ground fault (GFCI) protected outlets among the basic controls a lab needs at all times. Run cords along walls, never across walkways.
Safety rules to teach in the first lesson
The relay control lesson teaches why the relay stays on low voltage. The teachers' page has the full safety rules for the kit.
Running the lab week to week
Number everything. Board makerbuddy-04 lives in box 4, sits at station 4 and pairs with laptop 4. When something goes wrong, you know which kit and which team.
Check kits back in. At the end of each lesson, one student per team counts the parts back into the box. The makerspace page has a kit check-in sheet you can reuse.
Clear the last class's rules. Each board keeps up to 10 rules, even when unplugged, and runs them again at power-on. Before the next class, delete the last group's rules in the dashboard. Holding the button does not clear them.
Keep lesson boards on the MakerBuddy firmware. Uploading your own Arduino code replaces the MakerBuddy firmware until someone uploads it again. Set aside one or two boards for code, and use the documentation on updating the firmware to put them back.
Try each lesson first. The teachers' page has a before-class checklist for Wi-Fi, power and parts.
Swap cables first. When a sensor stops reading, a worn cable is the first thing to change.
Good STEM lab activities for middle school
Good first activities for middle schoolers use one sensor and one output, and start with a question. These come from the MakerBuddy lessons and project ideas. None of them needs code.
| Activity | Parts | The question students answer | Lesson |
|---|---|---|---|
| Smart night light | Light sensor, blue light | At what light level should it switch on, and is that the same in every room? | Light sensing |
| Room thermometer | Temperature and humidity sensor | How does the room temperature change across a school day? | Atmospheric sensing |
| Insulation tester | Waterproof temperature probe | Which wrapping keeps a cup of warm water warm longest? | Precision temperature |
| Distance warning | Distance sensor, buzzer | How close is too close, and what does the sensor miss? | Distance and echolocation |
| Plant thirst tracker | Soil moisture sensor, light, buzzer | When does a plant really need water? | Smart agriculture |
| Garage park assist | Distance sensor, colour light | How do you turn one distance into green, yellow and red? | Range logic |
- Activity
- Smart night light
- Parts
- Light sensor, blue light
- The question students answer
- At what light level should it switch on, and is that the same in every room?
- Lesson
- Light sensing
- Activity
- Room thermometer
- Parts
- Temperature and humidity sensor
- The question students answer
- How does the room temperature change across a school day?
- Lesson
- Atmospheric sensing
- Activity
- Insulation tester
- Parts
- Waterproof temperature probe
- The question students answer
- Which wrapping keeps a cup of warm water warm longest?
- Lesson
- Precision temperature
- Activity
- Distance warning
- Parts
- Distance sensor, buzzer
- The question students answer
- How close is too close, and what does the sensor miss?
- Activity
- Plant thirst tracker
- Parts
- Soil moisture sensor, light, buzzer
- The question students answer
- When does a plant really need water?
- Lesson
- Smart agriculture
- Activity
- Garage park assist
- Parts
- Distance sensor, colour light
- The question students answer
- How do you turn one distance into green, yellow and red?
- Lesson
- Range logic
The MakerBuddy curriculum puts all 32 lessons in order across four terms, and the curriculum guide for a full school year shows how to fit them into a timetable. For more builds sorted by sensor, see ESP32 project ideas for students. More guides for schools are on the MakerBuddy blog.
Common mistakes when setting up a STEM lab
| Symptom | Cause | Fix |
|---|---|---|
| The first lesson is spent on Wi-Fi | The network uses a sign-in page or is 5 GHz only | A 2.4 GHz network that asks only for a name and password, tested a week before |
| Laptops show an install screen | Managed browsers block the extension | Ask IT to allow the MakerBuddy extension |
| One student does everything | Teams of four or more | Teams of 2 or 3, with jobs that rotate |
| Parts go missing | No check-in routine | A numbered box per kit and a parts count each lesson |
| A class finds old rules still running | Rules are saved on the board | Delete them in the dashboard between classes |
| A board moved to a new room will not connect | It still looks for the old network | Hold its button for 10 seconds and set it up again |
| The room feels crowded at 24 | Space was worked out from the gross area | Measure the net area, after furniture |
- Symptom
- The first lesson is spent on Wi-Fi
- Cause
- The network uses a sign-in page or is 5 GHz only
- Fix
- A 2.4 GHz network that asks only for a name and password, tested a week before
- Symptom
- Laptops show an install screen
- Cause
- Managed browsers block the extension
- Fix
- Ask IT to allow the MakerBuddy extension
- Symptom
- One student does everything
- Cause
- Teams of four or more
- Fix
- Teams of 2 or 3, with jobs that rotate
- Symptom
- Parts go missing
- Cause
- No check-in routine
- Fix
- A numbered box per kit and a parts count each lesson
- Symptom
- A class finds old rules still running
- Cause
- Rules are saved on the board
- Fix
- Delete them in the dashboard between classes
- Symptom
- A board moved to a new room will not connect
- Cause
- It still looks for the old network
- Fix
- Hold its button for 10 seconds and set it up again
- Symptom
- The room feels crowded at 24
- Cause
- Space was worked out from the gross area
- Fix
- Measure the net area, after furniture
FAQ
What is a STEM lab?
A STEM lab is a space where students learn science, technology, engineering and maths by building and testing things. In a school, that means team tables, reusable kits, a device per team and storage for projects.
How much does a STEM lab cost?
It depends on what you already own. The new costs are usually the kits, plus any devices, sockets and storage you lack. In Pakistan, a class of 24 in teams of 3 needs 9 MakerBuddy kits for PKR 360,000, or 10 at the lower price for PKR 392,000. Outside Pakistan, ask for a written quote.
What are the requirements for a STEM lab?
Enough floor space, supervision, power and a network. NSTA says more than 24 students doing science activities is too many for one teacher (opens in a new tab), and recommends 50 to 60 square feet per secondary student (opens in a new tab). An electronics lab also needs 2.4 GHz Wi-Fi, USB power for each board and numbered storage.
What are some good STEM labs for middle schoolers?
Good middle school STEM lab activities pair one sensor with one output and start with a question. A smart night light, an insulation tester, a distance warning and a plant thirst tracker all fit. None needs code on the MakerBuddy kit.
How big should a STEM lab be?
For 24 secondary students, NSTA's space figures (opens in a new tab) work out to about 1,200 square feet (about 111 m²) of net floor space for a pure lab, or 1,440 square feet (about 134 m²) for a combined classroom and lab. Your fire marshal or building authority sets the legal limit.
Can you set up a STEM lab without a spare room?
Yes. A mobile cart with kits, chargers and laptops can serve several classrooms, as long as each room has the same Wi-Fi and enough sockets. You can start this way and move into a room once the timetable fills.
Do teachers need to know coding to run a STEM lab?
No. All 32 MakerBuddy lessons use the dashboard and rules built from menus, so nobody writes code. Coding is an optional extra for keen students later.
Sources
- NSTA: Safety and School Science Instruction (position statement, revised April 2024) (opens in a new tab)
- NSTA Safety Advisory Board: Overcrowding in the Instructional Space (revised April 2020) (opens in a new tab)
- NSTA Safety Issue Paper: Science/STEM Instructional Space Requirements (opens in a new tab)
- U.S. Access Board: 2010 ADA Standards, 226 Dining Surfaces and Work Surfaces (opens in a new tab)
- U.S. Access Board: 2010 ADA Standards, 902 Dining Surfaces and Work Surfaces (opens in a new tab)
- U.S. Access Board: 2010 ADA Standards, 403 Walking Surfaces (opens in a new tab)
- U.S. Access Board: 2010 ADA Standards, 104 Conventions (opens in a new tab)
- Espressif: ESP32 Series Datasheet (opens in a new tab)