
Time-Based Automation
Learning Objective
Open Term 4 by learning the Timer mode. Schedule a rule to repeat at a chosen interval, and understand the difference between a step delay and a loop interval.
Theory: Controlling Time
What We Know So Far
In Term 3 you learned to make the MakerBuddy do something once (No Loop) and constantly (Forever). Both are useful, but both are extremes. Most real automation lives in between.
Think about a smart farm that waters its plants. It cannot water them just once — the plants would die next week. It cannot water them constantly — they would drown. It needs to water them on a schedule: a burst of water, then a long wait, then another burst.
That is exactly what Timer mode does.
How Timer Mode Works
A Timer rule runs all of its steps, then parks and waits for the interval you chose. When the wait is over, it runs the whole sequence again from step 1. And it keeps doing that indefinitely.
Setting the Interval
When you select the ⏱️ Timer loop mode, a new panel appears with three boxes:
0 to 999
0 to 59
0 to 59
The three boxes are added together to make one interval. So 0 h : 1 m : 30 s means "wait one and a half minutes". The form starts with 5 minutes filled in, so always check the boxes before you save.
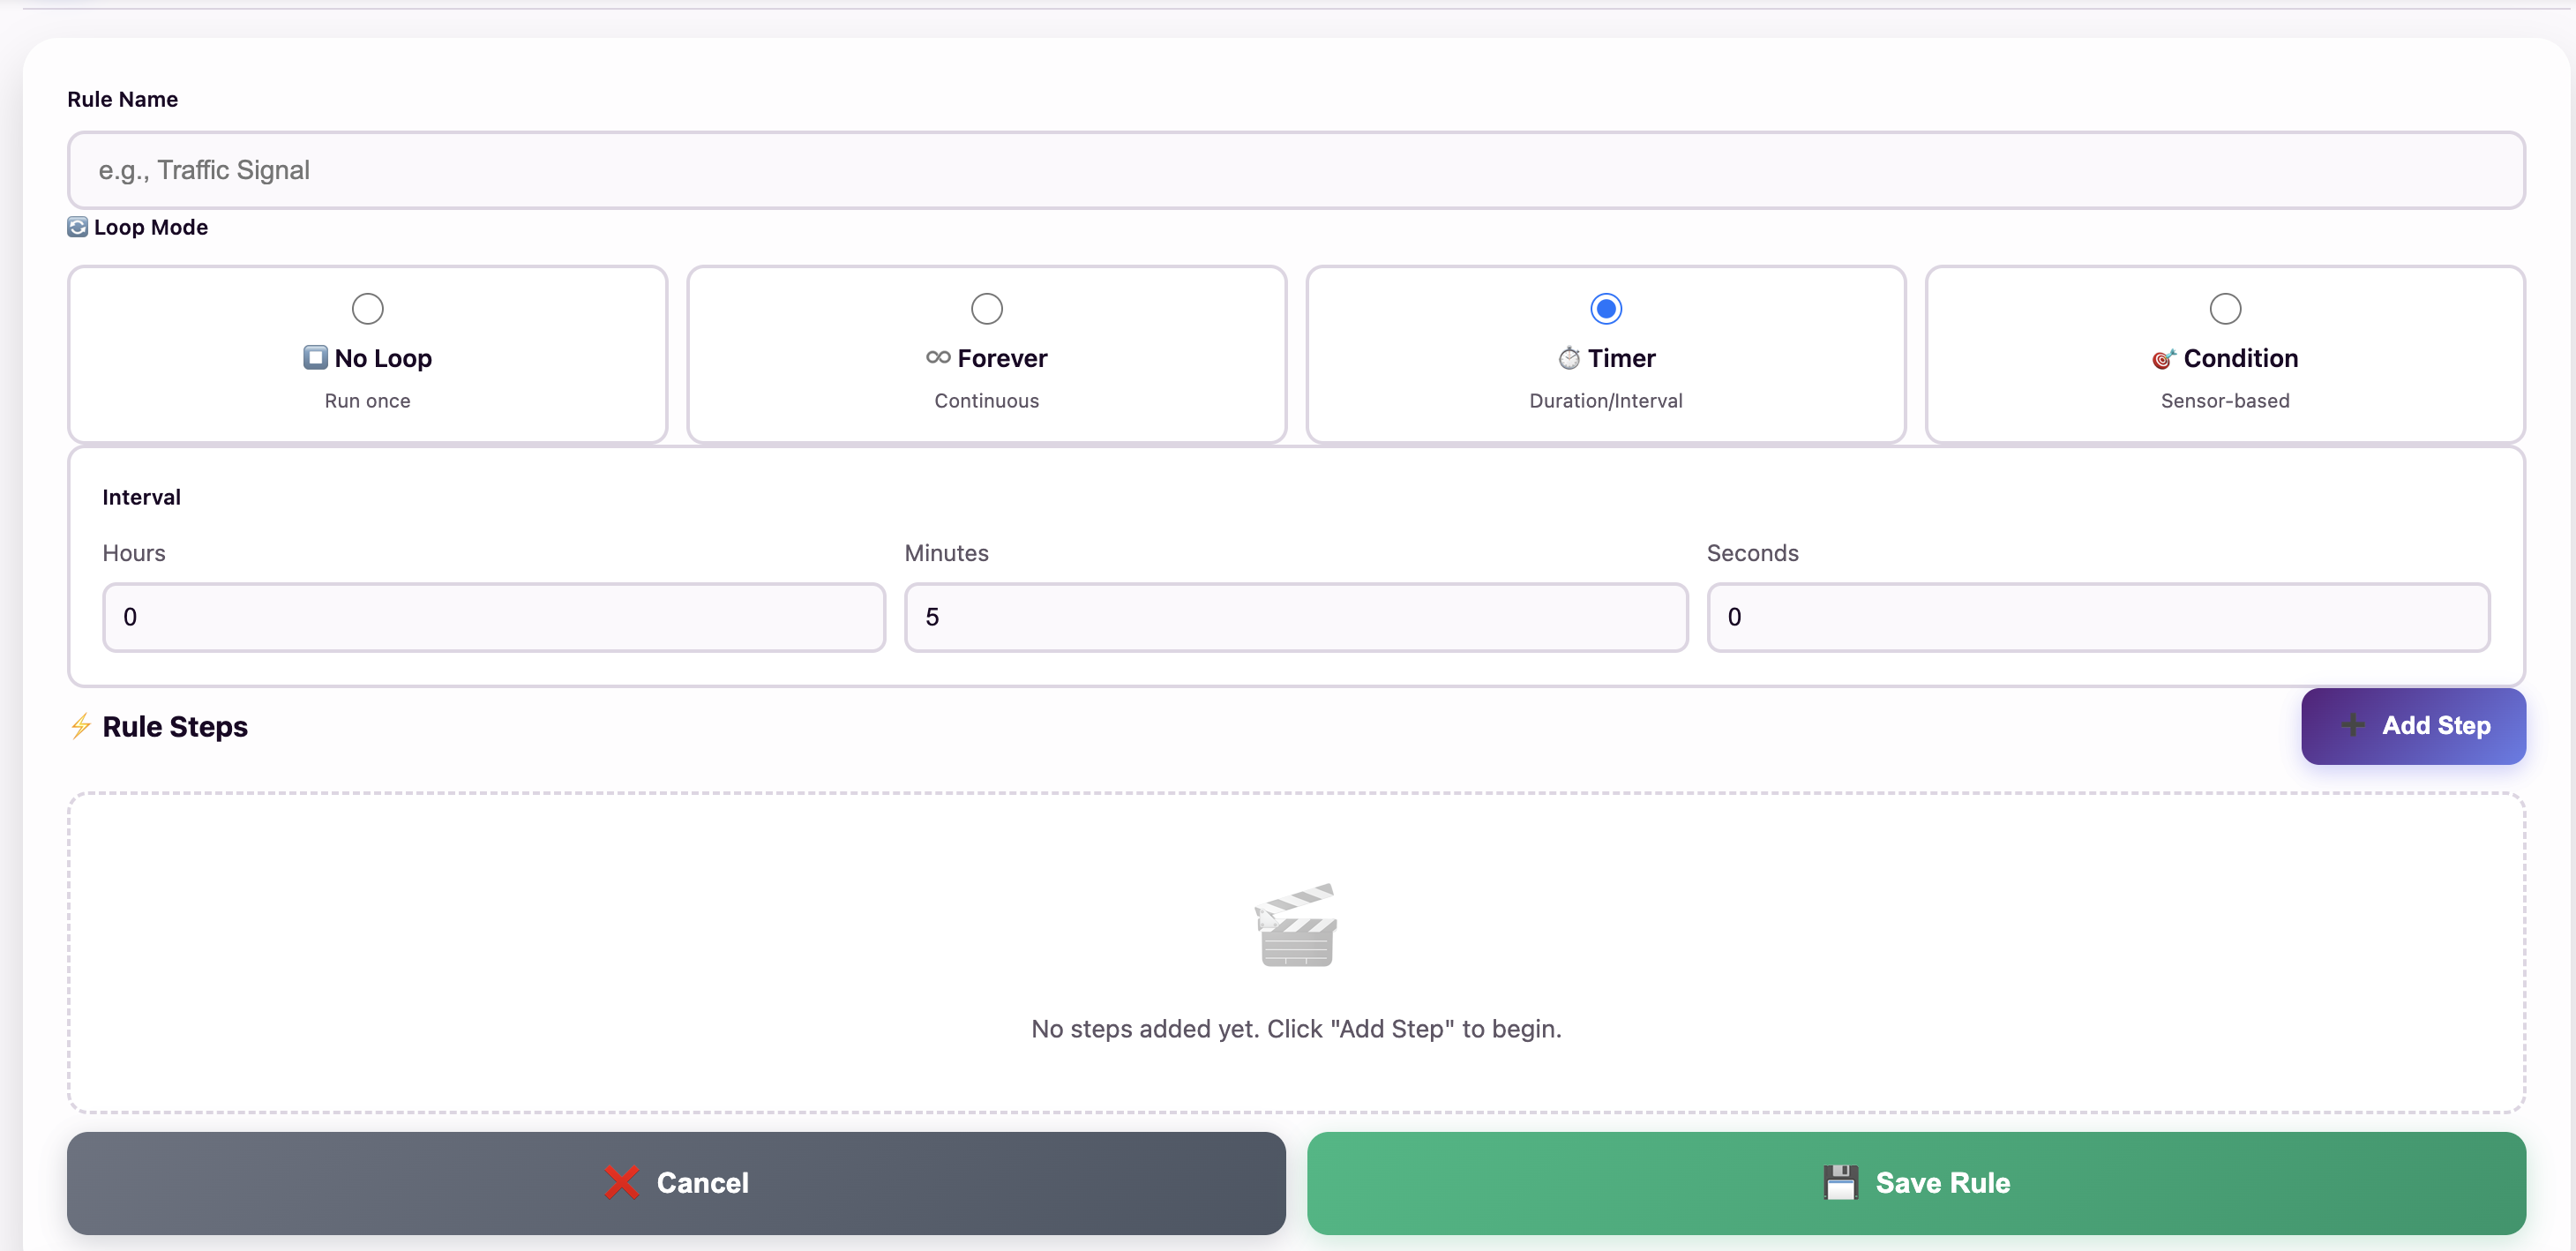
The Timer panel — set the interval using the Hours, Minutes and Seconds boxes.
Delay vs. Interval — Don't Mix Them Up
This is the trickiest idea of the lesson, because a Timer rule contains two different kinds of waiting:
| Step Delay | Loop Interval | |
|---|---|---|
| Where you set it | Inside each step | In the Timer panel at the top |
| Units | Milliseconds (minimum 100) | Hours, minutes and seconds |
| What it controls | The gap between steps — how long an action lasts | The gap between whole runs — how often the rule repeats |
| Example | Buzzer On, delay 200 → a 0.2 second chirp | Interval 0:00:30 → chirp again in 30 seconds |
Put simply: delays shape the action, the interval shapes the schedule.
Timer Beats Forever
Remember the priority order — Timer sits above Forever:
There is a neat consequence of this. While a Timer rule is parked and waiting for its next run, it is not using any component — so it releases them. A lower-priority Forever rule can control the LED during the gap, and the Timer rule takes it back for the moment it needs it. Sharing a component like this only works because one rule spends most of its time waiting.
For Teachers
Time-based logic underpins an enormous amount of the built environment: school bells, traffic lights, street lighting, sprinkler systems, medication reminders, factory shift buzzers. Ask students to audit the building for timed systems and estimate each interval. The delay-vs-interval distinction is the concept most worth drilling — a quick whiteboard exercise where students label which of the two they would change to make a beep longer versus more frequent exposes the misunderstanding immediately.
Real-World Applications
Water a field for 10 minutes every 12 hours, all summer, with nobody present.
Weather stations record a reading every 15 minutes — often enough to see a trend, rare enough to save power.
School bells, medication alerts and break reminders are all interval rules.
Notice what these have in common: the job is not urgent, and doing it constantly would waste water, power or everyone's patience. Choosing the right interval is an engineering decision with real consequences.
Activity: The Slow Blinker
Let's build a hazard light that flashes briefly, then goes quiet for a while — like a roadworks beacon conserving its battery.
Step-by-Step Instructions:
- Open the Rule Engine and add a new rule named HazardLight.
- Loop Mode: choose ⏱️ Timer. The interval panel appears.
- Set the interval: Hours → 0, Minutes → 0, Seconds → 10.
- Step 1: Action → LED On, Value → 255, Delay → 1000.
- Add Step 2: Action → LED Off, Delay → 100.
- Save and watch carefully with a clock.
What you should see: the LED turns on immediately, stays on for 1 second, switches off — and then nothing happens for 10 seconds. Then the whole thing repeats. The 1000 ms delay made the flash long; the 10 second interval made the flashes rare.
Now Experiment:
- Change Step 1's delay to 3000. Does the light flash longer or more often?
- Put the delay back to 1000, and change the interval to 0 : 0 : 3. Now which one changed?
- Set the interval to 0 : 1 : 0. Predict when the next flash will be, then check with a clock.
Troubleshooting: if Save does nothing and a step field turns red, your delay is below the 100 ms minimum. If the light seems to never come back, check you have not left 5 in the Minutes box — that is the default value.
Challenge: The Metronome & The Plant Waterer
Challenge 1: Keep the Beat
A metronome is a device musicians use to keep a steady rhythm. Turn your MakerBuddy into one.
- Create a Timer rule named Metronome. Set the interval to 0 h : 0 m : 1 s.
- Step 1: Action → Buzzer On, Delay → 100 (a short click).
- Step 2: Action → Buzzer Off, Delay → 100.
- Save it, then try clapping along with the beat. 🎵
Challenge 2: The Automatic Plant Waterer
Build a watering system for a greenhouse. The pump is represented by the relay, and a green RGB light shows the system is armed.
- Create a Timer rule named WaterPlant with an interval of 0 h : 1 m : 0 s.
- Step 1: Action → RGB Green, Delay → 100.
- Step 2: Action → Relay On, Delay → 2000 (the pump runs for 2 seconds).
- Step 3: Action → Relay Off, Delay → 100.
- Step 4: Action → RGB Off, Delay → 100.
- Save and listen for the relay clicking once a minute.
Key Takeaways
✓ Timer runs on a schedule
All steps run, then the rule waits for the interval before repeating.
✓ The interval is H : M : S
Three boxes added together — not milliseconds. The default is 5 minutes.
✓ Delay ≠ interval
Delays decide how long an action lasts; the interval decides how often it repeats.
✓ A parked rule shares nicely
While waiting, a Timer rule releases its components for other rules to use.
Coming Up Next Week:
Week 26: Sensor-Based Control — Condition Loops — the final Loop Mode, where your MakerBuddy finally reacts to the real world.