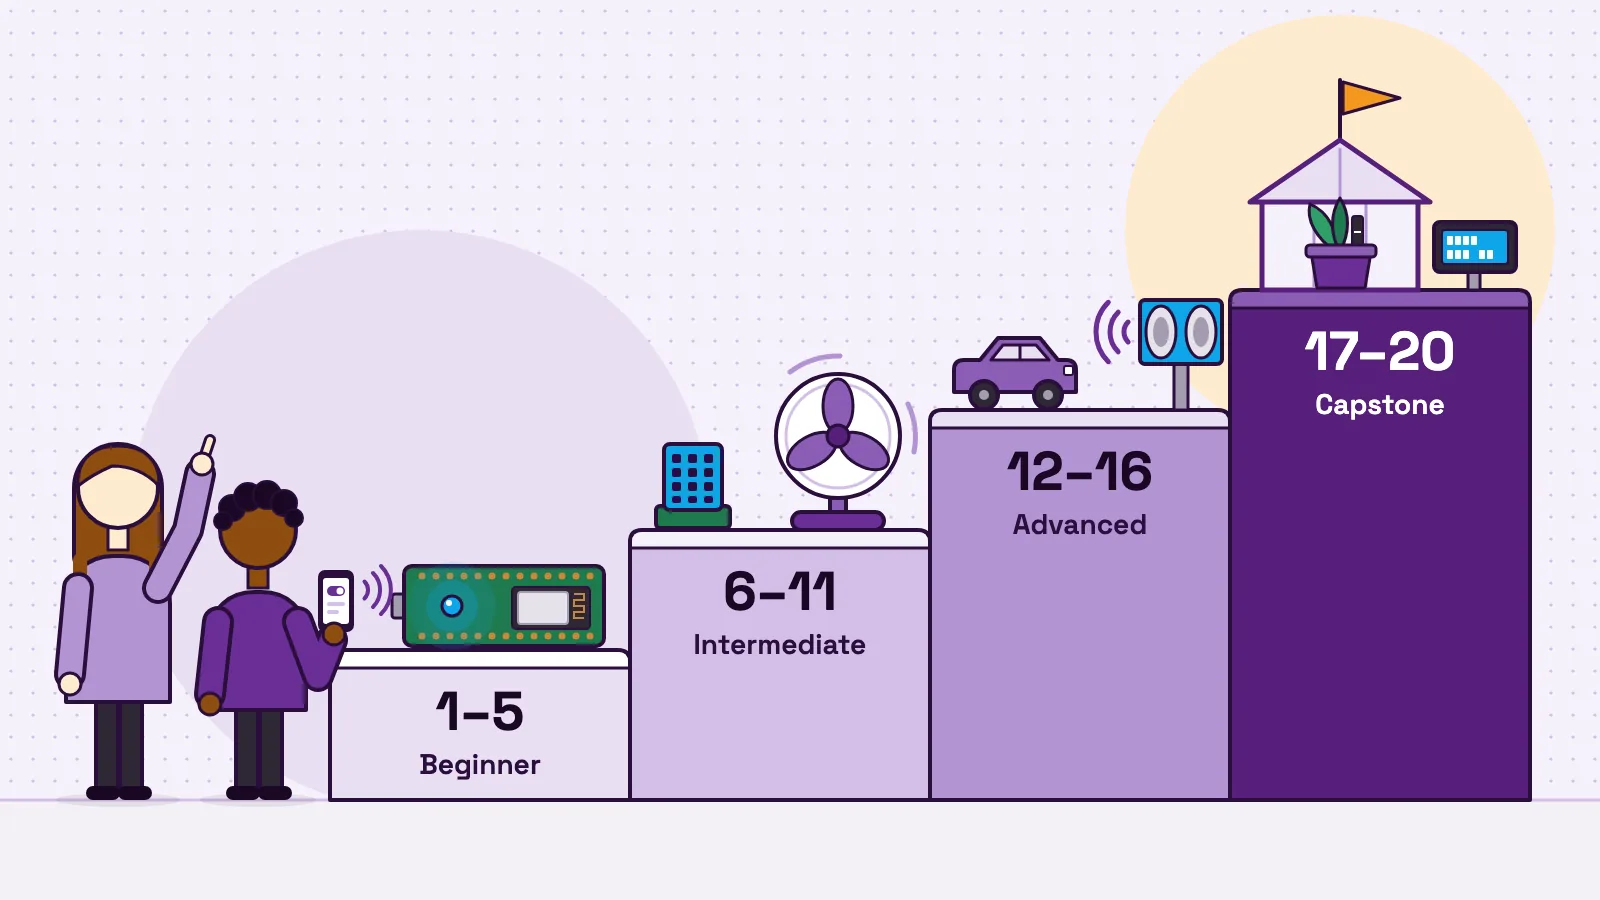
Good IoT projects for students do three things. A sensor measures something, the reading travels over Wi-Fi, and something reacts, on the board or on a phone. Below are 20 IoT project ideas in the order a class can build them, from switching a light from a phone to a capstone that runs four rules at once. Each one lists its difficulty, its parts and the lesson that teaches it.
All 20 run on the MakerBuddy IoT Kit, an ESP32 board with labelled sockets for its sensors. Eighteen need no code; projects 15 and 16 need a short laptop program. On a bare ESP32 and a breadboard, every one needs your own code.
The 20 IoT projects at a glance
- 1
Phone light switch
Beginner. Blue light. Lessons 3 and 4.
- 2
Remote colour mixer
Beginner. Colour light. Lesson 5.
- 3
Mini weather station
Beginner. DHT11 temperature and humidity sensor. Lesson 10.
- 4
Classroom data diary
Beginner. DHT11 and other sensors. Lesson 16.
- 5
Room watcher (learning model)
Beginner. DHT11 and motion sensor. Lessons 10 and 13.
- 6
Smart night light
Intermediate. Light sensor and blue light. Lessons 7 and 26.
- 7
Motion alarm
Intermediate. Motion sensor, buzzer and blue light. Lessons 13 and 26.
- 8
Plant thirst tracker
Intermediate. Soil sensor, blue light and buzzer. Lessons 18 and 26.
- 9
Auto-fan
Intermediate. DHT11, relay and a small fan. Lessons 15 and 26.
- 10
Pet feeder
Intermediate. Servo motor. Lessons 14 and 25.
- 11
Privacy status sign
Intermediate. Colour light and text screen. Lessons 19 and 22.
- 12
Garage park assist
Advanced. Distance sensor and colour light. Lessons 12 and 27.
- 13
Gas traffic light (learning model)
Advanced. MQ-2 gas sensor and colour light. Lessons 17 and 28.
- 14
Garden auto-waterer
Advanced. Soil sensor, relay and a small pump (not in the kit). Lessons 18 and 26.
- 15
Motion email alert
Advanced, needs code. Motion sensor and a laptop. Lesson 13.
- 16
Laptop data logger
Advanced, needs code. Any sensors and a laptop with Python. Lesson 16.
- 17
Shadow alarm
Capstone. Light and motion sensors, buzzer, screen. Lessons 27 and 31.
- 18
Smart parking gate
Capstone. Distance sensor, servo and colour light. Lessons 29 and 30.
- 19
Smart greenhouse
Capstone. Soil sensor, DHT11, relay, pump, screen. Lessons 27 and 31.
- 20
Classroom comfort station
Capstone. DHT11, relay, fan, lights, screen. Lessons 31 and 32.
Most also sit in the MakerBuddy project idea library, which filters ideas by part.
What makes a project an IoT project
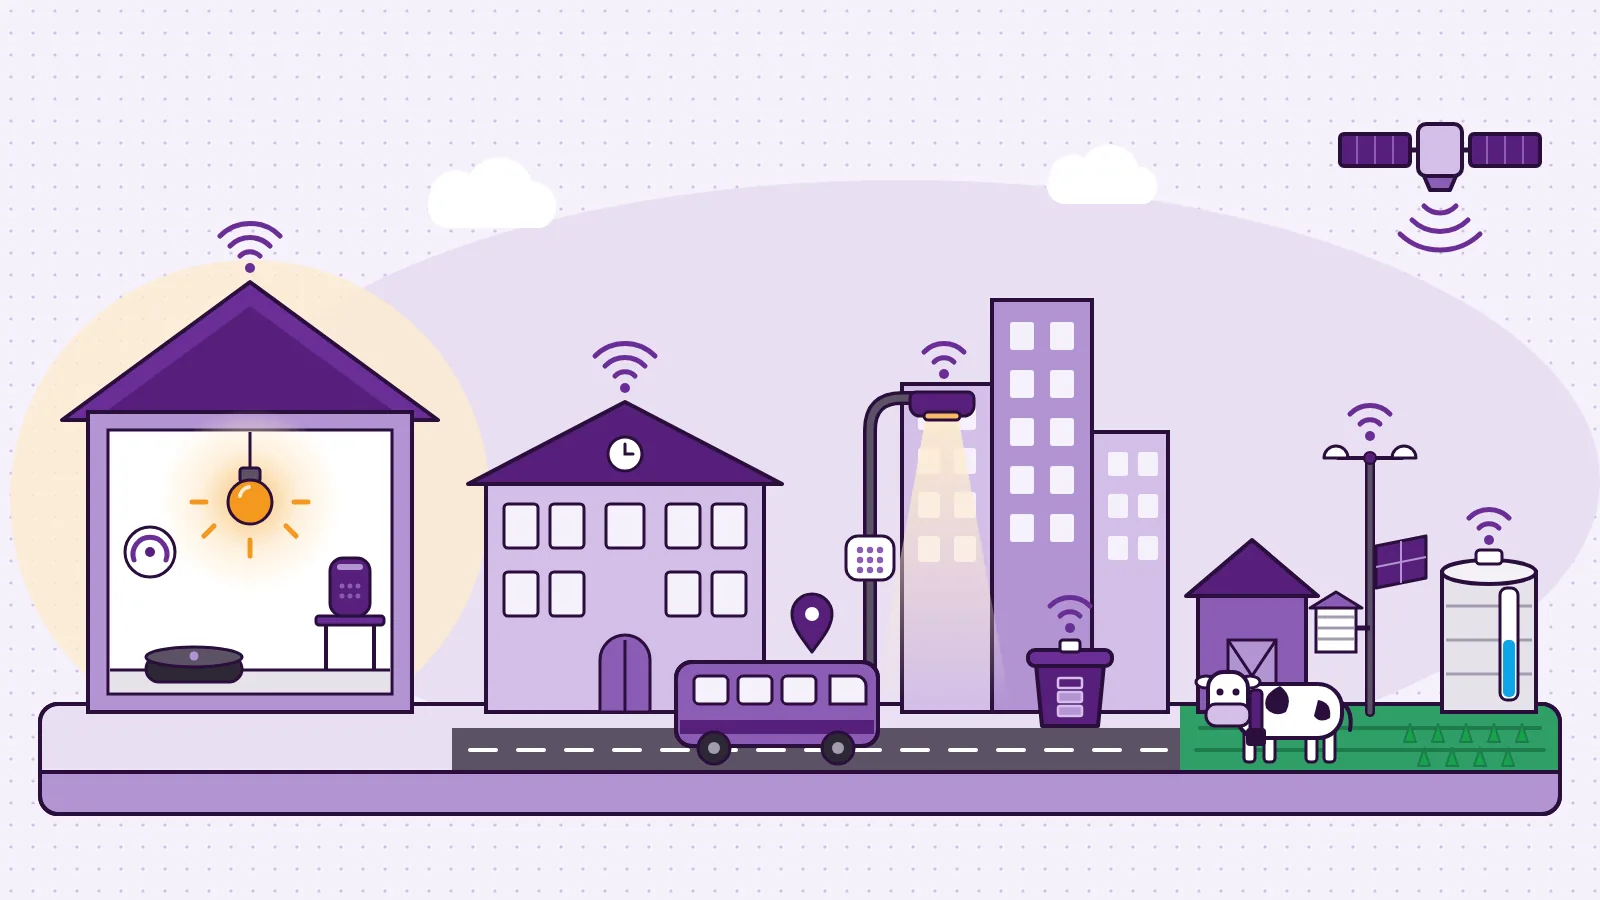
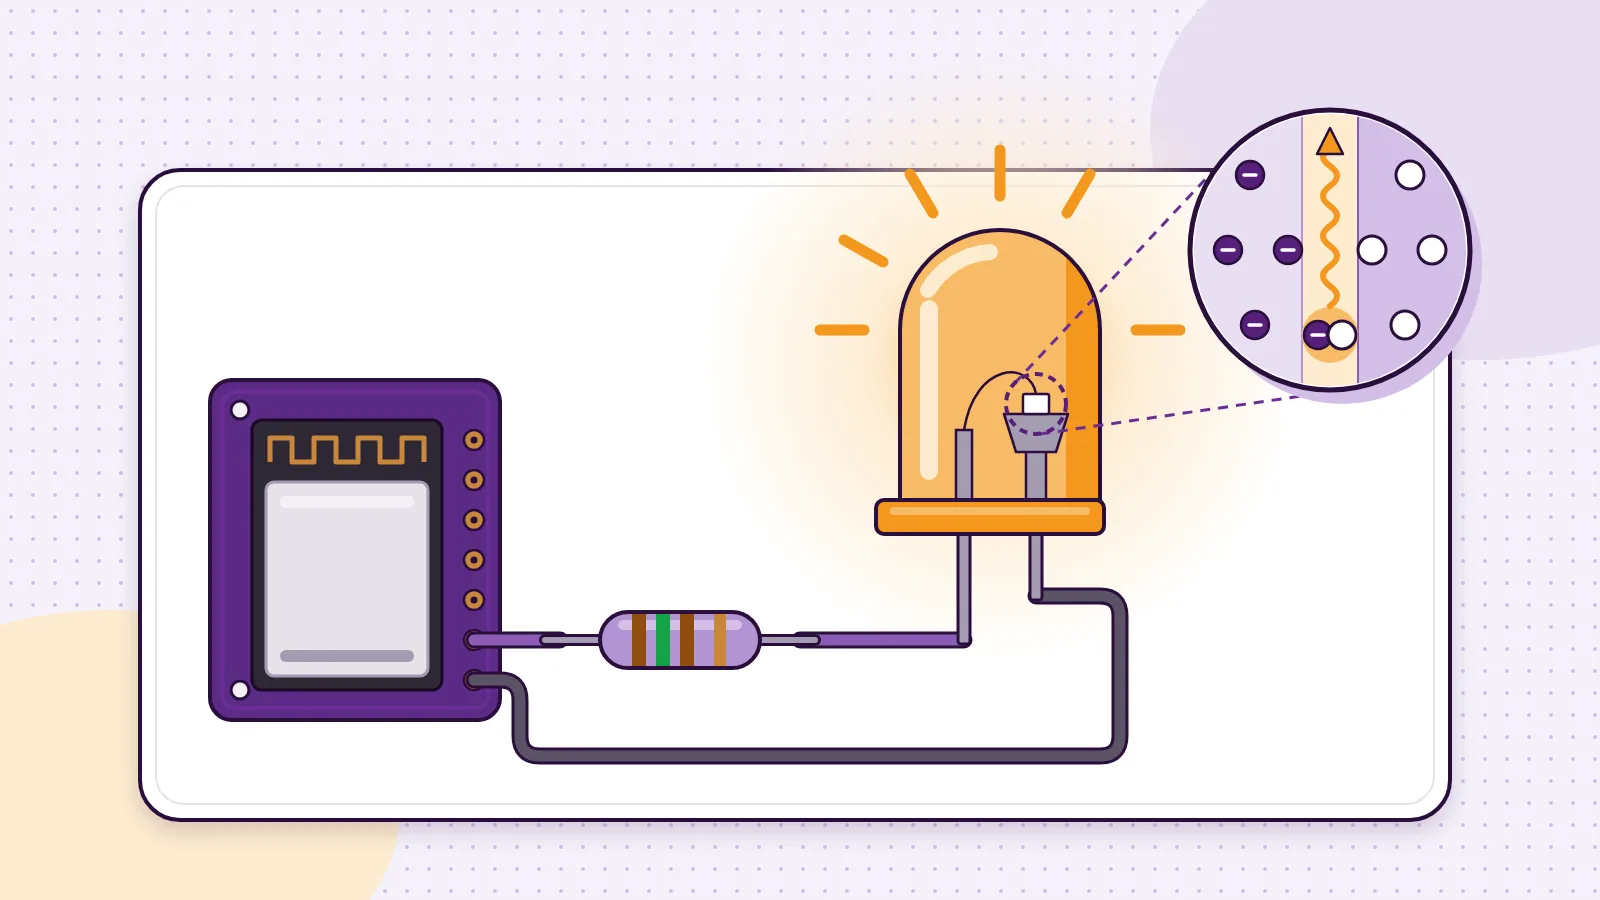
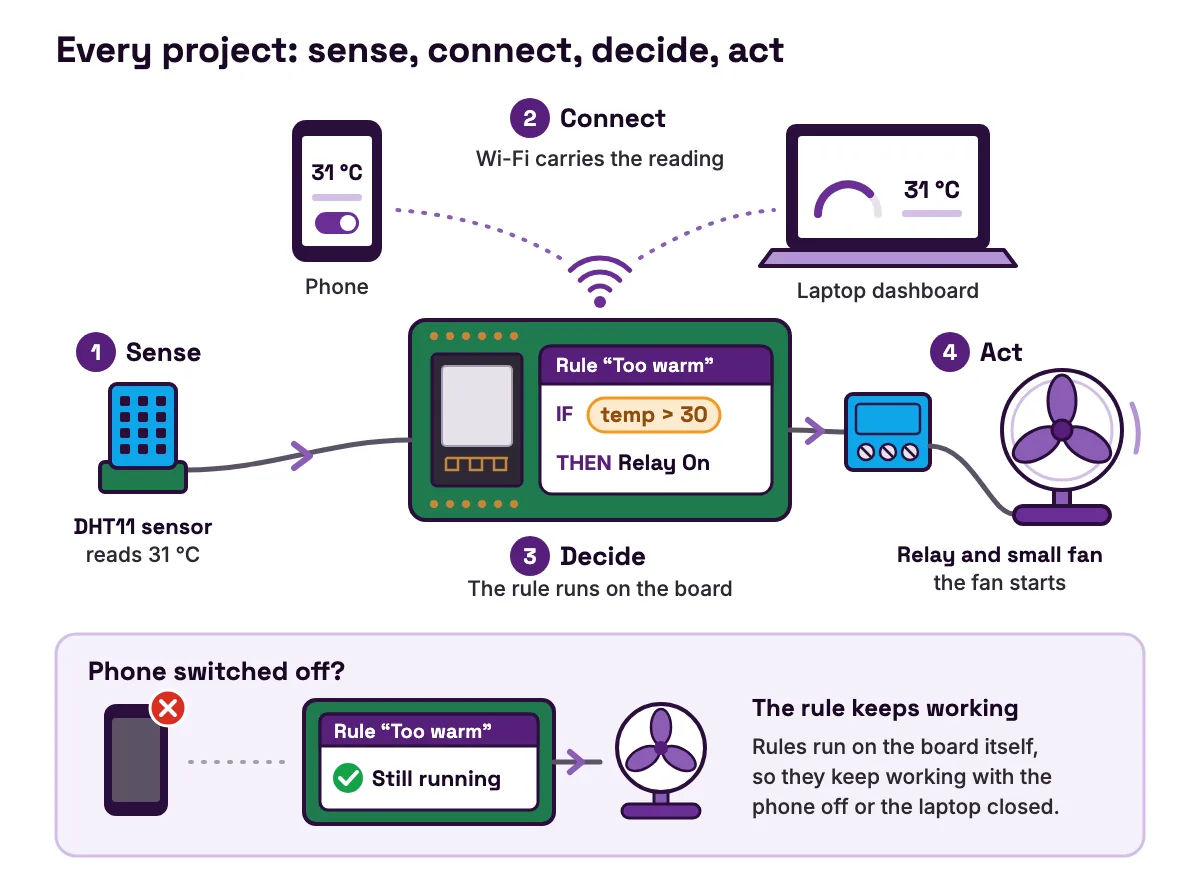
A project is IoT when its readings or controls travel over a network. A thermometer with its own screen is electronics. Read it on a phone across the room and it becomes IoT. Every project here has four parts:
- Sense. A sensor turns light, heat or movement into a number.
- Connect. The board sends that number over Wi-Fi. The ESP32 has 802.11 b/g/n Wi-Fi in the 2.4 GHz band built into the chip (opens in a new tab).
- Decide. A rule compares the number with a level you chose. On the MakerBuddy board, rules run on the board itself, so they keep working when the phone is off.
- Act. An output lights, beeps, moves or shows text.
The board works on your own Wi-Fi with no accounts. Its web connection has no password, so use only Wi-Fi you trust and never open it to the internet. For 25 real devices built from these four parts, read IoT examples: 25 everyday connected devices and how they work.
How the four difficulty levels work
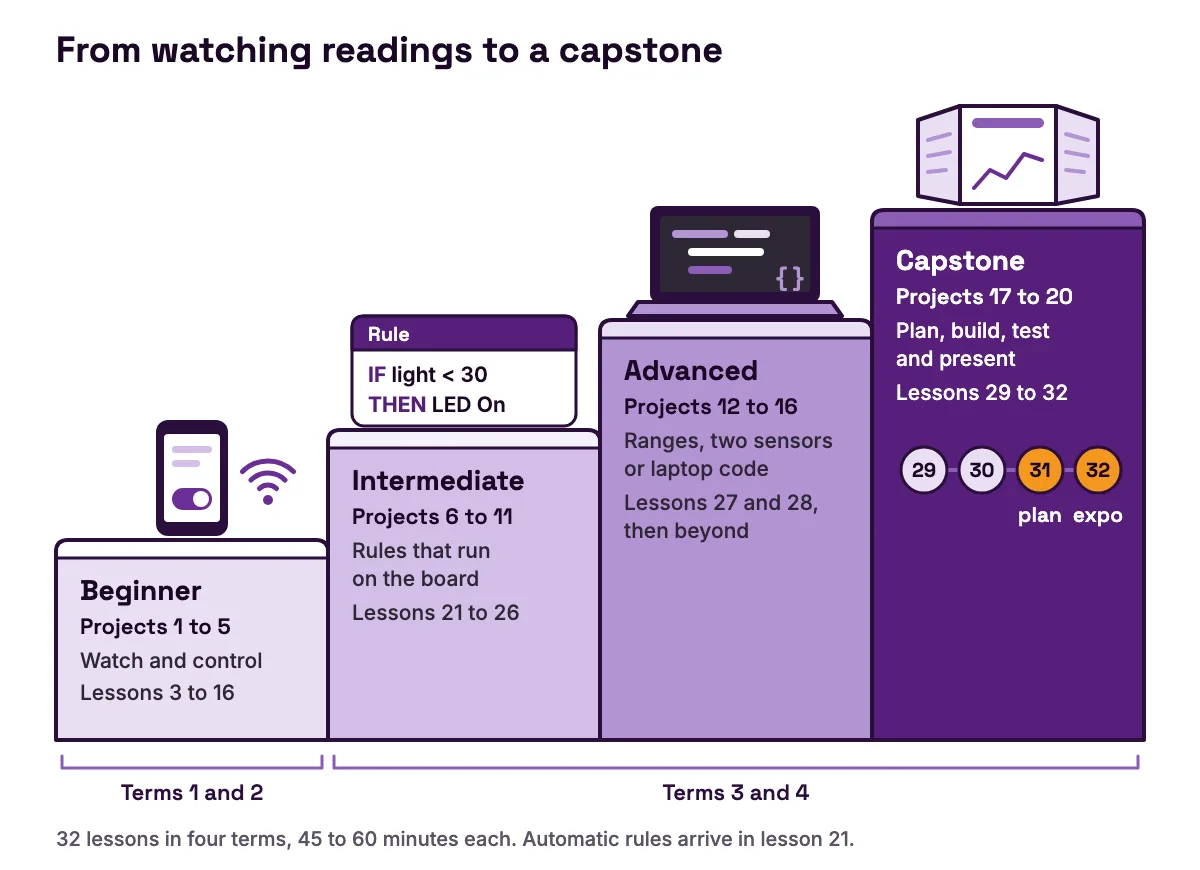
The level tells you what kind of thinking a project needs, not how impressive it looks.
| Level | Projects | What you do | Lessons | Rough time, first build |
|---|---|---|---|---|
| Beginner | 1 to 5 | Watch live readings and switch outputs from a phone or laptop | 3 to 16 | 15 to 45 minutes |
| Intermediate | 6 to 11 | Write one or two rules that run on the board by themselves | 21 to 26 | 45 to 90 minutes |
| Advanced | 12 to 16 | Use ranges, two sensors at once, or a program on a laptop | 27 and 28, then beyond | 1 to 2 hours |
| Capstone | 17 to 20 | Plan several rules, build, test and present | 29 to 32 | Two to four lessons |
- Level
- Beginner
- Projects
- 1 to 5
- What you do
- Watch live readings and switch outputs from a phone or laptop
- Lessons
- 3 to 16
- Rough time, first build
- 15 to 45 minutes
- Level
- Intermediate
- Projects
- 6 to 11
- What you do
- Write one or two rules that run on the board by themselves
- Lessons
- 21 to 26
- Rough time, first build
- 45 to 90 minutes
- Level
- Advanced
- Projects
- 12 to 16
- What you do
- Use ranges, two sensors at once, or a program on a laptop
- Lessons
- 27 and 28, then beyond
- Rough time, first build
- 1 to 2 hours
- Level
- Capstone
- Projects
- 17 to 20
- What you do
- Plan several rules, build, test and present
- Lessons
- 29 to 32
- Rough time, first build
- Two to four lessons
Times include learning what the readings mean; they are not targets. Lesson numbers come from the free 32-lesson MakerBuddy curriculum, four terms of 45 to 60 minute sessions. Automatic rules arrive in lesson 21.
Beginner IoT projects (1 to 5): watch and control from a phone
The board measures, and your phone shows it. Nothing is automatic yet, so students learn the readings before asking the board to act.
1. Phone light switch
Join the board to your Wi-Fi and switch the blue light from a phone, then do it again from the next room. The board needs 2.4 GHz Wi-Fi; a phone hotspot works. Use Safari on an iPhone or iPad, or the free MakerBuddy extension in Chrome, Edge or Firefox on a laptop. Android phones cannot control the board yet. Setup is in the powering up and connectivity lesson.
2. Remote colour mixer
Move the red, green and blue sliders and write down the numbers for colours you like. The physics of colour lesson explains why red and green light make yellow. For older students: the light is wired common anode, so the board writes 255 minus your number.
3. Mini weather station
Compare your room's temperature and humidity with a weather app. They will not match, and explaining why is the project. Adafruit lists the DHT11 as good for 0 to 50 °C with ±2 °C accuracy, at most one reading a second (opens in a new tab). The DHT11 lesson covers the rest.
4. Classroom data diary
In pairs, one student reads the dashboard and the other writes a row every 5 minutes, with a notes column for events like "window opened". The data logger lesson runs this for a class period, and it is meant to be tedious. The board has no clock and keeps no history, so the human is the logger until project 16.
5. Room watcher (learning model)
Watch a room's temperature and movement from another room, then decide which readings mean someone should check. A PIR sensor sees changes in heat, not shapes, as how a PIR motion sensor works explains. This is a learning project, never a real baby monitor.
Intermediate IoT projects (6 to 11): rules that run on the board
Now the board acts by itself. A rule you save keeps running after you close the laptop, and runs again after a power cut unless someone stopped it by hand. A board holds up to 10 rules of up to 10 steps. The board reads its sensors once a second, and a Condition rule starts once its test has been true for 0.3 seconds. Condition rules begin in the sensor-based control lesson, and if-then statements explained with real sensors covers the logic.
6. Smart night light
Watch the light number in daylight and in the dark first. Then make a rule: if Light Level (LDR) is less than 30, LED On. The surprise comes at dawn: the light stays on, because a Condition rule stops when its test turns false but does not undo what it did. Add a second rule: if Light Level is greater than 40, LED Off. The light sensing lesson explains why the best level changes from room to room.
7. Motion alarm
The rule watches Motion Sensor for true. Its steps: LED On (0 ms delay), Buzzer On (500 ms), Buzzer Off (500 ms), LED Off (500 ms). While movement lasts, the rule repeats, so the light flashes and the buzzer beeps. Buzzer On keeps sounding until a Buzzer Off step, so always pair them. The security sensing lesson sets up the motion sensor.
8. Plant thirst tracker
Calibrate first: hold the capacitive blade in air and save "dry", then stand it in water up to its printed line and save "wet". The factory points (raw 3000 and 1200) were not set in your soil. Then make a rule: if Soil Moisture is less than 30, LED On and a short beep. The smart agriculture lesson walks through it.
9. Auto-fan
One rule switches the relay on above 30 °C, a second switches it off below 28 °C. With one number for both, the fan would click every time the reading wobbled. That gap is called hysteresis, and why a fan keeps switching on and off explains it in full. The relay itself is covered in what a relay is and how it works. Ask whether a small fan comes with your order.
10. Pet feeder
A Timer rule opens a card flap with the servo, closes it, waits a set interval and runs again. The board has no clock, so it cannot feed at 8 am. It can feed every few hours, or when the motion sensor sees your pet, as in the Smart Pet Feeder guide on Hackster (opens in a new tab). Timer rules are in the time-based automation lesson.
11. Privacy status sign
Make two No Loop rules, which run once when started. "Busy" sets RGB Red and shows "Do not disturb" on the text screen; "Free" sets RGB Green and shows "Come in". Start the one you need from your phone. The no loop mode lesson covers rules that run once.
Advanced IoT projects (12 to 16): ranges, two sensors and code
Advanced projects add a two-limit range, two sensors in one rule, or a laptop program.
12. Garage park assist
Use three rules, one per distance band. Distance greater than 30: RGB Green. Distance at least 10 AND at most 30: RGB Yellow. Distance less than 10: RGB Red. Bands must not overlap, or two rules fight over the light. The HC-SR04 datasheet gives a range of 2 cm to 400 cm (opens in a new tab); test against a box, not a curtain. The range logic lesson teaches these windows, and how an ultrasonic sensor measures distance explains the echo.
13. Gas traffic light (learning model)
Watch the gas number (0 to 100) for a few days, then make three rules: green, yellow and red bands. The MQ-2 reacts to several gases and smoke without saying which, and its datasheet's figures assume a preheat of over 48 hours (opens in a new tab), so this is about patterns, not amounts. The smart safety systems lesson builds the alert.
14. Garden auto-waterer
When the soil reads too dry, the relay starts a small low-voltage pump, bought separately. A second rule stops it when the soil is wet. Here the action changes the reading, which engineers call feedback. Keep a wide gap between the levels, since water takes time to reach the blade, and keep the board away from the water.
15. Motion email alert
The board cannot send email. A laptop program asks the board for its readings every few seconds and sends an email when motion turns true. The board answers GET /api/sensors with a JSON snapshot, and motion is the md field; see the REST API documentation. Before anything reaches beyond the board, read IoT security basics for schools and makers.
16. Laptop data logger
This is project 4 done by a machine. A laptop asks the board for a reading once a minute and adds a row to a spreadsheet file, with the laptop's clock supplying the time. It uses only Python's standard library, including urllib.request (opens in a new tab).
"""Log MakerBuddy readings to a spreadsheet file, once a minute.
Run it on a laptop that is on the same Wi-Fi as the board."""
import csv
import json
import time
import urllib.request
from datetime import datetime

BOARD = "http://192.168.1.100"   # your board's IP address, or its name.local
EVERY_SECONDS = 60               # how often to take a reading
FILE = "readings.csv"

with open(FILE, "a", newline="") as f:
    log = csv.writer(f)
    if f.tell() == 0:            # a new file gets a header row first
        log.writerow(["time", "temp_c", "humidity", "light", "soil"])
    while True:
        try:
            with urllib.request.urlopen(BOARD + "/api/sensors", timeout=5) as reply:
                data = json.load(reply)
            now = datetime.now().isoformat(timespec="seconds")
            log.writerow([now, data["te"], data["hu"], data["li"], data["sm"]])
            f.flush()            # save the row now, not when the program ends
            print(now, data["te"], "C")
        except (OSError, ValueError, KeyError) as problem:
            print("No reading this time:", problem)
time.sleep(EVERY_SECONDS)- BOARD. The board's IP address, which a plugged-in text screen shows at start-up.
- The keys.
teis temperature,huhumidity,lilight andsmsoil moisture. - The try block. If Wi-Fi drops, the logger tries again next minute instead of crashing overnight.
- A 0.0 temperature. A failed DHT11 read shows as 0.0. Filter those rows out before you draw a graph.
Capstone IoT projects (17 to 20)
A capstone joins several sensors and outputs into one system. The capstone project lesson plans it, and students present it at the MakerBuddy expo.
17. Shadow alarm
One rule joins two sensor tests with OR: Light Level less than 20, OR Motion Sensor true. Its steps show "Intruder alert" on the screen, then beep and flash. List every rule before you build. A very fast shadow can slip between two once-a-second readings.
18. Smart parking gate
In the parking gate lesson, part 1, students find the servo's open and closed angles and draw a state diagram. In part 2 they build two rules. "CarArrived": Distance below the car threshold, then RGB Green and Servo Move to open. "CarLeft": Distance above a bigger number, then RGB Red for 3000 ms and Servo Move to closed. That countdown always finishes once started, so real gates add a safety sensor. Test with a toy car, never a hand. The Smart Car Parking Garage guide on Hackster (opens in a new tab) shows a finished model.
19. Smart greenhouse
Two rules run the pump, as in project 14. A third watches Soil Moisture less than 25 AND Temperature (DHT11) greater than 30, because dry soil on a hot day is the real emergency, and turns on the blue light with a beep. The screen shows live wildcards such as "Soil {soil}" and "Temp {temp} C".
20. Classroom comfort station
This grows out of the auto-fan, project 9. It is worked through in full below as a lesson 31 proposal.
Worked example: planning project 20 the lesson 31 way
Lesson 31 asks for an approved plan before anyone builds. Here is project 20 through the five planning parts of the lesson's template, then a test plan for once the teacher approves it.
1. Theme. A smart home device for the classroom.
2. Problem statement. "My class has a problem with the room getting hot and stuffy after lunch. My MakerBuddy will switch on a fan when the room is too warm, show the temperature on a screen and light a reminder to open a window when the air gets humid."
3. Components. One input, the DHT11, which gives temperature and humidity. Four outputs: the relay with a small low-voltage fan, the colour light, the blue light and the text screen.
4. Every rule. Four Condition rules, with the names the rule editor shows. Pick your own numbers from your own readings.
Rule 1 "Too warm"       Mode: Condition
If Temperature (DHT11) > 30
  Step 1: Relay On                           Delay: 100 ms
  Step 2: RGB Red                            Delay: 100 ms
  Step 3: LCD Display  "Room {temp} C"
                       "Fan on"              Delay: 5000 ms

Rule 2 "Cooled down"    Mode: Condition
If Temperature (DHT11) < 28
  Step 1: Relay Off                          Delay: 100 ms
  Step 2: RGB Green                          Delay: 100 ms
  Step 3: LCD Display  "Room {temp} C"
                       "Fan off"             Delay: 5000 ms

Rule 3 "Open a window"  Mode: Condition
If Humidity (DHT11) > 70
  Step 1: LED On                             Delay: 1000 ms

Rule 4 "Air is fine"    Mode: Condition
If Humidity (DHT11) < 60
  Step 1: LED Off                            Delay: 1000 ms
Why the plan looks like this:
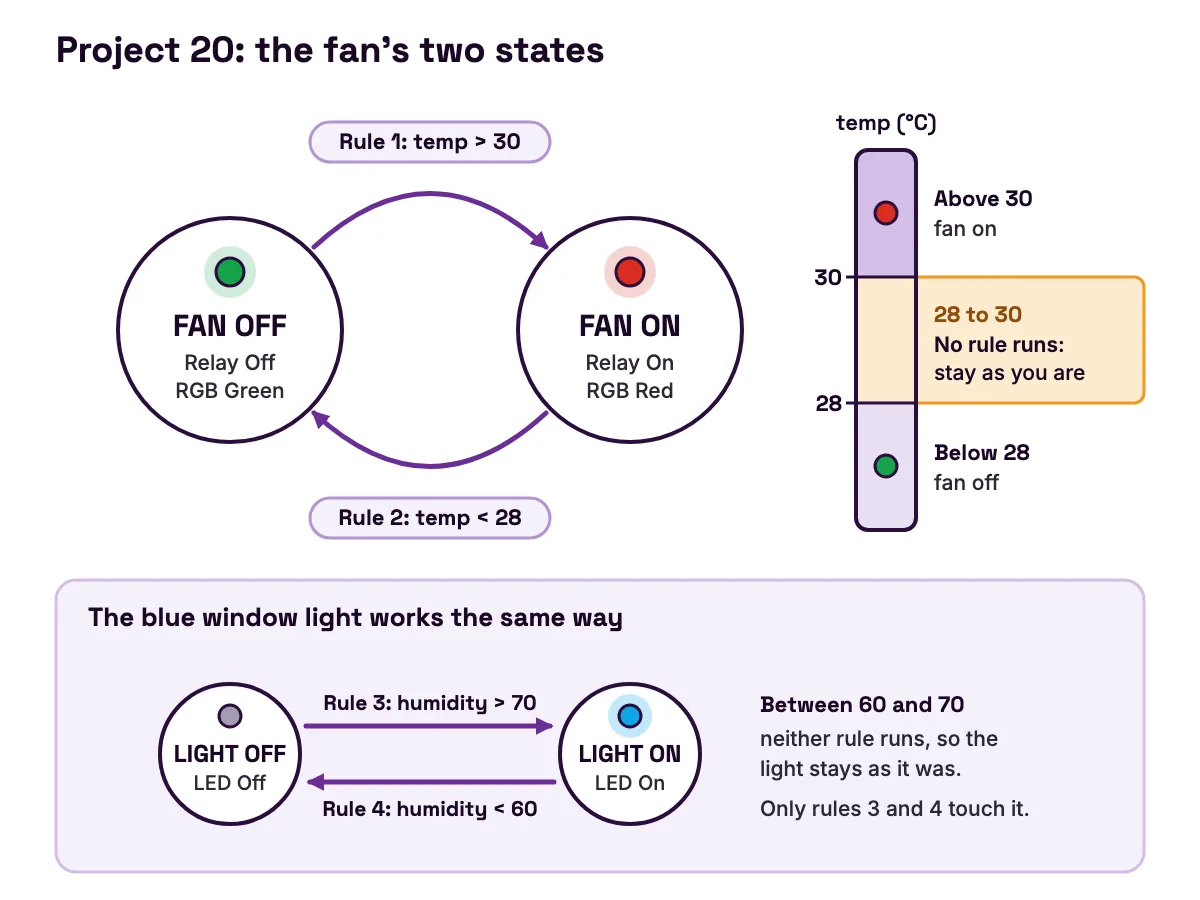
- A gap between on and off. Between 28 and 30 neither rule runs, so the fan stays as it was. If the reading wobbles by about a degree, a 2-degree gap stops the clicking.
- Your 30 is not the wall thermometer's 30. With the DHT11's ±2 °C accuracy (opens in a new tab), a reading of 30 °C could be a real 28 °C or 32 °C. Choose levels from what your sensor shows when the room feels warm.
- Each output has one owner. Rules 1 and 2 are never true together, so they never fight over the relay, colour light or screen. Only rules 3 and 4 touch the blue light.
- Repeating is harmless. A Condition rule repeats while its test is true. Switching on a relay that is already on changes nothing.
- The screen line fits.
{temp}shows one decimal place, so "Room 31.5 C" uses 11 of the 16 columns. The LCD screen reference lists every wildcard.
5. State diagram. Two circles, FAN OFF (green) and FAN ON (red), joined by arrows marked "above 30" and "below 28". A smaller diagram covers the window light.
6. Test plan. Use lesson 31's four-step fault-finding order.
- 1
Power.
Plug in the USB cable. The screen shows the Wi-Fi name and IP address at start-up.
- 2
Inputs.
Breathe near the DHT11 and watch humidity rise; cup it in your hands and watch the temperature creep up. A reading stuck at 0.0 means the sensor is not being read.
- 3
Outputs.
Switch the relay, lights and screen from the dashboard. If a rule controls a card, stop that rule first.
- 4
Logic.
Set rule 1 one degree above the current reading, warm the sensor and watch the fan start. Then restore the real level.
The pitch. Lesson 32's 30-second formula, filled in: "I noticed that my class has a problem with the room getting hot and stuffy after lunch. So I built the Comfort Station using my MakerBuddy kit. It uses a temperature and humidity sensor to detect a warm, humid room, and then it automatically switches on a fan and lights a window reminder using the rule engine. This solves the problem because the room cools itself."
An honest note for teachers: a capstone does not need four rules. If a group cannot explain why each rule exists, cut one. A two-rule build a student can defend beats a five-rule build nobody understands.
Common mistakes in student IoT projects
| Symptom | Cause | Fix |
|---|---|---|
| The light turns on at dusk but never turns off | A Condition rule stops when its test turns false, but does not undo its steps | Add a second rule that switches the output off |
| The fan clicks on and off near the level | The on and off levels are the same number | Use two levels with a gap, such as on above 30 and off below 28 |
| The colour light flickers between two colours | Two rules that can be true together set the same output | Give each output to rules whose tests never overlap |
| A dashboard switch does nothing | A rule is using that output | Stop the rule, switch by hand, then start the rule again |
| A quick wave or shadow is missed | Sensors are read once a second, and a test must hold for 0.3 seconds | Make the movement or shadow last about a second, or use your own code for fast events |
| The phone cannot find the board | The phone and board are on different networks, often one on 5 GHz | Put both on the same 2.4 GHz Wi-Fi; a phone hotspot works |
- Symptom
- The light turns on at dusk but never turns off
- Cause
- A Condition rule stops when its test turns false, but does not undo its steps
- Fix
- Add a second rule that switches the output off
- Symptom
- The fan clicks on and off near the level
- Cause
- The on and off levels are the same number
- Fix
- Use two levels with a gap, such as on above 30 and off below 28
- Symptom
- The colour light flickers between two colours
- Cause
- Two rules that can be true together set the same output
- Fix
- Give each output to rules whose tests never overlap
- Symptom
- A dashboard switch does nothing
- Cause
- A rule is using that output
- Fix
- Stop the rule, switch by hand, then start the rule again
- Symptom
- A quick wave or shadow is missed
- Cause
- Sensors are read once a second, and a test must hold for 0.3 seconds
- Fix
- Make the movement or shadow last about a second, or use your own code for fast events
- Symptom
- The phone cannot find the board
- Cause
- The phone and board are on different networks, often one on 5 GHz
- Fix
- Put both on the same 2.4 GHz Wi-Fi; a phone hotspot works
The rule rows follow from how the rule engine runs, as the technical details page explains: a running rule locks only the part its current step uses, and pressing stop never switches an output off.
Running these IoT projects with a class
Pick projects by the highest lesson number they need. A class that has finished lesson 16 can do projects 1 to 5; a class at lesson 26 can do everything up to 11. Let groups choose a capstone from a short list, such as 17 to 20, rather than a blank page. The project library's seven planning questions suit any capstone, and the page for teachers helps with lesson planning. To sort ideas by sensor instead, read 30 ESP32 project ideas for students. More guides are on the MakerBuddy blog.
Every project uses parts from one kit, apart from the pump in 14 and 19; ask whether a small fan for 9 and 20 comes with your order. Schools in Pakistan can order the MakerBuddy IoT Kit online at PKR 40,000 per kit, with volume discounts from 10 kits; schools in the United States, Canada and elsewhere can ask for a quote. The lessons are free, with or without a kit.
FAQ
What is the easiest IoT project for beginners?
A phone light switch. You join a Wi-Fi board to your network and switch a light from a phone. It takes about 15 minutes and shows the whole idea: a command crosses the network and something real happens.
What is a good IoT capstone project?
One that solves a problem for a real person and joins two or more sensors with several outputs. The smart parking gate, the smart greenhouse and the classroom comfort station all work. Plan every rule and draw a state diagram before you build, as lesson 31 does.
Do IoT projects need the internet?
They need a network, but it can be your own Wi-Fi with no internet. The MakerBuddy board works on a local 2.4 GHz network with no accounts. You need the internet only to open the web app or install a browser extension.
Can I do IoT projects without coding?
Yes. On the MakerBuddy kit, 18 of these 20 projects are built in a browser dashboard with rules. Code comes in when you want something rules cannot do, such as sending an email, logging data over time or timing in milliseconds.
Which board is best for IoT projects?
For student IoT projects an ESP32 is a strong choice, because its Wi-Fi is built into the chip, as the ESP32 datasheet (opens in a new tab) shows. The Arduino UNO R3 (opens in a new tab) lists no Wi-Fi or Bluetooth, so it needs extra hardware to join a network. A Raspberry Pi 5 (opens in a new tab) is a small computer with a 2.4 GHz quad-core processor, better for projects that need a full operating system.
Are IoT projects safe for kids?
Yes, when they stay at low voltage. The MakerBuddy board runs on 5 V USB power, and the relay must only switch small low-voltage things, never mains electricity. Gas and room-monitor projects are learning models, never real alarms. Younger students should have an adult nearby.
Can I build these projects with Arduino code instead?
Yes. Every project can be written as your own Arduino sketch for an ESP32. On the MakerBuddy board, uploading a sketch replaces the MakerBuddy firmware, so the dashboards and rules stop working until you put it back, as updating the board's software explains.
Sources
- Espressif: ESP32 Series Datasheet (opens in a new tab)
- Arduino: UNO R3 hardware page (opens in a new tab)
- Raspberry Pi 5 product page (opens in a new tab)
- Adafruit: DHT humidity and temperature sensors, overview (opens in a new tab)
- HC-SR04 ultrasonic ranging module datasheet (SparkFun) (opens in a new tab)
- MQ-2 semiconductor sensor for combustible gas, datasheet (Pololu) (opens in a new tab)
- Python documentation: urllib.request (opens in a new tab)
- Hackster: DIY Smart Pet Feeder with motion detection (opens in a new tab)
- Hackster: Smart Car Parking Garage using MakerBuddy (opens in a new tab)