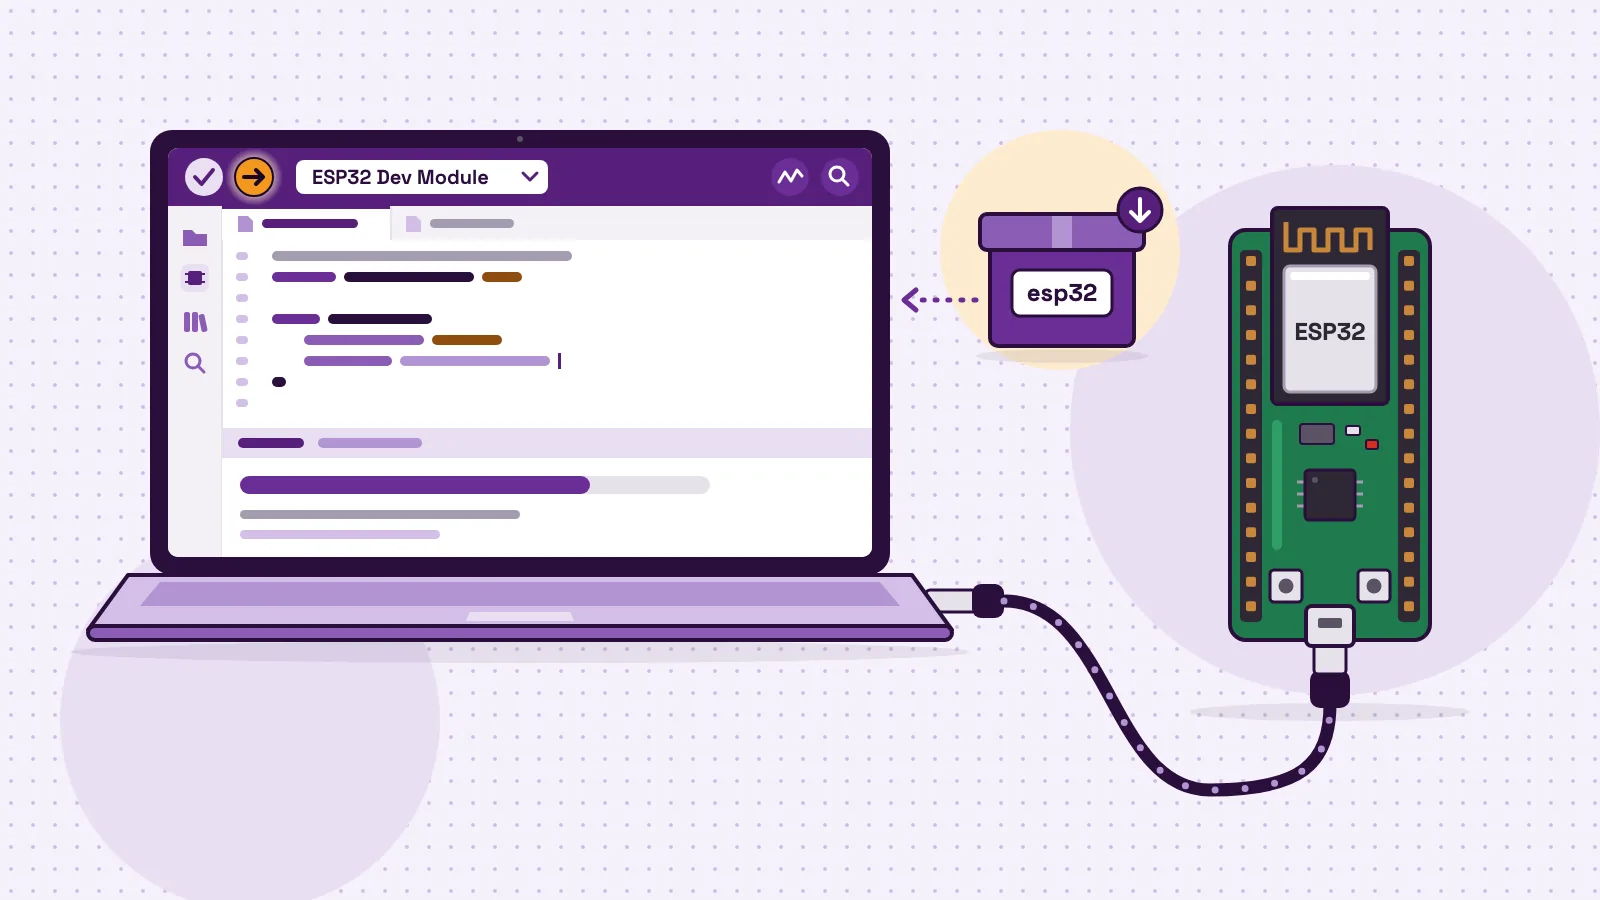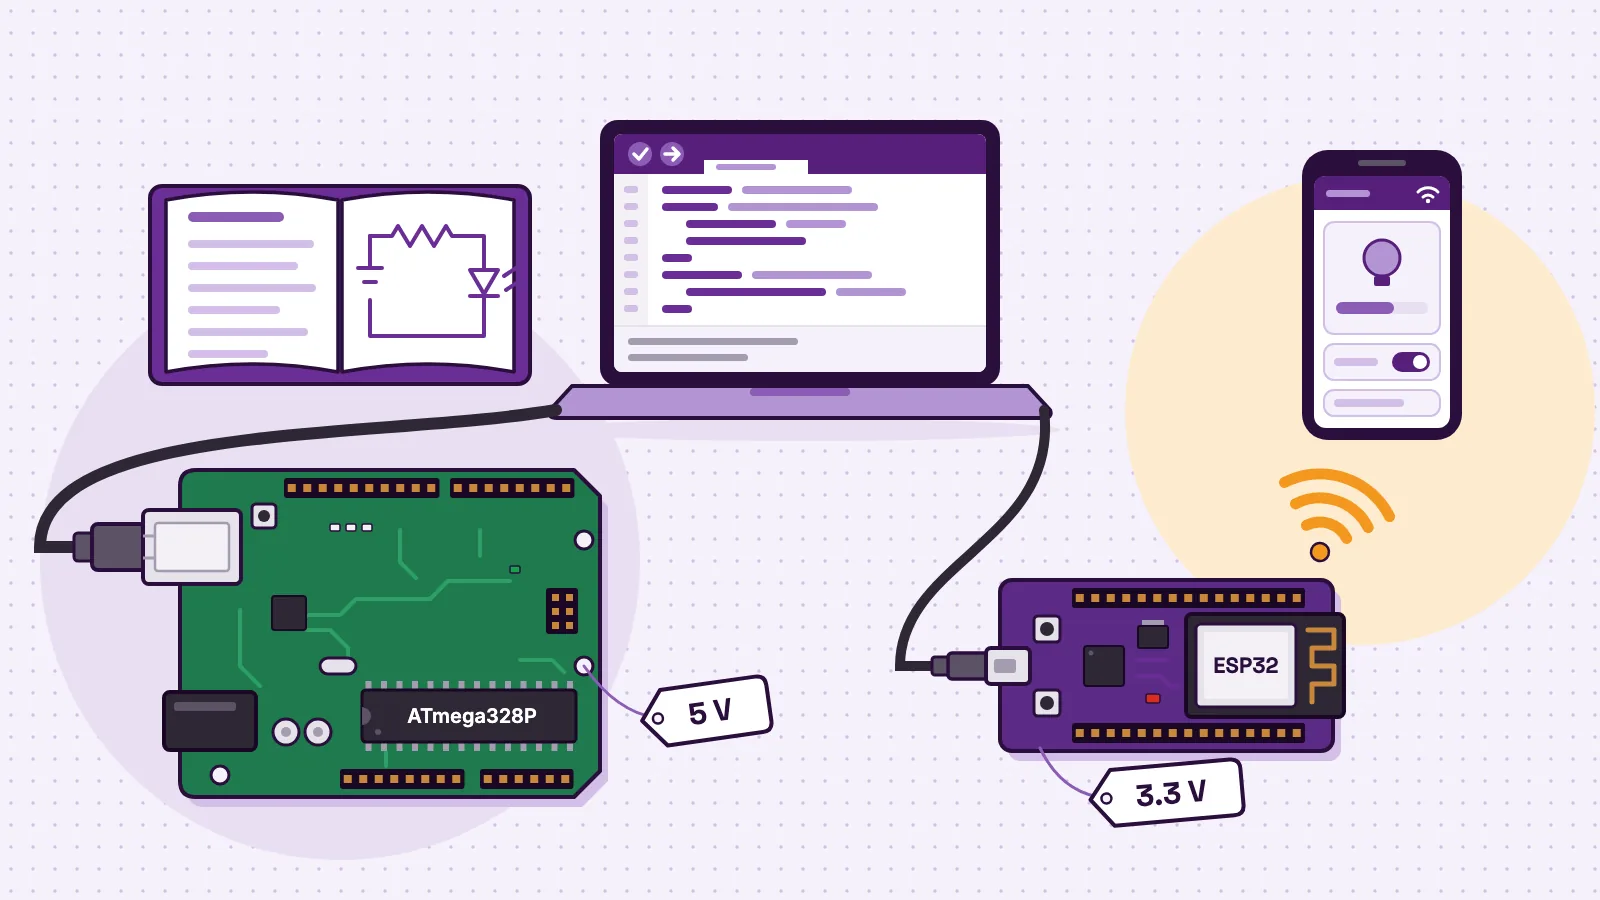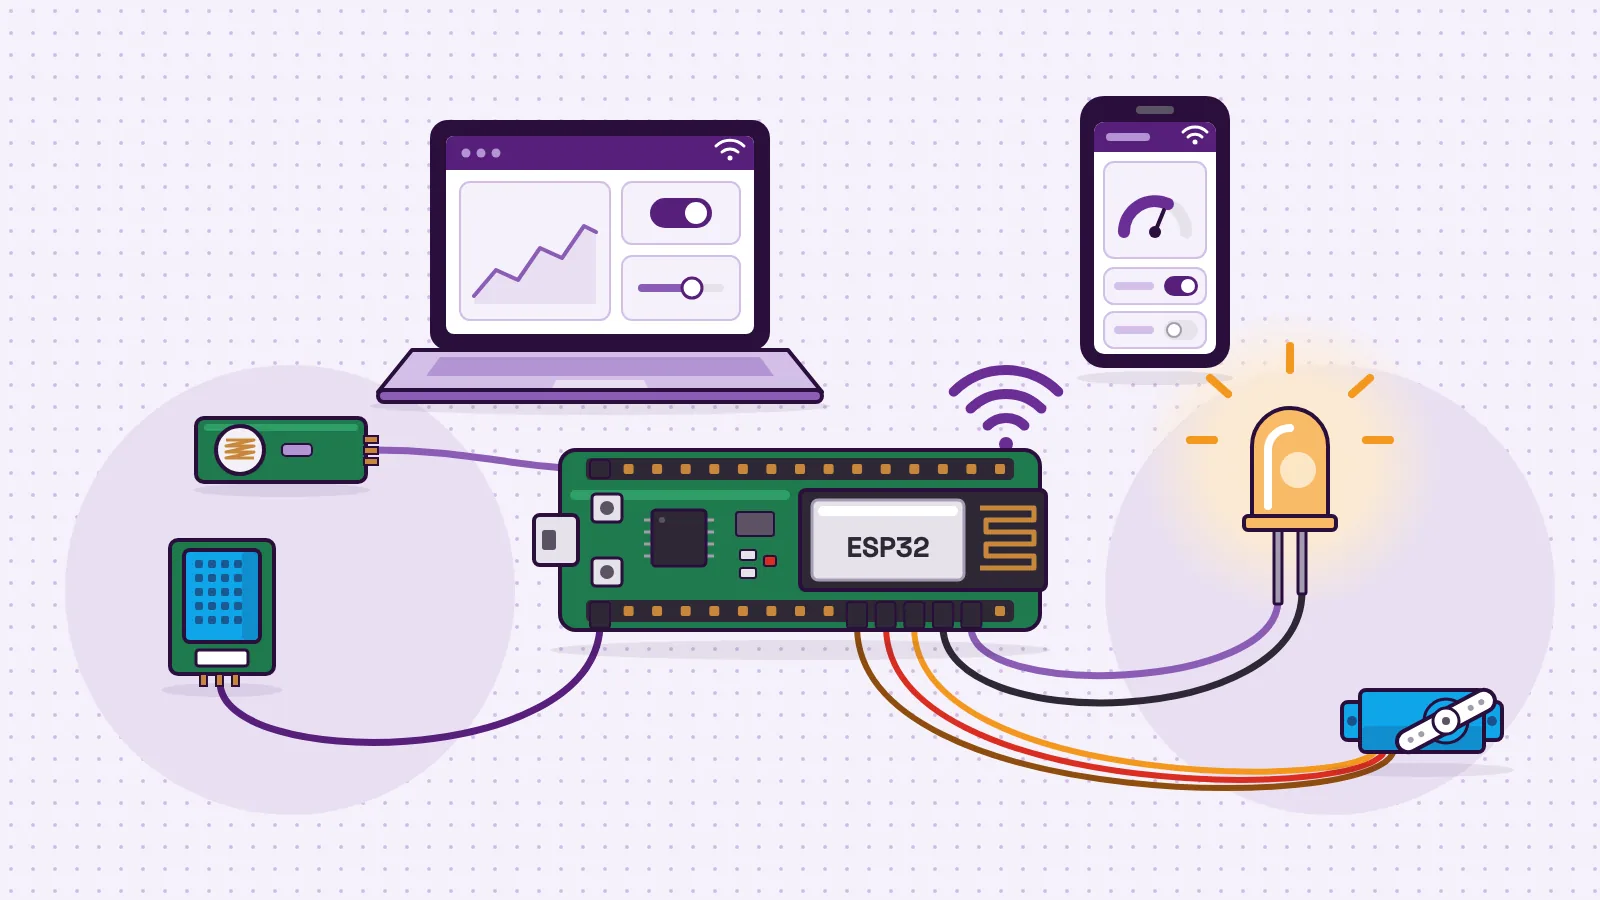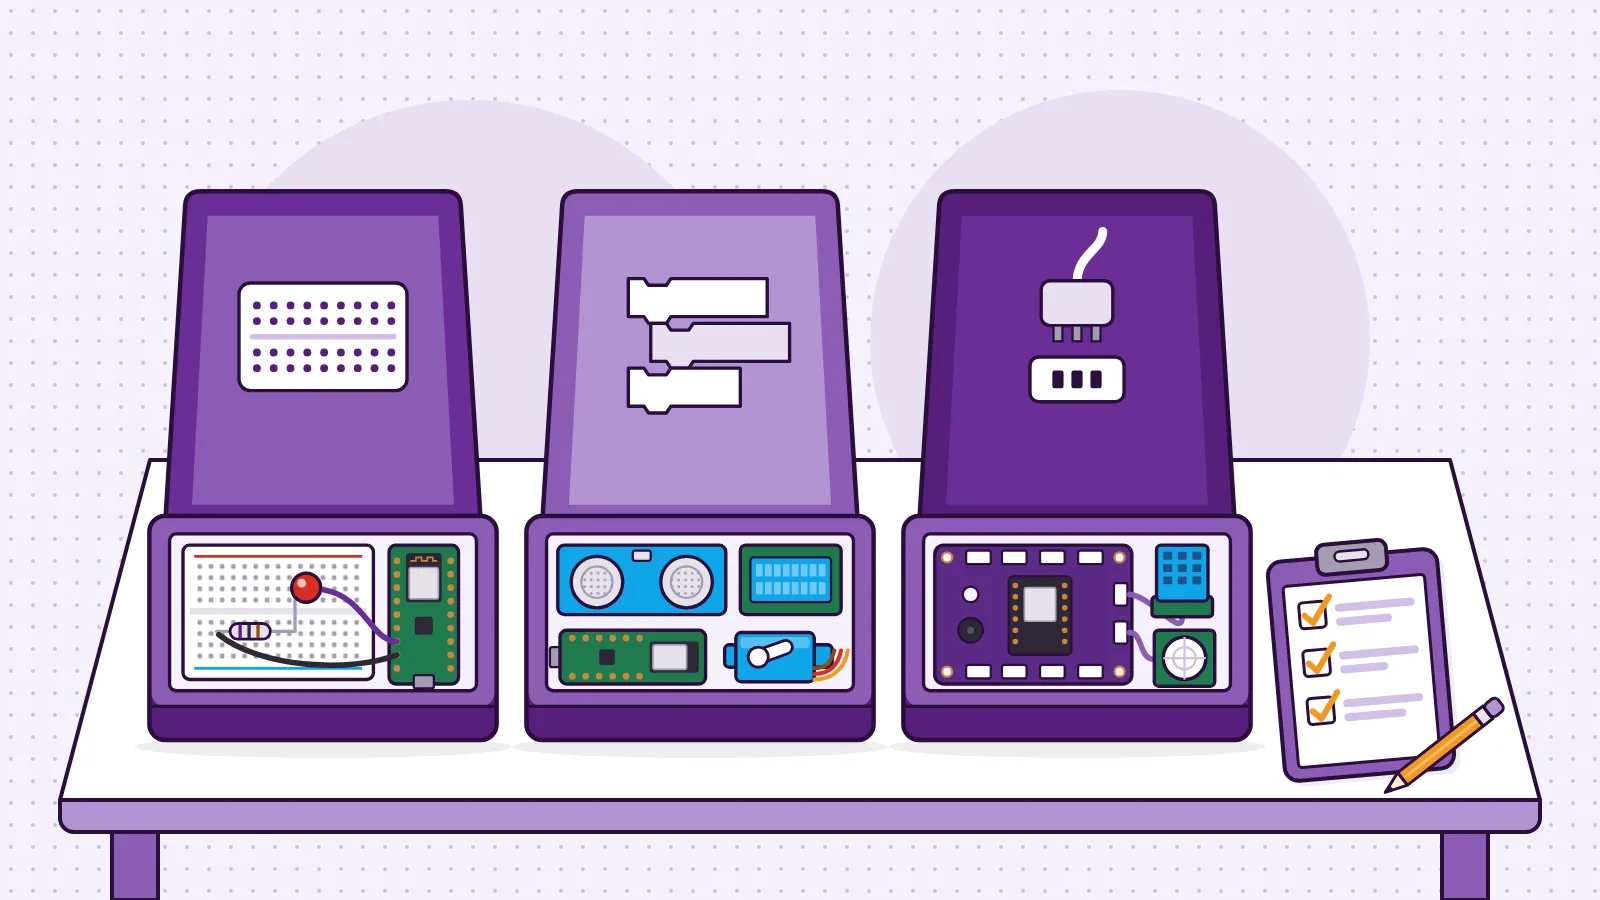
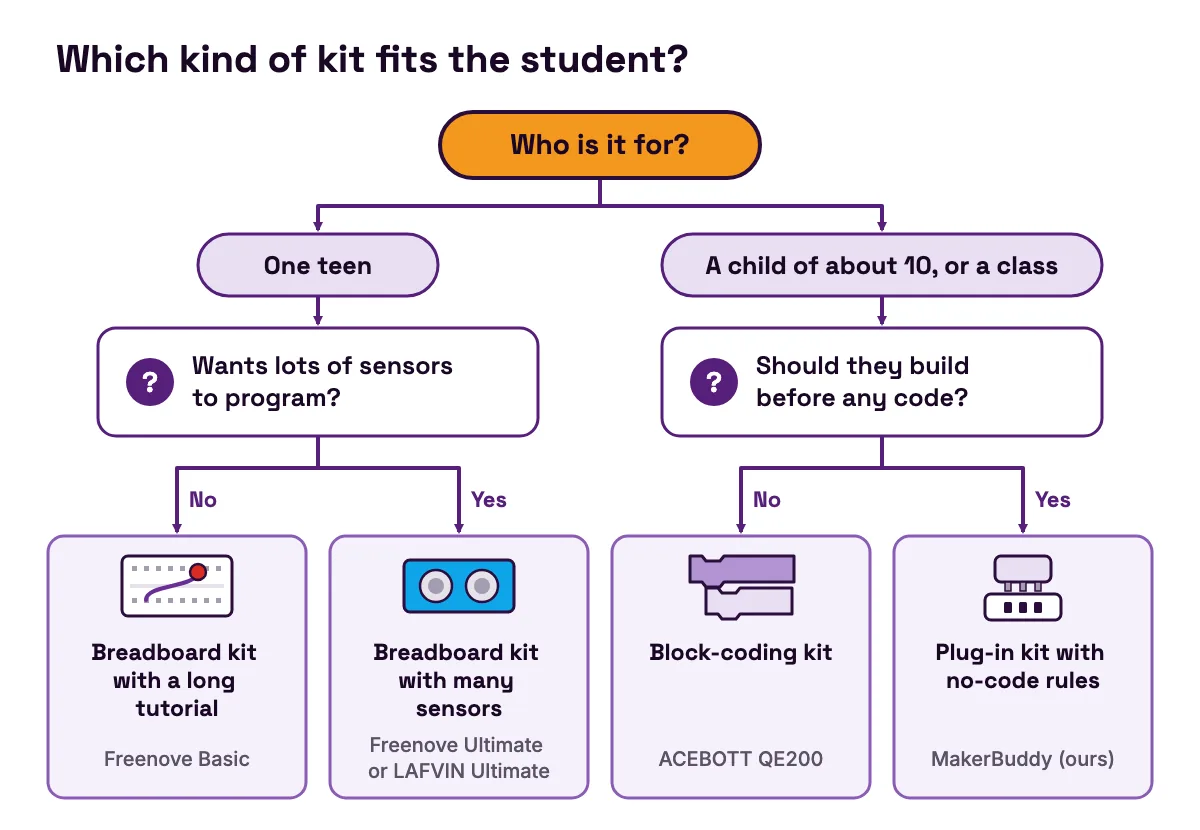
The best ESP32 starter kit for a student depends on how that student should start. A teen who wants to learn wiring and code from day one gets the most from a breadboard kit with a long tutorial, such as Freenove, LAFVIN or DIYables. A child of about 10, or a teacher who needs a whole class building something in the first lesson, does better with block coding (ACEBOTT QE200) or no code at all to start (MakerBuddy). This guide compares six ESP32 kits on the same criteria: how the parts connect, which sensors come in the box, the lessons, the no-code option and the price.
One thing first. MakerBuddy is our kit, so we have a stake in this comparison. We held it to the same criteria as the others and wrote a section on when it is the wrong choice. Every fact about the other kits comes from its maker's own product page, part list or tutorial, checked on 29 October 2026.
Which ESP32 starter kit fits which student
Start with the learner, not the part count. A 240-piece box is no use to a child who gives up by lesson three.
| If the student is | Look at | Because |
|---|---|---|
| A teen learning C++ or MicroPython who likes reading | Freenove Basic (FNK0061) | Two long tutorials, one per language, and a camera board |
| A teen who wants lots of sensors to program | Freenove Ultimate (FNK0047) or LAFVIN ESP32 Ultimate | Distance, motion, humidity, servo, relay and a screen in one box |
| A beginner who wants the common modules | DIYables ESP32 Starter Kit | Screen, servo, distance and motion sensors, with web guides |
| About 10 and happier with blocks than typed code | ACEBOTT QE200 | Block coding as well as Arduino, for age 10+ |
| A class, or a child who should build before coding | MakerBuddy IoT Kit V1.0 (ours) | Plug-in sockets, a dashboard with rules, and 32 free lessons |
- If the student is
- A teen learning C++ or MicroPython who likes reading
- Look at
- Freenove Basic (FNK0061)
- Because
- Two long tutorials, one per language, and a camera board
- If the student is
- A teen who wants lots of sensors to program
- Look at
- Freenove Ultimate (FNK0047) or LAFVIN ESP32 Ultimate
- Because
- Distance, motion, humidity, servo, relay and a screen in one box
- If the student is
- A beginner who wants the common modules
- Look at
- DIYables ESP32 Starter Kit
- Because
- Screen, servo, distance and motion sensors, with web guides
- If the student is
- About 10 and happier with blocks than typed code
- Look at
- ACEBOTT QE200
- Because
- Block coding as well as Arduino, for age 10+
- If the student is
- A class, or a child who should build before coding
- Look at
- MakerBuddy IoT Kit V1.0 (ours)
- Because
- Plug-in sockets, a dashboard with rules, and 32 free lessons
The best ESP32 kit for beginners is the one that matches how they should start. If you are still deciding whether an ESP32 is the right board at all, read our guide to what the ESP32 is and how to start with it first.
How we compared the kits
We used the questions a parent or teacher has to answer before paying.
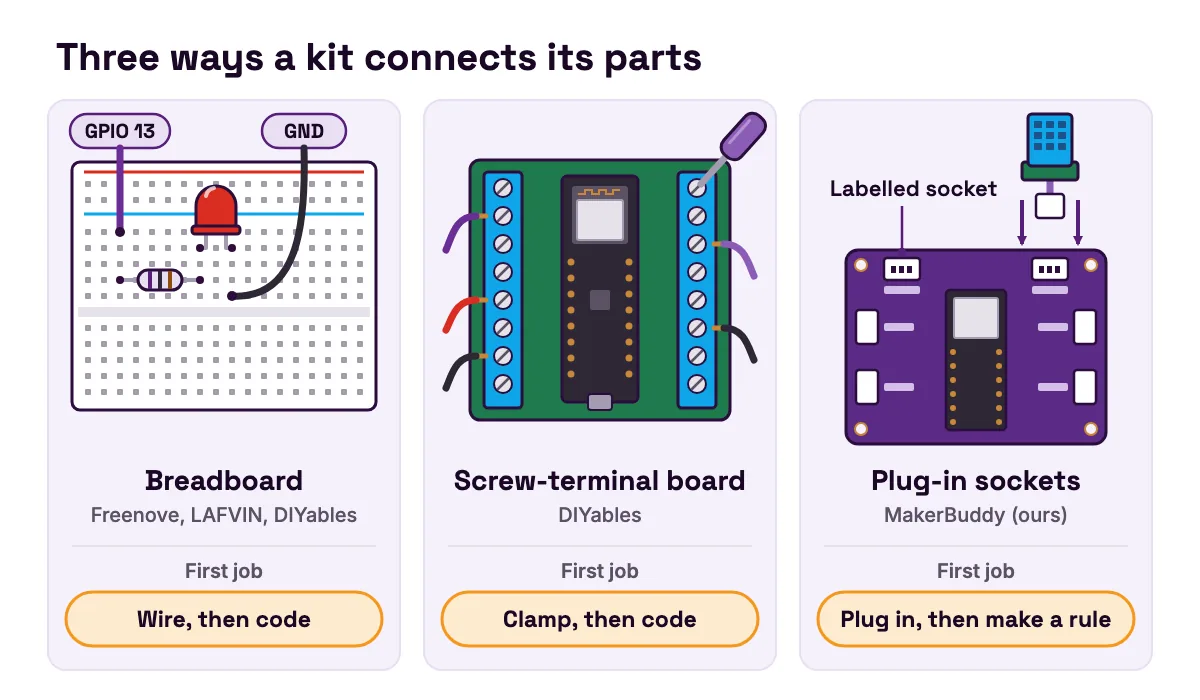
- How the parts connect: a breadboard, a screw-terminal board or plug-in sockets. This decides how much of the first lesson goes on wiring.
- Sensors and outputs in the box, checked against the parts in our ESP32 project ideas for students.
- The lessons: how many, in what order, and whether a teacher could run them.
- A no-code or block option, the languages taught, the maker's age guidance and the price.
We compare contents, not classroom results, and contents can change between sellers, so check the part list where you buy.
ESP32 starter kits compared side by side
| Kit | How parts connect | Lessons | No-code or blocks | Languages | Age (maker's) | Listed price |
|---|---|---|---|---|---|---|
| Freenove Basic (FNK0061) | Breadboard, GPIO extension board, jumper wires | Two PDFs: C (207 pages) and MicroPython (203 pages) | No | C/C++, MicroPython | Not stated | $28.99 |
| Freenove Ultimate (FNK0047) | Breadboard, GPIO extension board, jumper wires | 795 pages, 122 projects | No | C, MicroPython, Processing | Not stated | $56.99 |
| LAFVIN ESP32 Ultimate | Two 400-point breadboards | 30 online lessons | No | Arduino IDE | Not stated | Not listed by the maker |
| DIYables ESP32 Starter Kit | Half-size breadboard and a screw-terminal board | Online guides | No | C/C++, MicroPython | Not stated | $39.99 |
| ACEBOTT QE200 | Not stated by the maker | 41-lesson outline | Blocks (Blockly) | Arduino IDE, blocks | 10+ | $25.58 (usually $31.98) |
| MakerBuddy IoT Kit V1.0 (ours) | Labelled plug-in sockets | 32 lessons of 45 to 60 minutes, free online | Yes: dashboard and rules | Optional: Arduino IDE, or your own program over Wi-Fi | 10+ | PKR 40,000 in Pakistan; a quote elsewhere |
- Kit
- Freenove Basic (FNK0061)
- How parts connect
- Breadboard, GPIO extension board, jumper wires
- Lessons
- Two PDFs: C (207 pages) and MicroPython (203 pages)
- No-code or blocks
- No
- Languages
- C/C++, MicroPython
- Age (maker's)
- Not stated
- Listed price
- $28.99
- Kit
- Freenove Ultimate (FNK0047)
- How parts connect
- Breadboard, GPIO extension board, jumper wires
- Lessons
- 795 pages, 122 projects
- No-code or blocks
- No
- Languages
- C, MicroPython, Processing
- Age (maker's)
- Not stated
- Listed price
- $56.99
- Kit
- LAFVIN ESP32 Ultimate
- How parts connect
- Two 400-point breadboards
- Lessons
- 30 online lessons
- No-code or blocks
- No
- Languages
- Arduino IDE
- Age (maker's)
- Not stated
- Listed price
- Not listed by the maker
- Kit
- DIYables ESP32 Starter Kit
- How parts connect
- Half-size breadboard and a screw-terminal board
- Lessons
- Online guides
- No-code or blocks
- No
- Languages
- C/C++, MicroPython
- Age (maker's)
- Not stated
- Listed price
- $39.99
- Kit
- ACEBOTT QE200
- How parts connect
- Not stated by the maker
- Lessons
- 41-lesson outline
- No-code or blocks
- Blocks (Blockly)
- Languages
- Arduino IDE, blocks
- Age (maker's)
- 10+
- Listed price
- $25.58 (usually $31.98)
- Kit
- MakerBuddy IoT Kit V1.0 (ours)
- How parts connect
- Labelled plug-in sockets
- Lessons
- 32 lessons of 45 to 60 minutes, free online
- No-code or blocks
- Yes: dashboard and rules
- Languages
- Optional: Arduino IDE, or your own program over Wi-Fi
- Age (maker's)
- 10+
- Listed price
- PKR 40,000 in Pakistan; a quote elsewhere
Table notes: Freenove Basic's page counts come from its C tutorial (opens in a new tab) and MicroPython tutorial (opens in a new tab), and its price from Freenove's FNK0061 store page (opens in a new tab). The Ultimate's figures are from Freenove's FNK0047 store page (opens in a new tab). LAFVIN's come from its tutorial contents (opens in a new tab) and bill of materials (opens in a new tab). DIYables' kit page (opens in a new tab) gives its price as the final price on Amazon. ACEBOTT's lessons and age are from its QE200 documentation (opens in a new tab), and its price from its shop page (opens in a new tab). Prices change, so check before you buy.
So there are three kinds of kit. With Freenove, LAFVIN and DIYables you wire each circuit and write each program. ACEBOTT adds blocks, so a younger student can program without typing. MakerBuddy starts with no wiring and no code, and teaches the thinking behind code through rules.
Which sensors and outputs come in each ESP32 kit
The part list decides which projects you can build without buying more. Here are the parts our student project ideas rely on.
| Part | Freenove Basic | Freenove Ultimate | LAFVIN Ultimate | DIYables | ACEBOTT QE200 | MakerBuddy |
|---|---|---|---|---|---|---|
| Temperature and humidity | No | Yes | Yes | Not listed | Yes | Yes |
| Other temperature sensor | Thermistor | Thermistor | Thermistor | DS18B20 | Not listed | Waterproof DS18B20 probe |
| Distance (ultrasonic) | No | Yes | Yes | Yes | Yes | Yes |
| Motion | No | Yes | Yes | Yes | Yes | Yes |
| Light | Yes | Yes | Yes | Yes | Yes | Yes, built in |
| Soil moisture | No | No | No | Not listed | Not listed | Yes, capacitive |
| Gas or smoke | No | No | No | Not listed | Not listed | Yes, MQ-2 |
| Servo | No | Yes | Yes | Yes | Yes | Yes |
| Relay | No | Yes | Yes | Not listed | Not listed | Yes, low-voltage only |
| Text screen | No | LCD | 0.96-inch OLED | 16x2 LCD | LCD1602 | 1602 LCD |
| Camera | Yes | Yes | No | Not listed | Not listed | No |
- Part
- Temperature and humidity
- Freenove Basic
- No
- Freenove Ultimate
- Yes
- LAFVIN Ultimate
- Yes
- DIYables
- Not listed
- ACEBOTT QE200
- Yes
- MakerBuddy
- Yes
- Part
- Other temperature sensor
- Freenove Basic
- Thermistor
- Freenove Ultimate
- Thermistor
- LAFVIN Ultimate
- Thermistor
- DIYables
- DS18B20
- ACEBOTT QE200
- Not listed
- MakerBuddy
- Waterproof DS18B20 probe
- Part
- Distance (ultrasonic)
- Freenove Basic
- No
- Freenove Ultimate
- Yes
- LAFVIN Ultimate
- Yes
- DIYables
- Yes
- ACEBOTT QE200
- Yes
- MakerBuddy
- Yes
- Part
- Motion
- Freenove Basic
- No
- Freenove Ultimate
- Yes
- LAFVIN Ultimate
- Yes
- DIYables
- Yes
- ACEBOTT QE200
- Yes
- MakerBuddy
- Yes
- Part
- Light
- Freenove Basic
- Yes
- Freenove Ultimate
- Yes
- LAFVIN Ultimate
- Yes
- DIYables
- Yes
- ACEBOTT QE200
- Yes
- MakerBuddy
- Yes, built in
- Part
- Soil moisture
- Freenove Basic
- No
- Freenove Ultimate
- No
- LAFVIN Ultimate
- No
- DIYables
- Not listed
- ACEBOTT QE200
- Not listed
- MakerBuddy
- Yes, capacitive
- Part
- Gas or smoke
- Freenove Basic
- No
- Freenove Ultimate
- No
- LAFVIN Ultimate
- No
- DIYables
- Not listed
- ACEBOTT QE200
- Not listed
- MakerBuddy
- Yes, MQ-2
- Part
- Servo
- Freenove Basic
- No
- Freenove Ultimate
- Yes
- LAFVIN Ultimate
- Yes
- DIYables
- Yes
- ACEBOTT QE200
- Yes
- MakerBuddy
- Yes
- Part
- Relay
- Freenove Basic
- No
- Freenove Ultimate
- Yes
- LAFVIN Ultimate
- Yes
- DIYables
- Not listed
- ACEBOTT QE200
- Not listed
- MakerBuddy
- Yes, low-voltage only
- Part
- Text screen
- Freenove Basic
- No
- Freenove Ultimate
- LCD
- LAFVIN Ultimate
- 0.96-inch OLED
- DIYables
- 16x2 LCD
- ACEBOTT QE200
- LCD1602
- MakerBuddy
- 1602 LCD
- Part
- Camera
- Freenove Basic
- Yes
- Freenove Ultimate
- Yes
- LAFVIN Ultimate
- No
- DIYables
- Not listed
- ACEBOTT QE200
- Not listed
- MakerBuddy
- No
Table notes: the Freenove and LAFVIN columns come from full part lists: the Freenove Basic part list (opens in a new tab), the Freenove Ultimate part list (opens in a new tab) and the LAFVIN bill of materials (opens in a new tab). The DIYables page (opens in a new tab) names only some of its 20 components, and ACEBOTT's column comes from the lesson titles in its QE200 documentation (opens in a new tab). So "Not listed" means we could not confirm the part, not that it is missing.
The breadboard kits carry parts MakerBuddy lacks. The Freenove Basic is more a circuits kit than a sensor kit, with no distance, motion or humidity sensor. The Freenove Ultimate has a keypad, joystick, stepper motor and accelerometer. LAFVIN adds an RFID reader, a water level sensor and an infrared remote. If your project needs one of those, choose one of them. In the other direction, no other list we checked had a soil or gas sensor. A MakerBuddy gas project is a learning model of an alarm, never a real one. Our visual guide to the sensors used in student projects explains how each sensor works.
The six kits, one by one
Freenove Basic Starter Kit (FNK0061)
The kit is built around an ESP32-WROVER board with a camera and a 1 GB memory card, according to its part list (opens in a new tab). There is no paper tutorial: the download link is on the box. The C tutorial (opens in a new tab) runs from a blinking LED through buzzers, Bluetooth and Wi-Fi to a camera web server, and its safety page asks for adult supervision.
Best for: a teen who reads well and wants to understand circuits. Watch out for: a lot of reading before anything moves, and few sensors.
Freenove Ultimate Starter Kit (FNK0047)
The Ultimate kit's store page (opens in a new tab) lists 242 items and 122 projects in C, MicroPython and Processing, a language for computer programs with a graphical screen. There is no paper tutorial either. Chapter 36 is about soldering, so you will need a soldering iron by then.
Best for: a teen who wants most of the common sensors and a long, ordered course. Watch out for: the length. It is a year of evenings, not a weekend.
LAFVIN ESP32 Ultimate Starter Kit
LAFVIN's online tutorial (opens in a new tab) has 20 basic and 10 advanced lessons for the Arduino IDE. The basic half includes an RFID door lock and an internet clock. The advanced half leans on Wi-Fi: a web-controlled servo, a web-controlled fan and a web weather station.
Best for: a teen who wants many Wi-Fi projects in Arduino code. Watch out for: no MicroPython in the lesson list, no age guidance, and no price from the maker.
DIYables ESP32 Starter Kit
The DIYables kit (opens in a new tab) is smaller and sticks to the common modules. Its 38-pin ESP32 board uses a CP2102 USB chip, and the kit adds a screw-terminal expansion board, where wires clamp under screws instead of pushing into holes. Its guides are online, for the Arduino IDE and MicroPython.
Best for: a student happy to follow web tutorials. Watch out for: no published lesson sequence for a teacher to plan around.
ACEBOTT QE200 ESP32 Basic Starter Kit
The QE200 documentation (opens in a new tab) lists "Arduino & Blockly Programming" and age 10+. Its outline moves from one part at a time to combined projects, such as a temperature-controlled fan and a radar alarm, then to builds like a smart gate. Wooden structure parts for those builds are sold separately, as the QE201 pack on ACEBOTT's shop page (opens in a new tab).
Best for: children from about 10 who should start with blocks. Watch out for: the maker's pages do not say how the modules connect, so check the box photo and the seller's part list.
MakerBuddy IoT Kit V1.0 (our kit)
The MakerBuddy board carries a 30-pin ESP32 DevKit and six built-in parts: a blue light, a colour-changing light, a push button, a light sensor, a buzzer and a turning knob. The nine parts in the sensor table plug into labelled sockets. Most plugs fit only one way round, and the distance sensor and screen use four wires you match by name. Purple and green boards are the same board in two colours. Every pin is on the technical details page.
There is no code to start. A browser dashboard shows live readings, switches the outputs and runs rules. A rule watches one or two sensors and runs up to 10 steps, and a board holds up to 10 rules. Rules run on the board itself, not in the browser. The 32 free lessons in the curriculum are for ages 10 and up, over four terms, ending with a capstone and an expo. In the project library, 43 of the 50 ideas need no code.
Code comes later, if you want it. Uploading your own Arduino sketch replaces the MakerBuddy firmware until you install it again by USB.
Best for: classes, and children who should see a working project before they see syntax. Its weak points have their own section below.
What the first hour looks like on each kind of kit
Here is the same first goal on both kinds of kit: make a light do something.
On a breadboard kit (Freenove, LAFVIN or DIYables)
- 1
Install the free Arduino IDE.
- 2
Add ESP32 support.
In File > Preferences, add
https://espressif.github.io/arduino-esp32/package_esp32_index.jsonto "Additional Board Manager URLs", then install the "esp32" package from the Boards Manager, as Espressif's installation guide (opens in a new tab) describes. - 3
Plug in the board.
If no new port appears, install the driver for the board's USB chip. Freenove's C tutorial (opens in a new tab) says its board uses a CH340 chip and shows how to install the driver, and the DIYables kit page (opens in a new tab) names a CP2102 chip.
- 4
Wire the LED.
Run a wire from GPIO 13 to a 220-ohm resistor, the resistor to the LED's long leg, and the short leg to GND. Avoid GPIO 0, 2, 5, 12 and 15 for now: Espressif's GPIO page (opens in a new tab) lists them as strapping pins, which affect how the board starts.
- 5
Upload the sketch below.
If the upload stops with "Failed to connect", hold BOOT and press EN as it starts, the manual download mode in Espressif's esptool troubleshooting guide (opens in a new tab).
// First sketch for a breadboard ESP32 kit: blink an LED on GPIO 13.
const int LED_PIN = 13;     // the pin wired to the resistor and LED

void setup() {
  pinMode(LED_PIN, OUTPUT); // this pin will drive the LED
}

void loop() {
  digitalWrite(LED_PIN, HIGH);  // LED on
  delay(500);                   // wait half a second
  digitalWrite(LED_PIN, LOW);   // LED off
  delay(500);                   // wait, then loop() starts again
}
setup() runs once, and loop() then runs forever. The resistor limits the current so the LED survives. If nothing lights up, turn the LED round. Our guide to programming an ESP32 with the Arduino IDE covers each step in more depth.
That is a good first hour: the student has learnt what a pin is, why the resistor is there and what a program looks like.
On the MakerBuddy kit
- 1
Power the board
with a micro-USB cable and a 5 V USB charger. Ask us whether these come with your order.
- 2
Join it to Wi-Fi.
The board needs a 2.4 GHz network, and a phone hotspot works. The first-time setup is done once per board.
- 3
Open a dashboard.
On a laptop, use Chrome, Edge or Firefox with the free MakerBuddy extension. On a Mac, iPhone or iPad, use Safari. Android phones cannot control the board yet.
- 4
Watch the readings.
Cover the light sensor with your hand and watch its number, on a scale of 0 to 100, fall.
- 5
Make a rule.
Pick the Condition mode, choose the light sensor, set "less than 30" and add one step: turn the blue light on. Cover the sensor, and the light comes on by itself. A second rule, light above 40, can turn it off.
In the same hour, this student has built something that reacts, without a resistor or a line of code. The Wi-Fi and dashboard lesson, the first light lesson and the light sensing lesson are free to read before you buy anything.
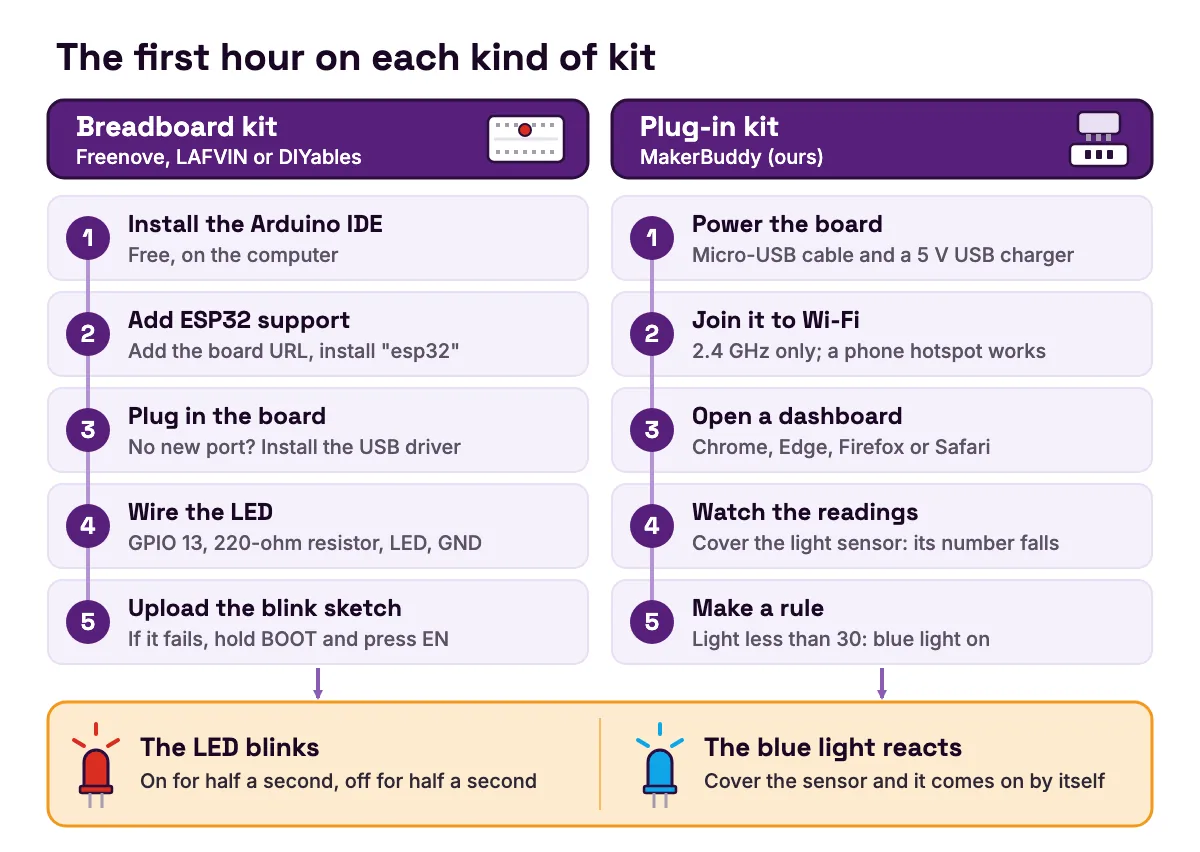
Both paths are valid. The breadboard path builds electronics knowledge first. The plug-in path builds the habit of turning an idea into a working rule, which we explain in how no-code rules teach real logic.
Worked example: two buyers, one checklist
Write down two or three must-haves, cross out every kit that fails one, then compare what is left on price.
Buyer 1: a 15-year-old who wants a Wi-Fi weather station
Must-haves: a temperature and humidity sensor, a screen, and a tutorial in typed code.
- 1
Freenove Basic is out
no humidity sensor and no screen.
- 2
DIYables is out
no humidity sensor is listed.
- 3
MakerBuddy is out
its lessons do not teach typed code.
- 4
ACEBOTT stays, just
it has both parts and Arduino code, but it is aimed at younger starters.
- 5
Freenove Ultimate and LAFVIN stay
both have a humidity sensor and a screen.
Decision: LAFVIN for a ready-made web weather station lesson in Arduino code. Freenove Ultimate, at $56.99 on Freenove's store page (opens in a new tab), for MicroPython as well and a longer course.
Buyer 2: a teacher with 30 students aged 11
Must-haves: something working in the first lesson without wiring, a lesson sequence for the year, and kits shared by two or three students. Our guide for teachers counts 10 to 15 kits for a class of 30, plus a spare, so this teacher plans on 13.
- 1
Freenove, LAFVIN and DIYables are out
none offers blocks or a no-code start, so the first project means wiring a circuit and uploading a program.
- 2
ACEBOTT stays
blocks avoid typed code, and its outline has 41 lessons. Check how the modules connect before you buy 13.
- 3
MakerBuddy stays
no wiring, no code to start, and 32 lessons over four terms.
Here is the cost of 13 kits at each maker's listed price, before shipping and tax. Each group also needs a computer, or for MakerBuddy a laptop, Mac or iPad.
| Kit | Listed price | 13 kits |
|---|---|---|
| ACEBOTT QE200 | $25.58 | $332.54 |
| DIYables ESP32 Starter Kit | $39.99 | $519.87 |
| Freenove Ultimate | $56.99 | $740.87 |
| MakerBuddy, Pakistan | PKR 40,000 | PKR 509,600 after the 2% discount |
| MakerBuddy, elsewhere | Written quote | Written quote |
- Kit
- ACEBOTT QE200
- Listed price
- $25.58
- 13 kits
- $332.54
- Kit
- DIYables ESP32 Starter Kit
- Listed price
- $39.99
- 13 kits
- $519.87
- Kit
- Freenove Ultimate
- Listed price
- $56.99
- 13 kits
- $740.87
- Kit
- MakerBuddy, Pakistan
- Listed price
- PKR 40,000
- 13 kits
- PKR 509,600 after the 2% discount
- Kit
- MakerBuddy, elsewhere
- Listed price
- Written quote
- 13 kits
- Written quote
Table note: prices from ACEBOTT's shop page (opens in a new tab), the DIYables kit page (opens in a new tab) and Freenove's FNK0047 page (opens in a new tab), checked 29 October 2026.
In Pakistan, MakerBuddy takes 2% off orders of 10 kits or more, 5% from 25 and 8% from 50. The discount applies to the whole order, so look at the rows near each step:
| Kits | Before discount | Off each kit | Total |
|---|---|---|---|
| 13 | PKR 520,000 | PKR 800 | PKR 509,600 |
| 24 | PKR 960,000 | PKR 800 | PKR 940,800 |
| 25 | PKR 1,000,000 | PKR 2,000 | PKR 950,000 |
| 49 | PKR 1,960,000 | PKR 2,000 | PKR 1,862,000 |
| 50 | PKR 2,000,000 | PKR 3,200 | PKR 1,840,000 |
- Kits
- 13
- Before discount
- PKR 520,000
- Off each kit
- PKR 800
- Total
- PKR 509,600
- Kits
- 24
- Before discount
- PKR 960,000
- Off each kit
- PKR 800
- Total
- PKR 940,800
- Kits
- 25
- Before discount
- PKR 1,000,000
- Off each kit
- PKR 2,000
- Total
- PKR 950,000
- Kits
- 49
- Before discount
- PKR 1,960,000
- Off each kit
- PKR 2,000
- Total
- PKR 1,862,000
- Kits
- 50
- Before discount
- PKR 2,000,000
- Off each kit
- PKR 3,200
- Total
- PKR 1,840,000
Twenty-five kits cost only PKR 9,200 more than 24, and fifty kits cost PKR 22,000 less than 49. If you are just under a step, price the next one. Outside Pakistan, schools in the US and Canada can ask for a MakerBuddy quote with the number of kits, the delivery city and the date needed.
Decision: ACEBOTT if the budget is tight and the teacher is happy to plan from an outline. MakerBuddy if the teacher wants a ready sequence and no wiring in the first term.
Common mistakes when buying an ESP32 kit
| Symptom | Cause | Fix |
|---|---|---|
| The kit arrives with no instructions | Freenove kits have no paper tutorial; the link is on the box | Check that the tutorial is online and in a language your student reads well |
| A favourite project needs a part you don't have | You bought the basic tier | Compare the part list with your projects before you pay |
| The computer does not see the board | A missing USB driver, or a charge-only cable | Install the driver for the board's USB chip and use a data cable |
| A 5 V module gives odd readings | The ESP32 works at 3.3 V and the module at 5 V | Check each module's voltage before you connect it |
| An analogue sensor reads junk once Wi-Fi connects | It is on an ADC2 pin, which Wi-Fi takes over | Move it to an ADC1 pin, GPIO 32 to 39 |
| The board will not join the school Wi-Fi | The network is 5 GHz only, or needs a web login | Use a 2.4 GHz network that joins with a name and password, or a phone hotspot |
| A child loses interest by lesson three | The first lessons are all LEDs and resistors | Pick a kit whose early lessons build something the child cares about |
- Symptom
- The kit arrives with no instructions
- Cause
- Freenove kits have no paper tutorial; the link is on the box
- Fix
- Check that the tutorial is online and in a language your student reads well
- Symptom
- A favourite project needs a part you don't have
- Cause
- You bought the basic tier
- Fix
- Compare the part list with your projects before you pay
- Symptom
- The computer does not see the board
- Cause
- A missing USB driver, or a charge-only cable
- Fix
- Install the driver for the board's USB chip and use a data cable
- Symptom
- A 5 V module gives odd readings
- Cause
- The ESP32 works at 3.3 V and the module at 5 V
- Fix
- Check each module's voltage before you connect it
- Symptom
- An analogue sensor reads junk once Wi-Fi connects
- Cause
- It is on an ADC2 pin, which Wi-Fi takes over
- Fix
- Move it to an ADC1 pin, GPIO 32 to 39
- Symptom
- The board will not join the school Wi-Fi
- Cause
- The network is 5 GHz only, or needs a web login
- Fix
- Use a 2.4 GHz network that joins with a name and password, or a phone hotspot
- Symptom
- A child loses interest by lesson three
- Cause
- The first lessons are all LEDs and resistors
- Fix
- Pick a kit whose early lessons build something the child cares about
Table notes: the Freenove Basic part list (opens in a new tab) says there is no paper tutorial and the download link is on the box. esptool's troubleshooting guide (opens in a new tab) lists faulty serial drivers and bad USB cables among the causes of connection errors. The ESP32 datasheet (opens in a new tab) gives the chip's characteristics at 3.3 V and its Wi-Fi as 802.11 b/g/n at 2.4 GHz. The HC-SR04 distance sensor runs on 5 V, according to its datasheet (opens in a new tab). Espressif's GPIO page (opens in a new tab) lists GPIO 32 to 39 as ADC1 and says ADC2 pins cannot be used when Wi-Fi is used.
When MakerBuddy is the wrong choice
We would rather you buy the right kit than ours. Pick something else if any of these is true:
- You want breadboard wiring and C++ from day one. MakerBuddy's lessons do not teach typed code.
- You need a camera, keypad, RFID reader, stepper motor or OLED screen. None is in the MakerBuddy kit.
- You want Bluetooth projects. The ESP32 has Bluetooth, but the MakerBuddy firmware does not use it.
- Something must happen at a set time, such as 8 am. The board has no clock. Timer rules repeat at intervals but cannot wait for a time of day.
- Your family uses only Android phones. Android phones cannot control the board yet.
- You want to switch mains power. No kit here should do that. MakerBuddy's relay is for low-voltage things only.
- Your school network stops devices talking to each other. The dashboard reaches the board over your own Wi-Fi. The board's local connection has no password, so use only a network you trust, and never open it to the internet.
- You need the cheapest kit outside Pakistan. MakerBuddy is sold there by quote, and it is not a budget kit.
If none of those applies, MakerBuddy gives a working project in the first hour and an ordinary ESP32 underneath for when the student is ready to code. For kits beyond the ESP32, see our honest guide to STEM kits by age and the guide to electronics kits for beginners. To weigh the board against a plain Arduino, read ESP32 vs Arduino Uno for beginners. More guides are on the MakerBuddy blog.
FAQ
What is an ESP32 starter kit?
It is a box with an ESP32 development board, parts to connect to it, and lessons that show you how. The ESP32 has Wi-Fi and Bluetooth built in, according to Espressif's ESP32 datasheet (opens in a new tab), which is why many are sold as an IoT starter kit.
Which ESP32 kit is best for beginners?
For a teen who wants to learn code, a breadboard kit with a long tutorial, such as the Freenove Basic or the LAFVIN Ultimate, is a good start. For a child of about 10, blocks (ACEBOTT QE200) or no code to start (MakerBuddy, our kit) avoid an early wall of wiring and syntax.
Is Arduino or ESP32 better for a beginner?
Both suit beginners, and both use the Arduino IDE. The Arduino UNO R3 datasheet (opens in a new tab) gives a 16 MHz ATmega328P with 2 kB of SRAM, and its feature list has no Wi-Fi or Bluetooth. The ESP32 datasheet (opens in a new tab) lists up to 240 MHz, 520 KB of SRAM, Wi-Fi and Bluetooth. Choose the ESP32 if your projects should talk to a phone or a dashboard.
Which ESP32 board should I buy?
For a first kit, buy the kit, not a bare board, because the lessons are written for the board inside. If you buy a board on its own, a common DevKit with a USB port and labelled pins is the easy choice. Our guide to ESP32 development boards and which to buy compares the common types.
Is an ESP32 kit good for a 10-year-old?
Yes, if the kit is made for that age. ACEBOTT gives age 10+ in its QE200 documentation (opens in a new tab), and the MakerBuddy lessons are written for ages 10 and up, with an adult nearby for younger builders. Breadboard kits with long tutorials suit older students, or a 10-year-old working with an adult.
Can you use an ESP32 without coding?
Only if the board runs firmware made for it. The breadboard kits here start in the Arduino IDE or MicroPython, so the first project is a program. MakerBuddy's board comes with firmware that gives a dashboard and rules, so its first projects need no code.
Does the ESP32 use C++ or Python?
Both. In the Arduino IDE you write C++, which most kit tutorials use. MicroPython also runs on the ESP32 (opens in a new tab), and Freenove's MicroPython tutorial (opens in a new tab) and the DIYables kit page (opens in a new tab) offer MicroPython guides as well.
How much does an ESP32 starter kit cost?
On 29 October 2026, ACEBOTT's QE200 was listed at $25.58 on its shop page (opens in a new tab), DIYables at $39.99 on its kit page (opens in a new tab), the Freenove Basic at $28.99 on Freenove's FNK0061 page (opens in a new tab) and the Freenove Ultimate at $56.99 on Freenove's store (opens in a new tab). A MakerBuddy kit is PKR 40,000 in Pakistan and sold by quote elsewhere. Add shipping, and a computer for a breadboard kit.
Is there a free ESP32 starter kit PDF?
Yes, for some kits. Freenove publishes its Basic kit's C tutorial (opens in a new tab) as a free PDF, and LAFVIN's lessons are free on its tutorial site (opens in a new tab). All 32 MakerBuddy lessons are free to read on the curriculum page, with or without a kit.
What else do I need besides the kit?
For a breadboard kit, a computer that runs the Arduino IDE, and sometimes a USB driver. For MakerBuddy, a micro-USB cable, a 5 V USB charger, a 2.4 GHz Wi-Fi network (a phone hotspot works) and a laptop, Mac, iPhone or iPad. It needs no accounts, and its readings stay on your own network.
Sources
- Freenove: Basic Starter Kit for ESP32 part list (GitHub) (opens in a new tab)
- Freenove: Basic Starter Kit for ESP32, C tutorial (PDF on GitHub) (opens in a new tab)
- Freenove: Basic Starter Kit for ESP32, MicroPython tutorial (PDF on GitHub) (opens in a new tab)
- Freenove: ESP32 Basic Starter Kit, FNK0061 (store page) (opens in a new tab)
- Freenove: ESP32 Ultimate Starter Kit, FNK0047 (store page) (opens in a new tab)
- Freenove: Ultimate Starter Kit for ESP32 part list (GitHub) (opens in a new tab)
- LAFVIN: ESP32 Ultimate Starter Kit, introduction and bill of materials (opens in a new tab)
- LAFVIN: ESP32 Ultimate Starter Kit tutorial contents (opens in a new tab)
- DIYables: ESP32 Starter Kit (opens in a new tab)
- ACEBOTT: QE200 ESP32 Basic Starter Kit documentation (opens in a new tab)
- ACEBOTT shop: QE200 ESP32 Basic Starter Kit (opens in a new tab)
- Espressif: ESP32 Series Datasheet (opens in a new tab)
- Espressif: ESP32 GPIO and RTC GPIO (strapping pins, ADC1 and ADC2, Wi-Fi) (opens in a new tab)
- Espressif: Installing the Arduino-ESP32 core (opens in a new tab)
- Espressif: esptool troubleshooting (opens in a new tab)
- Arduino: UNO R3 datasheet (opens in a new tab)
- HC-SR04 ultrasonic ranging module datasheet (SparkFun) (opens in a new tab)
- MicroPython: Quick reference for the ESP32 (opens in a new tab)