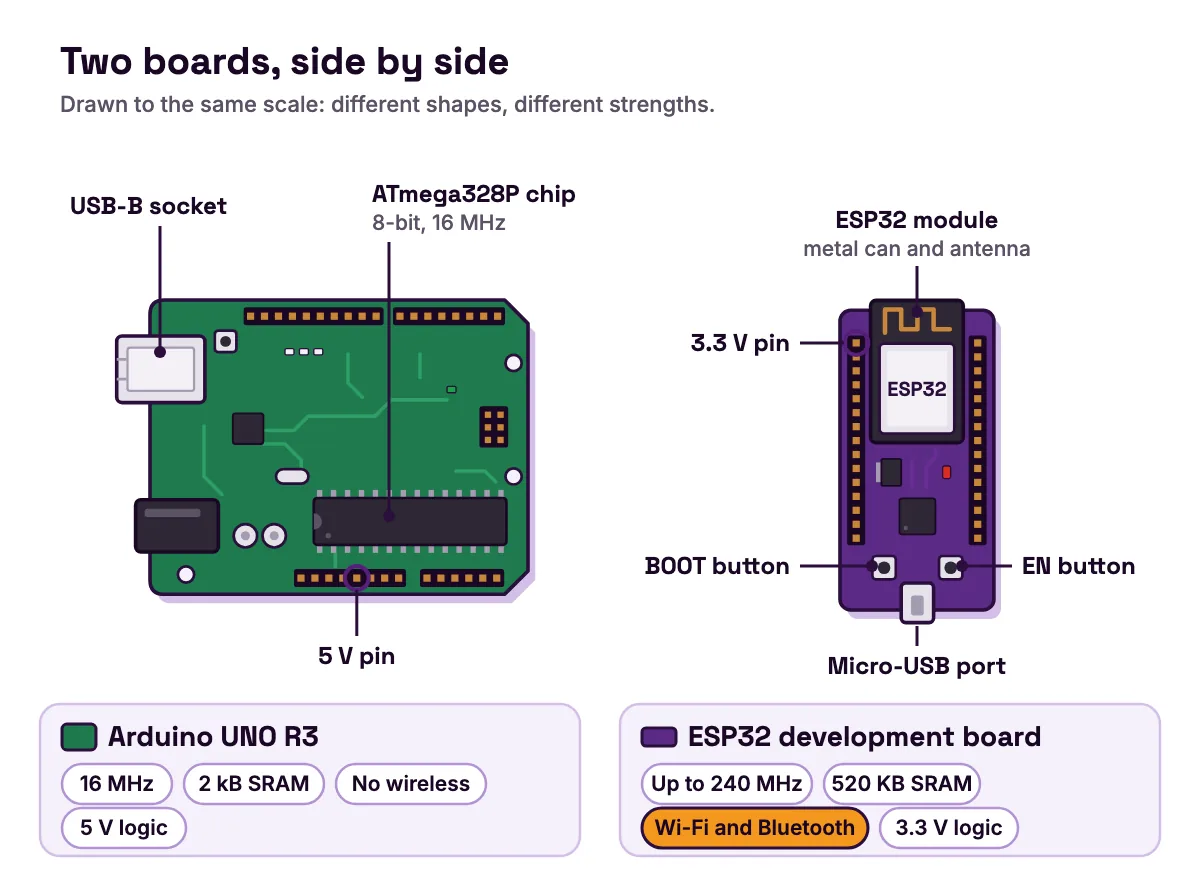
ESP32 vs Arduino comes down to one question: should your project talk to a phone or a laptop? If it should, choose an ESP32. It has Wi-Fi and Bluetooth on the chip, runs at up to 240 MHz and has 520 KB of working memory, according to Espressif's ESP32 datasheet (opens in a new tab). If your circuits use 5 V parts and never need a network, the classic Arduino UNO R3 is a fine, simple start. It runs at 16 MHz with 2 kB of working memory and no wireless, according to its datasheet (opens in a new tab).
Both boards use the same free Arduino IDE, so what you learn on one carries over to the other. Below, one night-light sketch runs on both, so you can see exactly what changes.
ESP32 vs Arduino Uno at a glance
| ESP32 development board | Arduino UNO R3 | |
|---|---|---|
| Main chip | Espressif ESP32: one or two 32-bit Xtensa LX6 cores | ATmega328P: an 8-bit AVR microcontroller |
| Speed | Up to 240 MHz | 16 MHz |
| Working memory (SRAM) | 520 KB | 2 kB |
| Room for your program (default settings) | 1,310,720 bytes | 32,256 bytes |
| Wireless | 2.4 GHz Wi-Fi (802.11 b/g/n), Bluetooth 4.2 and Bluetooth LE | None |
| Logic level | 3.3 V | 5 V |
| Pins | 34 programmable GPIOs on the chip; a 30-pin board brings out fewer | 14 digital pins (6 with PWM) and 6 analog inputs |
| Analog readings | 12-bit, 0 to 4095, on up to 18 channels | 10-bit, 0 to 1023, on A0 to A5 |
| USB | Micro-USB with a USB-to-UART bridge chip (Espressif's DevKitC) | USB-B |
| Price, checked 29 October 2026 | US$10.00 for Espressif's ESP32-DevKitC-32E at DigiKey | US$27.60 for an Arduino Uno R3 at SparkFun |
| Ways to program it | Arduino IDE, MicroPython or Espressif's ESP-IDF | Arduino IDE |
- Main chip
- ESP32 development board
- Espressif ESP32: one or two 32-bit Xtensa LX6 cores
- Arduino UNO R3
- ATmega328P: an 8-bit AVR microcontroller
- Speed
- ESP32 development board
- Up to 240 MHz
- Arduino UNO R3
- 16 MHz
- Working memory (SRAM)
- ESP32 development board
- 520 KB
- Arduino UNO R3
- 2 kB
- Room for your program (default settings)
- ESP32 development board
- 1,310,720 bytes
- Arduino UNO R3
- 32,256 bytes
- Wireless
- ESP32 development board
- 2.4 GHz Wi-Fi (802.11 b/g/n), Bluetooth 4.2 and Bluetooth LE
- Arduino UNO R3
- None
- Logic level
- ESP32 development board
- 3.3 V
- Arduino UNO R3
- 5 V
- Pins
- ESP32 development board
- 34 programmable GPIOs on the chip; a 30-pin board brings out fewer
- Arduino UNO R3
- 14 digital pins (6 with PWM) and 6 analog inputs
- Analog readings
- ESP32 development board
- 12-bit, 0 to 4095, on up to 18 channels
- Arduino UNO R3
- 10-bit, 0 to 1023, on A0 to A5
- USB
- ESP32 development board
- Micro-USB with a USB-to-UART bridge chip (Espressif's DevKitC)
- Arduino UNO R3
- USB-B
- Price, checked 29 October 2026
- ESP32 development board
- US$10.00 for Espressif's ESP32-DevKitC-32E at DigiKey
- Arduino UNO R3
- US$27.60 for an Arduino Uno R3 at SparkFun
- Ways to program it
- ESP32 development board
- Arduino IDE, MicroPython or Espressif's ESP-IDF
- Arduino UNO R3
- Arduino IDE
Sources: Espressif's ESP32 datasheet (opens in a new tab), DevKitC guide (opens in a new tab) and ADC reference (opens in a new tab), and the MicroPython quick reference (opens in a new tab); Arduino's UNO R3 datasheet (opens in a new tab), product page (opens in a new tab), analogRead reference (opens in a new tab) and UNO R4 announcement (opens in a new tab), which calls the R3's chip an "8-bit AVR microcontroller"; and the DigiKey (opens in a new tab) and SparkFun (opens in a new tab) listings. Program space is what the compiler reported for the sketch below.
Prices change often, and boards from other makers cost different amounts. If you buy in Pakistan, our guide to ESP32 and Arduino prices in Pakistan covers local shops.
ESP32 or Arduino for beginners: which to choose
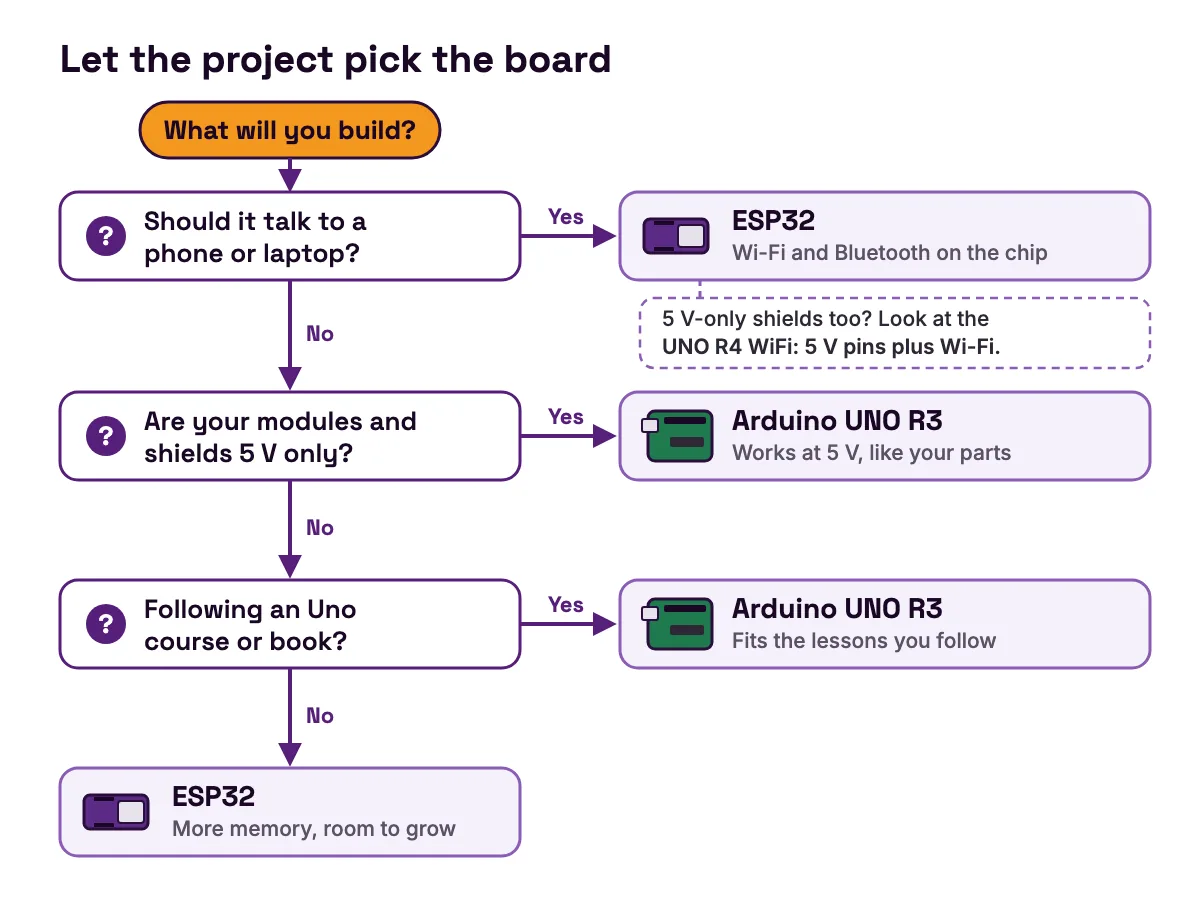
Start with what the learner wants to build, not with the specs.
Choose an ESP32 if:
- your project should show its readings on a phone, laptop or web page, or take commands from one
- you want Bluetooth, for example to talk to a phone app
- you plan to grow into bigger programs with a screen, many sensors or a small web server
- you are happy to check that each sensor and module works at 3.3 V
- you want to try MicroPython as well as Arduino code
Choose an Arduino UNO R3 if:
- your circuits use 5 V modules and shields made for the Uno
- you are following a book, course or starter kit written for the Uno
- you want the fewest rules on day one: no pins that stop working with Wi-Fi on, and no start-up pins to avoid
- the project never needs a network
There is a fair case for the Uno. Arduino's own UNO R3 datasheet (opens in a new tab) calls it "our most used and documented board", and a first traffic light or buzzer game needs no Wi-Fi. The case against it is growth. With 2 kB of working memory and no wireless, it runs out of room once a project wants a screen and a network. Our beginner's guide to the ESP32 shows what the extra room makes possible.
Arduino is a platform, ESP32 is a chip
The two names are different kinds of thing, which is why the comparison confuses people.
Arduino is a company and a platform: a family of boards, the free Arduino IDE and its libraries. A sketch is C++. The Arduino tools compile it with versions of gcc and g++ made for your board's chip, as the Arduino CLI build notes (opens in a new tab) explain.
The ESP32 is a chip made by Espressif Systems. Its datasheet (opens in a new tab) describes it as "a single 2.4 GHz Wi-Fi-and-Bluetooth combo chip". You use it on a development board, which adds a micro-USB port, a USB-to-UART bridge chip and Boot and EN buttons, as Espressif's DevKitC guide (opens in a new tab) lists.
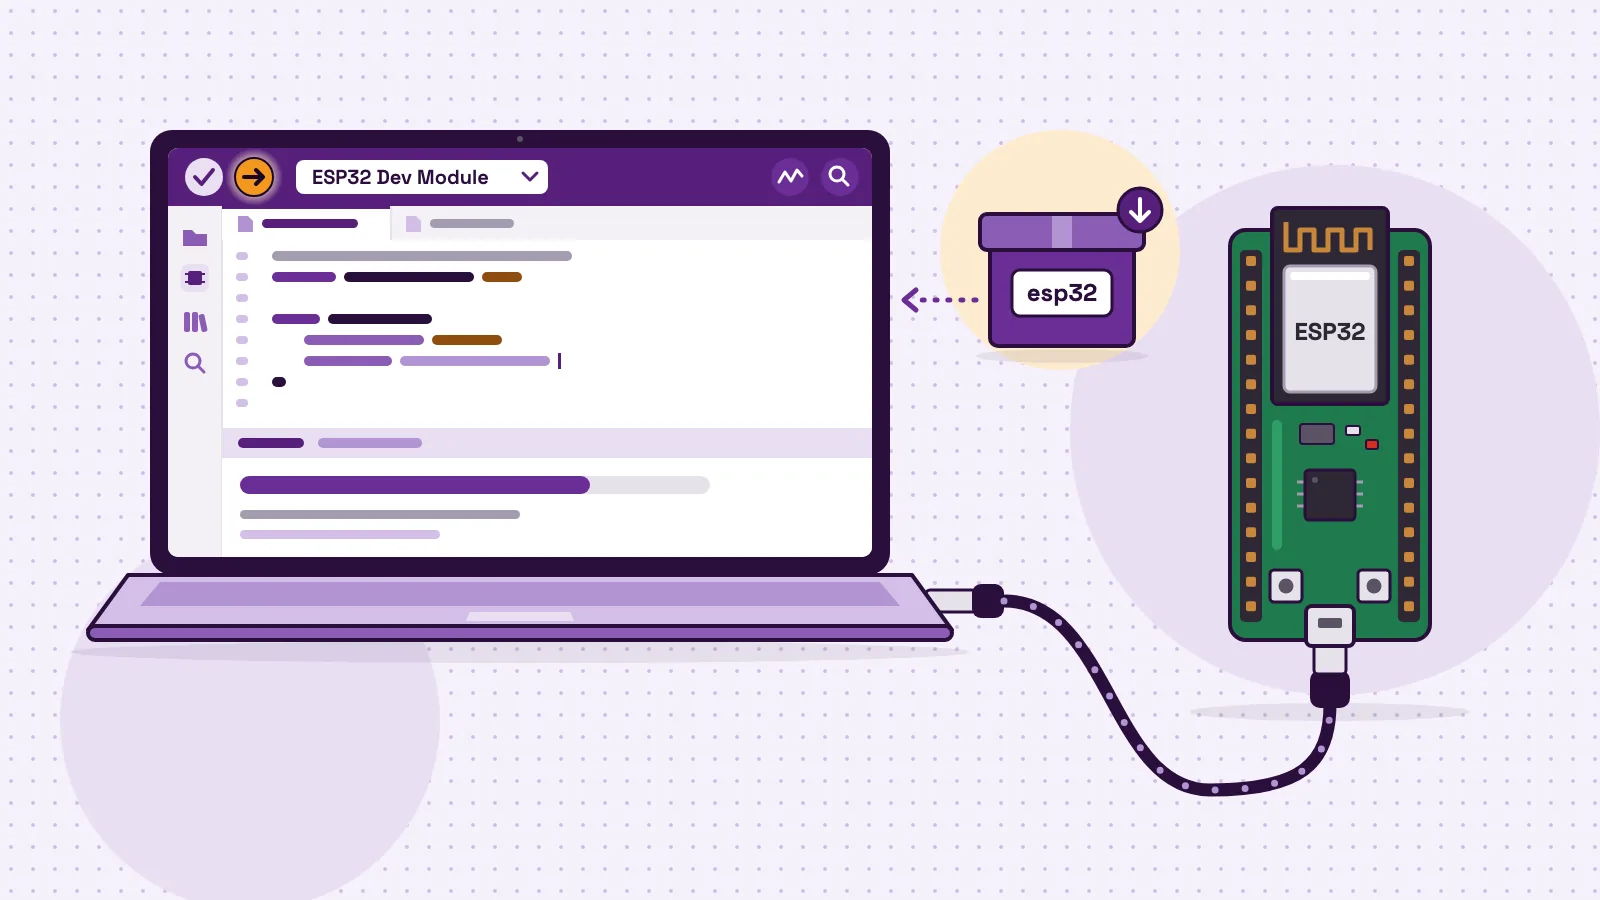
So "ESP32 or Arduino" is not really either-or. Once you install Espressif's Arduino package (opens in a new tab), you write ordinary Arduino sketches for an ESP32 board. Our guide to programming an ESP32 with the Arduino IDE walks through it step by step.
Arduino's own boards blur the line further. The UNO R4 WiFi (opens in a new tab) keeps 5 V pins, with a 48 MHz Renesas RA4M1 chip, 256 kB of flash and 32 kB of SRAM, and it carries an ESP32-S3 for Wi-Fi and Bluetooth. The Arduino Nano ESP32 (opens in a new tab) is built on a u-blox NORA-W106 module with an ESP32-S3 chip inside. The ESP32-S3 is a different chip from the original ESP32 in this guide, with its own pins. Our guide to the ESP32, ESP8266, ESP32-S3 and ESP32-C3 explains the family.
Neither board is a Raspberry Pi, which is a small computer with an operating system. Our comparison of Arduino, Raspberry Pi and ESP32 matches each one to a project.
Speed and memory: what the numbers mean in practice
The ESP32 runs at up to 240 MHz and the UNO R3 at 16 MHz, according to their datasheets (ESP32 (opens in a new tab), UNO R3 (opens in a new tab)). That is fifteen times the clock speed. But reading a button and lighting an LED happen faster than you can see on either board. Speed matters when the board juggles Wi-Fi, a web page, a screen and sensors at once.
Memory matters sooner. We compiled the same night-light sketch, the worked example below, for both boards with the Arduino tools.
| Arduino UNO R3 | ESP32 Dev Module | |
|---|---|---|
| Program size | 2,396 bytes | 289,864 bytes |
| Space for programs | 32,256 bytes | 1,310,720 bytes |
| Working memory used at start | 221 bytes | 22,164 bytes |
| Working memory left for your variables | 1,827 bytes | 305,516 bytes |
- Program size
- Arduino UNO R3
- 2,396 bytes
- ESP32 Dev Module
- 289,864 bytes
- Space for programs
- Arduino UNO R3
- 32,256 bytes
- ESP32 Dev Module
- 1,310,720 bytes
- Working memory used at start
- Arduino UNO R3
- 221 bytes
- ESP32 Dev Module
- 22,164 bytes
- Working memory left for your variables
- Arduino UNO R3
- 1,827 bytes
- ESP32 Dev Module
- 305,516 bytes
The ESP32 build is bigger because its Arduino package brings in more system code, but it still leaves far more room. The UNO's 2 kB of SRAM, listed in its datasheet (opens in a new tab), has to hold your variables, any text you print and every library's buffers.
A real IoT program shows the gap. The MakerBuddy firmware, which runs the board's Wi-Fi dashboard link and its rules, is 1,284,130 bytes in version 2.10, as the technical details list. 1,284,130 ÷ 32,256 is about 39.8, so that one program would need the program space of about 40 UNOs.
3.3 V vs 5 V: the difference that breaks things
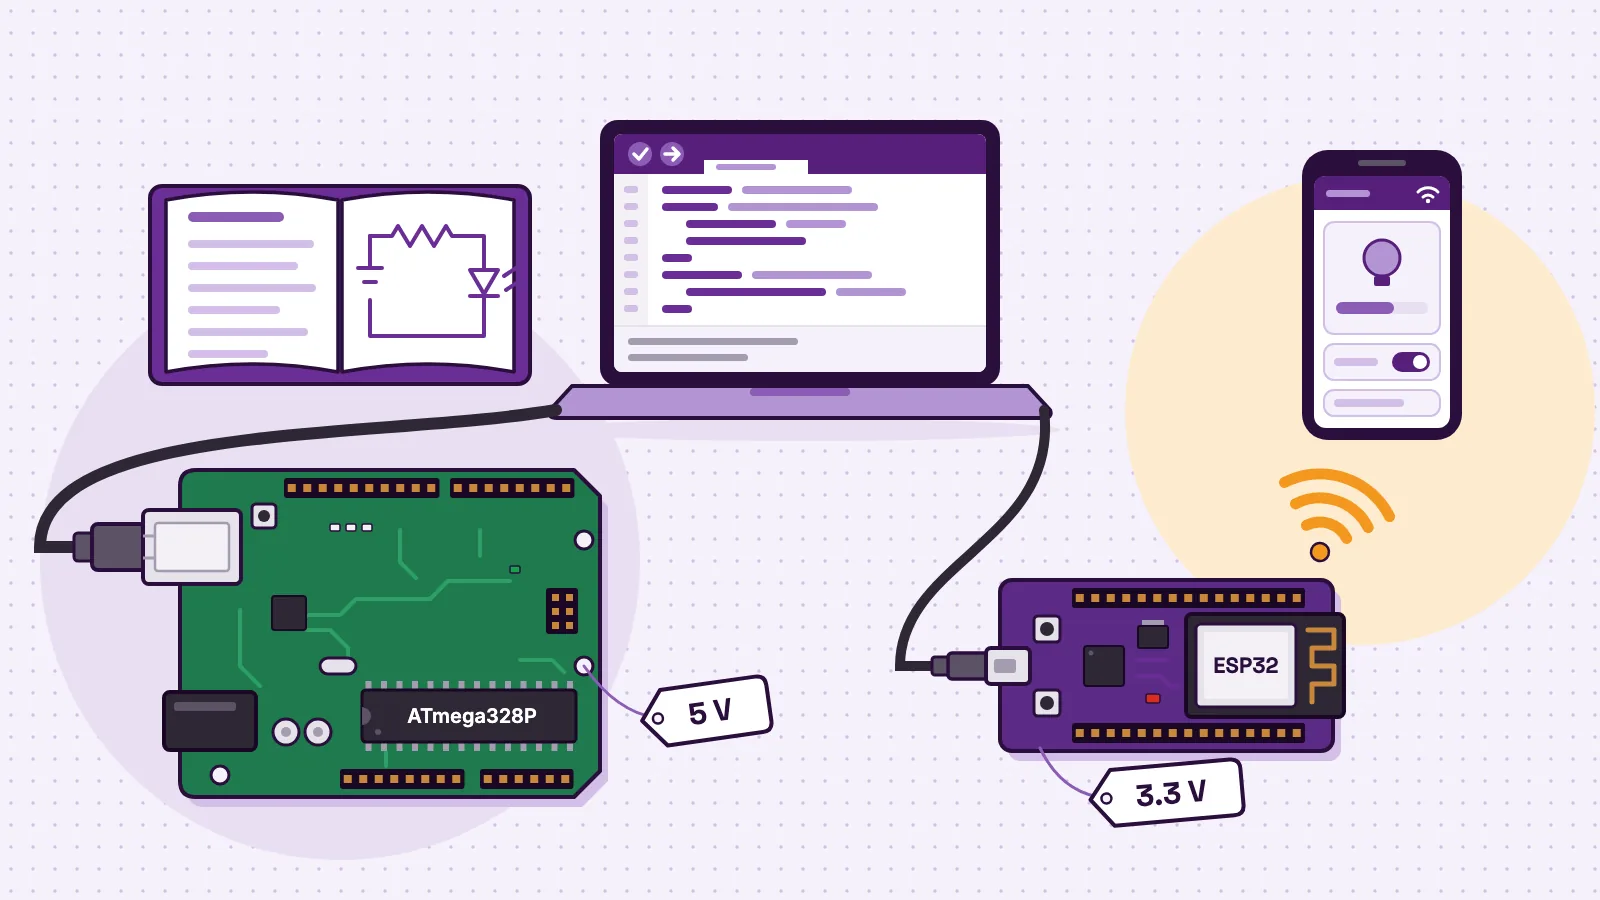
The UNO R3 works at 5 V. Its datasheet (opens in a new tab) says the IOREF pin, which tells shields the logic voltage, is connected to 5 V. When an UNO pin is HIGH, it is close to 5 V.
The ESP32 works at 3.3 V. Its datasheet (opens in a new tab) gives the highest input voltage as the supply plus 0.3 V, which is 3.6 V on a 3.3 V board. A 5 V signal is above that. The same table says a HIGH output from the ESP32 is at least 0.8 times the supply, about 2.64 V, so some 5 V modules may not read it as HIGH.
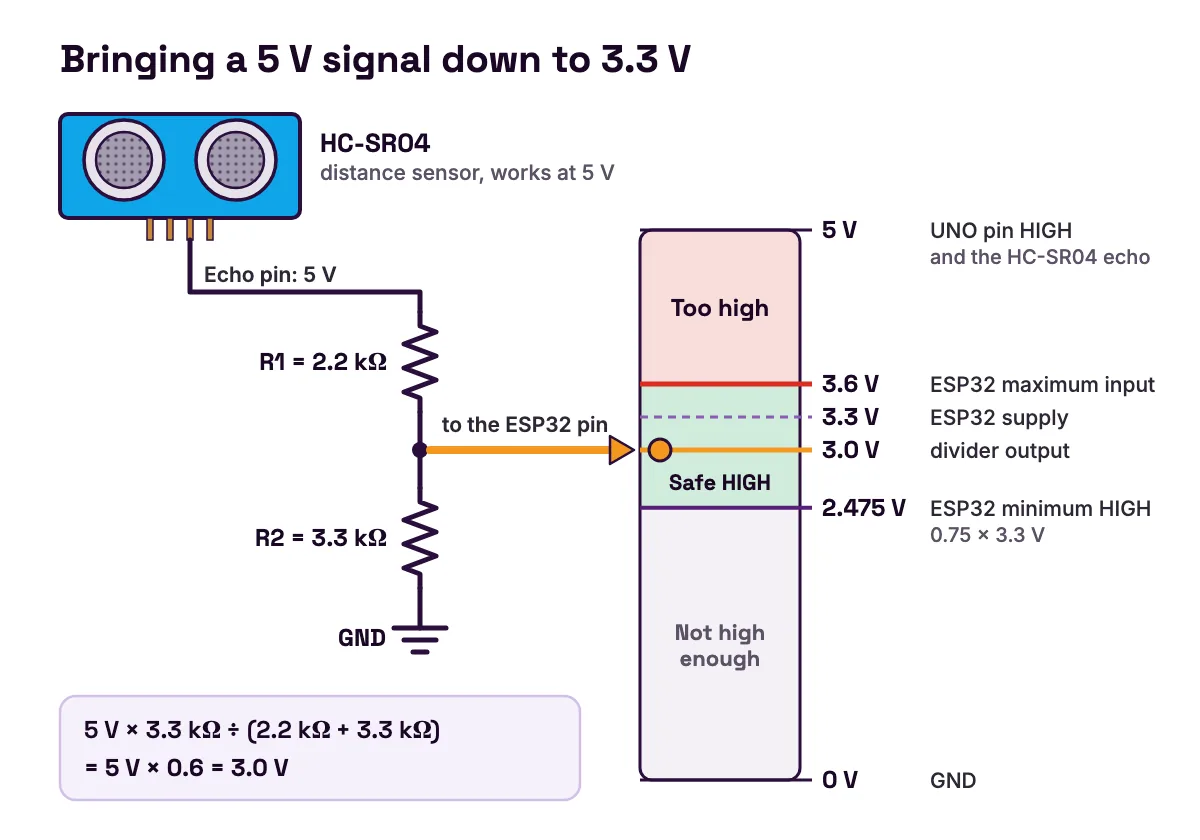
Many beginner modules are 5 V parts. The HC-SR04 datasheet (opens in a new tab) gives the distance sensor's working voltage as 5 V, and its echo pin sends a signal back to the board.
Worked example: bringing a 5 V signal down to 3.3 V
A voltage divider is two resistors in a line. The signal goes in at the top, and the board reads the point between them. Use 2.2 kΩ on top and 3.3 kΩ below:
Vout = Vin × R2 ÷ (R1 + R2)
     = 5 V × 3.3 kΩ ÷ (2.2 kΩ + 3.3 kΩ)
     = 5 V × 0.6
     = 3.0 V
Now check 3.0 V against the ESP32's limits in its datasheet (opens in a new tab):
- Not too high. 3.0 V is below the 3.6 V maximum, with some margin in case the 5 V supply runs a little high.
- High enough. A HIGH input must be at least 0.75 times the supply: 0.75 × 3.3 V = 2.475 V. 3.0 V is above that, so the pin reads HIGH.
A divider only works for signals going into the ESP32. For signals going out to a 5 V part, use a logic-level shifter, or pick a version of the module made for 3.3 V. Our guide to 3.3 V and 5 V logic goes further.
Wi-Fi and Bluetooth: what the ESP32 adds
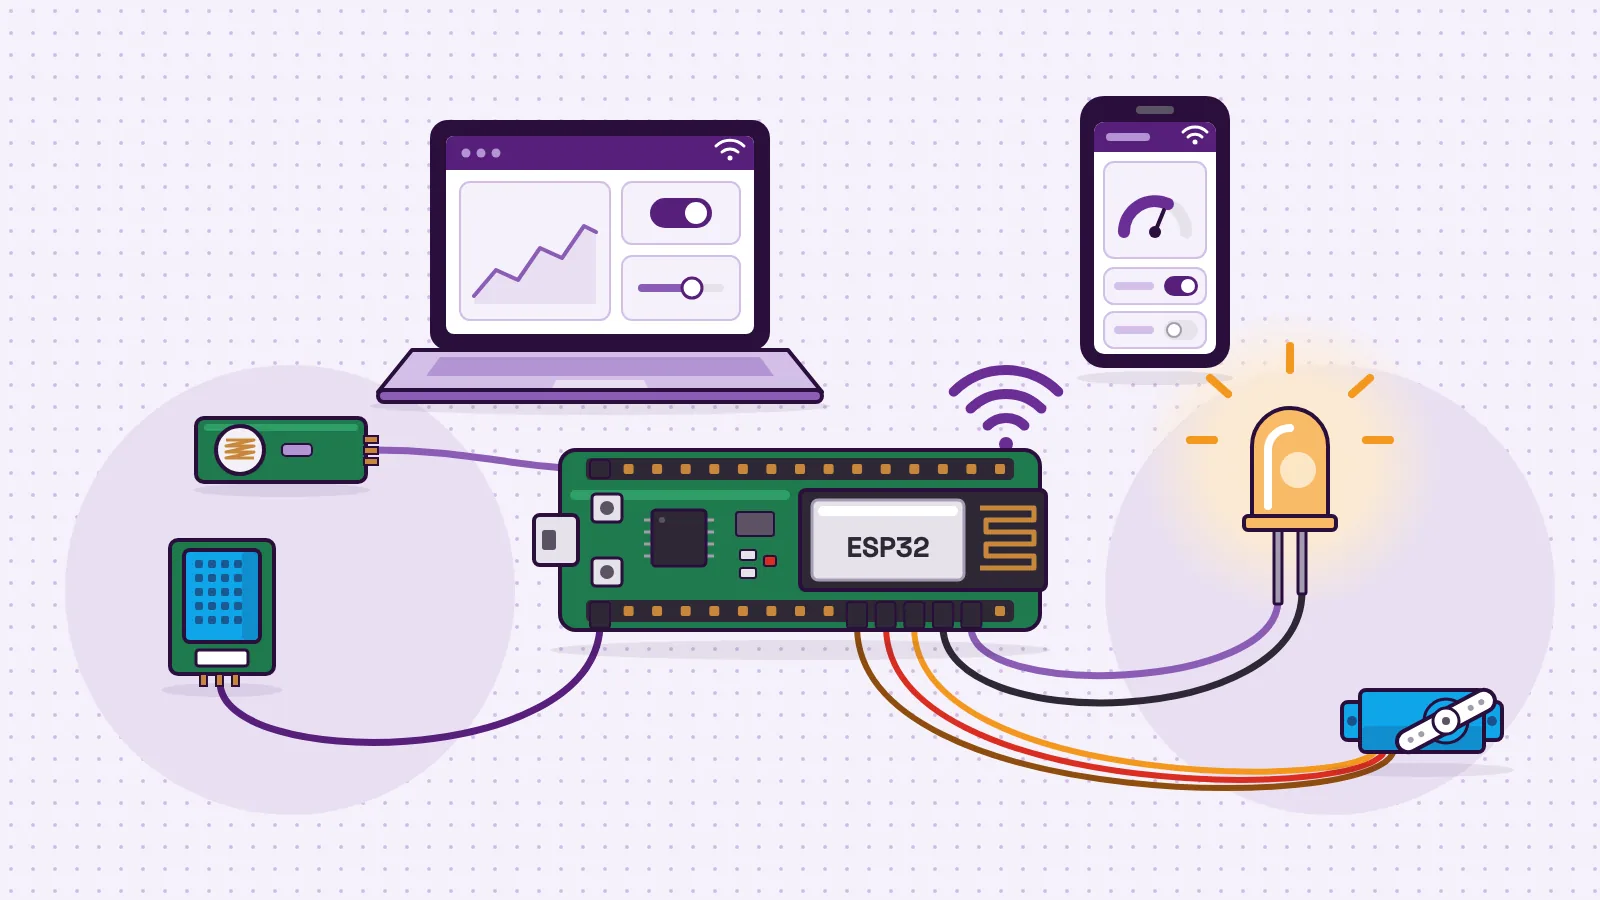
The ESP32 has 2.4 GHz Wi-Fi (802.11 b/g/n) and Bluetooth 4.2 with Bluetooth LE on the chip, according to its datasheet (opens in a new tab). That one feature turns a gadget into an IoT project: a weather station you read on a phone, a plant monitor you check from another room, a light you switch from a web page.
The UNO R3 has no radio. To connect it, you add a Wi-Fi module or shield, or move to an UNO R4 WiFi (opens in a new tab), which uses an ESP32-S3 for its Wi-Fi.
Two Wi-Fi limits catch beginners:
- 1
2.4 GHz only.
An ESP32 cannot join a 5 GHz network. A phone hotspot set to 2.4 GHz works. Networks with a sign-in web page cause trouble too, as the MakerBuddy network notes explain.
- 2
Some analog pins stop working.
Espressif's GPIO reference (opens in a new tab) says "ADC2 pins cannot be used when Wi-Fi is used". Put analog sensors on the ADC1 pins, GPIO 32 to 39.
Pins, analog inputs and PWM compared
| Arduino UNO R3 | ESP32 | |
|---|---|---|
| Pin names | D0 to D13 and A0 to A5, printed on the board | GPIO numbers, such as GPIO 35 |
| Analog input range | 0 to 5 V, read as 0 to 1023 | Up to about 3.1 V at the default setting, read as 0 to 4095 |
| Step size | About 4.9 mV per step | Depends on the setting; readings vary a little between chips |
| PWM (dimming) | analogWrite on 6 pins | analogWrite or ledcAttach on most output pins |
| Pins to treat with care | Some pins are shared with the USB bridge chip | Flash pins 6 to 11, input-only pins 34 to 39, start-up pins 0, 2, 5, 12 and 15, and ADC2 pins while Wi-Fi is on |
- Pin names
- Arduino UNO R3
- D0 to D13 and A0 to A5, printed on the board
- ESP32
- GPIO numbers, such as GPIO 35
- Analog input range
- Arduino UNO R3
- 0 to 5 V, read as 0 to 1023
- ESP32
- Up to about 3.1 V at the default setting, read as 0 to 4095
- Step size
- Arduino UNO R3
- About 4.9 mV per step
- ESP32
- Depends on the setting; readings vary a little between chips
- PWM (dimming)
- Arduino UNO R3
analogWriteon 6 pins- ESP32
analogWriteorledcAttachon most output pins
- Pins to treat with care
- Arduino UNO R3
- Some pins are shared with the USB bridge chip
- ESP32
- Flash pins 6 to 11, input-only pins 34 to 39, start-up pins 0, 2, 5, 12 and 15, and ADC2 pins while Wi-Fi is on
Sources: Arduino's analogRead reference (opens in a new tab) (the UNO's range and 4.9 mV step), UNO R3 product page (opens in a new tab) (the 6 PWM pins) and UNO R3 datasheet (opens in a new tab) (pins reserved for the USB bridge chip); Espressif's ADC reference (opens in a new tab) (150 mV to 3100 mV at the default 11 dB setting), LEDC reference (opens in a new tab) (analogWrite and ledcAttach) and GPIO reference (opens in a new tab) (the pin groups).
The sources differ on the top of that range: the MicroPython quick reference (opens in a new tab) gives 150 mV to 2450 mV as the roughly straight-line part of the same setting. So avoid thresholds right at the top of the scale.
The ESP32's analog readings need a little more care. Its datasheet (opens in a new tab) says results can differ by ±6% between chips by default, and suggests taking several samples and averaging them. The MakerBuddy firmware does exactly that: it averages four readings for each analog sensor.
The start-up pins are read once at power-on, then work as normal pins, as the ESP32 datasheet (opens in a new tab) explains. A part that holds one at the wrong level can stop the board starting. Our guide to which ESP32 pins are safe to use goes pin by pin.
Worked example: one night-light sketch for both boards
The clearest way to see the ESP32 vs Arduino Uno difference is to run the same program on both. This night light switches a lamp on when the room gets dark and off when it gets bright.
What you need:
- On an UNO R3: a light-dependent resistor (LDR) from 5V to A0, a 10 kΩ resistor from A0 to GND, and an LED with a 220 Ω resistor from pin 9 to GND.
- On a MakerBuddy board: nothing extra. The light sensor (GPIO 35) and the blue light (GPIO 12) are built in.
With the LDR wired this way, the reading goes up as the light gets brighter. The MakerBuddy light sensor works the same way: low numbers mean dark. Our guide to how an LDR works explains why.
The sketch
// Night light that runs on an Arduino UNO R3 or an ESP32 board.
// Everything that differs between the two boards is in this first block.

#if defined(ESP32)
  // ESP32: the MakerBuddy IoT Kit V1.0's built-in light sensor and blue light.
  const int LIGHT_PIN = 35;    // light sensor (LDR): ADC1, input only
  const int LAMP_PIN  = 12;    // blue light
  const int ADC_MAX   = 4095;  // 12-bit readings: 0 to 4095
#else
  // Arduino UNO R3: LDR from 5V to A0, a 10 kΩ resistor from A0 to GND,
  // and an LED with a 220 Ω resistor from pin 9 to GND.
  const int LIGHT_PIN = A0;
  const int LAMP_PIN  = 9;
  const int ADC_MAX   = 1023;  // 10-bit readings: 0 to 1023
#endif

// Switch on below 30/100 of full scale, and off again above 40/100.
const int DARK   = (long)ADC_MAX * 30 / 100;  // UNO 306, ESP32 1228
const int BRIGHT = (long)ADC_MAX * 40 / 100;  // UNO 409, ESP32 1638

bool lampOn = false;

void setup() {
  Serial.begin(115200);
  pinMode(LAMP_PIN, OUTPUT);

#if defined(ESP32)
  // Keep the MakerBuddy board's other outputs off.
  // The colour light is common anode: HIGH keeps each colour off.
  const int RGB_PINS[] = {13, 14, 27};
  for (int pin : RGB_PINS) {
    pinMode(pin, OUTPUT);
    digitalWrite(pin, HIGH);
  }
  pinMode(4, OUTPUT);           // buzzer
  digitalWrite(4, LOW);
  pinMode(23, OUTPUT);          // relay
  digitalWrite(23, LOW);
#endif
}

void loop() {
  int light = analogRead(LIGHT_PIN);

  if (!lampOn && light < DARK)   lampOn = true;   // dark enough: switch on
  if (lampOn  && light > BRIGHT) lampOn = false;  // bright again: switch off
  digitalWrite(LAMP_PIN, lampOn ? HIGH : LOW);

  Serial.print("light ");
  Serial.print(light);
  Serial.print(" of ");
  Serial.print(ADC_MAX);
  Serial.println(lampOn ? "  lamp on" : "  lamp off");

  delay(200);
}
We compiled this sketch on 29 October 2026 for the UNO R3 with Arduino AVR Boards 1.8.7, and for ESP32 Dev Module with "esp32 by Espressif Systems" 3.3.7, the version the MakerBuddy firmware is built with. For an ESP32, install that package first, as Espressif's installation guide (opens in a new tab) describes. Open the Serial Monitor at 115200 baud to watch the numbers.
What changed between the two boards
| Line | UNO R3 | ESP32 | Why |
|---|---|---|---|
| Light sensor pin | A0 | 35 | Different pin names. On the ESP32, 35 is an ADC1 pin, so it keeps working with Wi-Fi on |
| Lamp pin | 9 | 12 | Any output pin works for on and off |
ADC_MAX | 1023 | 4095 | 10-bit readings on the UNO, 12-bit on the ESP32 |
DARK | 306 | 1228 | The same point, three-tenths of the way up the scale |
BRIGHT | 409 | 1638 | The same point, four-tenths of the way up |
| Extra setup | None | Colour light, buzzer and relay switched off | The MakerBuddy board has other outputs built in. Its colour light is common anode, so HIGH means off |
- Line
- Light sensor pin
- UNO R3
- A0
- ESP32
- 35
- Why
- Different pin names. On the ESP32, 35 is an ADC1 pin, so it keeps working with Wi-Fi on
- Line
- Lamp pin
- UNO R3
- 9
- ESP32
- 12
- Why
- Any output pin works for on and off
- Line
ADC_MAX- UNO R3
- 1023
- ESP32
- 4095
- Why
- 10-bit readings on the UNO, 12-bit on the ESP32
- Line
DARK- UNO R3
- 306
- ESP32
- 1228
- Why
- The same point, three-tenths of the way up the scale
- Line
BRIGHT- UNO R3
- 409
- ESP32
- 1638
- Why
- The same point, four-tenths of the way up
- Line
- Extra setup
- UNO R3
- None
- ESP32
- Colour light, buzzer and relay switched off
- Why
- The MakerBuddy board has other outputs built in. Its colour light is common anode, so HIGH means off
Everything else is identical: analogRead, digitalWrite, Serial and delay work the same on both boards.
Why the thresholds are worked out, not typed in
For the UNO, 1023 × 30 ÷ 100 = 306.9, and whole-number maths drops the fraction, giving 306. For the ESP32, 4095 × 30 ÷ 100 = 1228.5, giving 1228. Copy 306 from an UNO tutorial onto an ESP32 and the lamp waits for much deeper darkness, because 306 out of 4095 is far down the scale.
The (long) matters too. On the UNO, an int holds −32,768 to 32,767, according to Arduino's int reference (opens in a new tab). 1023 × 40 = 40,920, which does not fit. Without (long), the multiplication overflows and BRIGHT comes out as −246. Every reading is above −246, so the lamp switches off in the same pass that switches it on, and it never lights. With compiler warnings set to None, the default in Arduino's compile command reference (opens in a new tab), the build is silent. Set Compiler warnings to All in the Arduino IDE's Preferences and it reports an integer overflow. On the ESP32, an int is 4 bytes (we checked this with the ESP32 compiler), so the same line works there and breaks only on the UNO.
The gap between DARK and BRIGHT stops the lamp flickering when a reading wobbles around a single value.
The same night light with no code
On a MakerBuddy board you can build the same night light from the dashboard with two Condition rules. Rule 1 watches Light Level (LDR) with Less than (<) and a threshold of 30, and its step is LED On. Rule 2 watches Light Level (LDR) with Greater than (>) and 40, and its step is LED Off.
Two rules are needed because a Condition rule finishes its current round when its test stops being true, but it never undoes what it did. The gap between 30 and 40 is the same anti-flicker gap as in the sketch. The rules run on the board, not in the browser, so the night light keeps working with the dashboard closed. Our guide to how an LDR works builds a two-rule night light like this one click by click.
Lesson 7 on light sensing has students measure their own dark and bright numbers first, Lesson 21 on the rule engine explains the four loop modes, and our post on how no-code rules teach real logic shows why this counts as programming.
Common mistakes when you move from an Uno to an ESP32
A 5 V module wired straight to an ESP32 pin
Symptom: A pin stops responding, or readings are wild. Cause: The module sends close to 5 V, above the ESP32's 3.6 V input limit in its datasheet (opens in a new tab). Fix: Add a divider like the 2.2 kΩ and 3.3 kΩ one above, use a level shifter, or choose a 3.3 V version of the module.
An analog sensor reads nothing once Wi-Fi starts
Symptom: The sensor works in a test sketch, then fails in a Wi-Fi project. Cause: It is on an ADC2 pin, which Espressif's GPIO reference (opens in a new tab) says cannot be used with Wi-Fi. Fix: Move it to GPIO 32 to 39.
Thresholds copied from an Uno tutorial
Symptom: A light or soil project triggers at the wrong time. Cause: The UNO reads 0 to 1023 and the ESP32 reads 0 to 4095, per the Arduino-ESP32 ADC reference (opens in a new tab). Fix: Work thresholds out from ADC_MAX, as the sketch does, or measure your own dark and bright readings.
Upload stops with "Failed to connect"
Symptom: The upload fails while connecting. Cause: The chip is not entering its bootloader, the likely cause Espressif's esptool troubleshooting guide (opens in a new tab) names for this error. Fix: Hold BOOT, press and release EN, release BOOT, and upload again, as the DevKitC guide (opens in a new tab) describes. Also try a USB cable you know carries data.
Old tutorial code will not compile
Symptom: Errors such as ledcSetup was not declared. Cause: Espressif's 2.x to 3.0 migration guide (opens in a new tab) removed ledcSetup and ledcAttachPin. Fix: Use ledcAttach(pin, frequency, resolution) and pass the pin to ledcWrite, or simply use analogWrite.
Why MakerBuddy is built on an ESP32
MakerBuddy is a kit for ages 10 and up, and its first lessons need no code. That only works because the board itself talks to a browser, which is why we built it on an ESP32. Lesson 1 on electronics, automation and IoT calls the ESP32 the board's brain.
- A dashboard over your own Wi-Fi. The MakerBuddy IoT Kit V1.0 joins your 2.4 GHz network and talks to the dashboard directly, through web requests and a live WebSocket link. There are no accounts, and readings stay on your network.
- Live readings. The board reads its sensors once a second and sends them to the dashboard about every 2 seconds, as the technical details list.
- Analog sensors that keep working with Wi-Fi on. The soil, gas, knob and light sensors sit on pins 32 to 35, all ADC1 pins.
- Rules that run on the board. Up to 10 rules, each with up to 10 steps, keep running when the dashboard is closed.
- Arduino IDE when you are ready. The firmware is an open-source Arduino sketch under GPL-3.0. The source and build notes show how to change it, and you can upload your own sketch, like the night light above.
The limits are worth knowing too. The board needs 2.4 GHz Wi-Fi. Its local web connection has no password, so use it only on a Wi-Fi network you trust and never make it reachable from the internet. Laptops connect through the Chrome, Edge or Firefox extension, or Safari on a Mac, and iPhones and iPads through Safari. Android phones cannot control the board yet.
To compare whole kits, see our guide to the best ESP32 starter kits for students. The MakerBuddy curriculum has 32 free lessons in 45 to 60 minute sessions. If the kit fits, you can order a MakerBuddy IoT kit: Pakistan orders online at PKR 40,000 per kit, and every other region gets a written quote. More board comparisons are on the MakerBuddy blog.
FAQ
Which is better for beginners, Arduino or ESP32?
For a project that should connect to a phone or laptop, the ESP32, because Wi-Fi and Bluetooth are on the chip, as its datasheet (opens in a new tab) shows. For simple 5 V circuits with no network, an Arduino UNO R3 has fewer pin rules to learn. Both use the Arduino IDE, so starting on one is never wasted.
Is ESP32 harder to learn than Arduino?
A little, at first. The code is the same Arduino C++, but you add a board package, learn GPIO numbers instead of printed pin names, and keep every signal at 3.3 V. You also avoid a few pins: the start-up pins, and the ADC2 pins when Wi-Fi is on, as Espressif's GPIO reference (opens in a new tab) lists. Once those habits stick, the two feel much the same day to day.
Can I replace an Arduino Uno with an ESP32?
Usually, yes, with three checks. Make sure every module works at 3.3 V, or bring its signals down to 3.3 V. Change the pin numbers and any analog thresholds, since the ESP32 reads 0 to 4095 instead of 0 to 1023, per the Arduino-ESP32 ADC reference (opens in a new tab). Then check that each library supports the ESP32: the Arduino library specification (opens in a new tab) lets a library list its board families, and the tools warn you when you compile it for one that is not listed.
Does ESP32 use C or C++?
Both. Arduino sketches for an ESP32 are C++, which the Arduino tools compile with g++, as the Arduino CLI build notes (opens in a new tab) explain. Espressif's own framework, ESP-IDF, is "primarily written in C and provides C APIs", and also supports C++ programs, according to its C++ support page (opens in a new tab). An ESP32 can run Python too, through MicroPython (opens in a new tab).
Why is the ESP32 so cheap?
Part of the answer is that most of what a wireless board needs sits on one chip. Espressif's datasheet (opens in a new tab) describes the ESP32 as a single Wi-Fi-and-Bluetooth combo chip, so a development board adds little more than a module, a USB bridge and two buttons. On 29 October 2026, Espressif's own ESP32-DevKitC-32E was US$10.00 at DigiKey (opens in a new tab), against US$27.60 for an Arduino Uno R3 at SparkFun (opens in a new tab).
Is ESP32 a Chinese company?
The ESP32 is a chip, not a company. It is made by Espressif Systems, whose about page (opens in a new tab) gives its address in Shanghai, China, and its stock code, 688018.SH. Arduino, which makes the Uno, is a separate company.
Does NASA use Arduino?
NASA's education teams publish student activities built on Arduino boards. NASA Science's Arduino magnetometer guide (opens in a new tab) has students in grades 6 to 8 build a magnetometer from a sensor and an Arduino. JPL's heat flow programming challenge (opens in a new tab) lists Arduino among the microcontrollers students can use.
Can ChatGPT program an ESP32?
An AI chat tool can draft a sketch, but it cannot see your board or your wiring. Drafts can mix up pin numbers, copy UNO thresholds onto an ESP32, or use functions such as ledcSetup that Arduino-ESP32 3.0 removed, according to Espressif's migration guide (opens in a new tab). Check every pin against your board, compile the code and test one part at a time.
Sources
- Espressif: ESP32 Series Datasheet, version 5.3 (opens in a new tab)
- Espressif: ESP32-DevKitC V4 user guide (opens in a new tab)
- Espressif ESP-IDF: GPIO and RTC GPIO reference for the ESP32 (opens in a new tab)
- Espressif ESP-IDF: C++ support (opens in a new tab)
- Espressif: Installing Arduino-ESP32 (opens in a new tab)
- Espressif: Arduino-ESP32 ADC API reference (opens in a new tab)
- Espressif: Arduino-ESP32 LEDC API reference (opens in a new tab)
- Espressif: Arduino-ESP32 migration guide from 2.x to 3.0 (opens in a new tab)
- Espressif: esptool troubleshooting for the ESP32 (opens in a new tab)
- Espressif: About Espressif (opens in a new tab)
- Arduino: UNO R3 datasheet (opens in a new tab)
- Arduino: UNO Rev3 product page (opens in a new tab)
- Arduino: UNO R4 WiFi product page (opens in a new tab)
- Arduino: Nano ESP32 product page (opens in a new tab)
- Arduino blog: Arduino UNO R4 announcement (opens in a new tab)
- Arduino: analogRead() reference (opens in a new tab)
- Arduino: int reference (opens in a new tab)
- Arduino CLI: sketch build process (opens in a new tab)
- Arduino CLI: compile command reference (opens in a new tab)
- Arduino CLI: library specification (opens in a new tab)
- MicroPython: quick reference for the ESP32 (opens in a new tab)
- HC-SR04 ultrasonic ranging module datasheet (opens in a new tab)
- DigiKey: Espressif ESP32-DevKitC-32E (opens in a new tab)
- SparkFun: Arduino Uno R3 (opens in a new tab)
- NASA Science: Arduino Magnetometer Student Guide (opens in a new tab)
- NASA JPL Education: Heat Flow Programming Challenge (opens in a new tab)